Hyper-V — Microsoft’s virtualization platform available with Windows 10 Pro, Enterprise, and Education license, definitely not for the Windows 10 home user. But it is indeed a dream feature to have. Right? The good news is that there is a way to use Hyper-V on Windows 10 Home! Yes, it is possible! It was first available on Windows Server Operating Systems but Microsoft has added the functionality to Windows 8.1 and Windows 10 later. It is used for running virtual machines on CPUs that support virtualization. If you are planning to run a lot of virtualization then this is a pretty feature-rich and most user-friendly tool to have. Definitely, You can’t install Hyper-V on Windows 10 Home Edition by default but using this trick, it will be possible! So, let’s know the magical method in order to enable Hyper-V in Windows 10 Home edition!
System Requirements To Run Hyper-V On Windows 10 Home
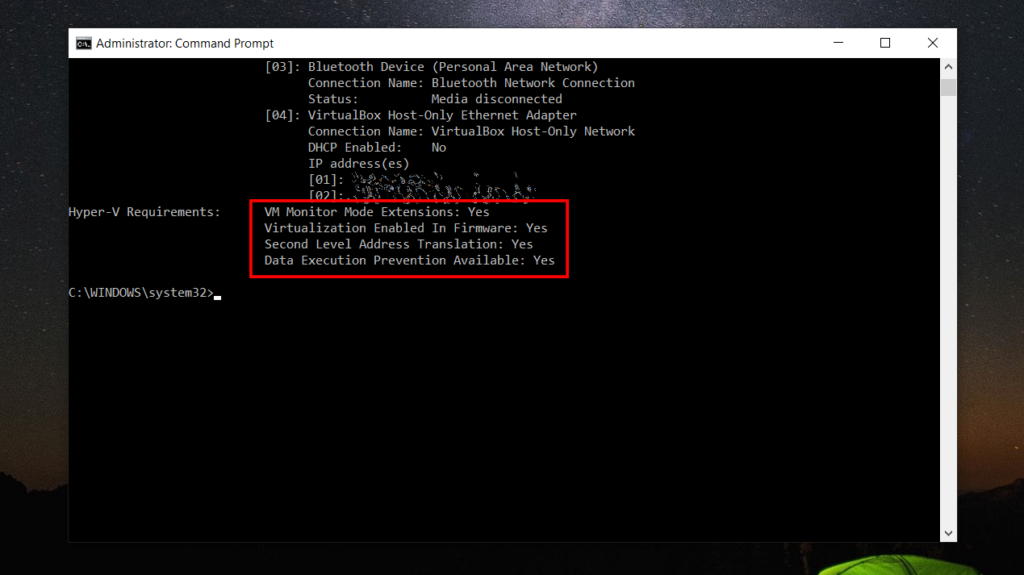
You have already known that Windows 10 Home doesn’t have native support of Hyper-V but if you want to run Hyper-V in Windows 10 Home then you have to check if our system supports virtualization. Hardware virtualization is required for Hyper-V to function correctly. Along with this, you have to check whether you have these features (listed below) on your PC.
- VM Monitor Mode Extensions
- Virtualization enabled in firmware
- Second level address translation
- Data execution prevention
Mostly, these features are available in all modern PCs but sometimes Virtualization is disabled from the firmware which you can enable from BIOS/UEFI. You can check our other article:– How to enable Virtualization from BIOS/UEFI?
Oh! Yes, to check all the listed requirements, go to Command Prompt (Run –> cmd) type ‘Systeminfo.exe’. Here you got the information about Hyper-V.
Keep in mind, According to Microsoft, to run Hyper-V smoothly, a computer should have at least 4GB of RAM but our experience says there should at least 8GB or 16GB RAM to smoothly run the operating system that you install on the Hyper-V.
Enable Hyper-V on Windows 10 Home!
Enable Hyper-V on Windows 10 Home isn’t a rocket science. It is pretty easy. Follow the steps below.
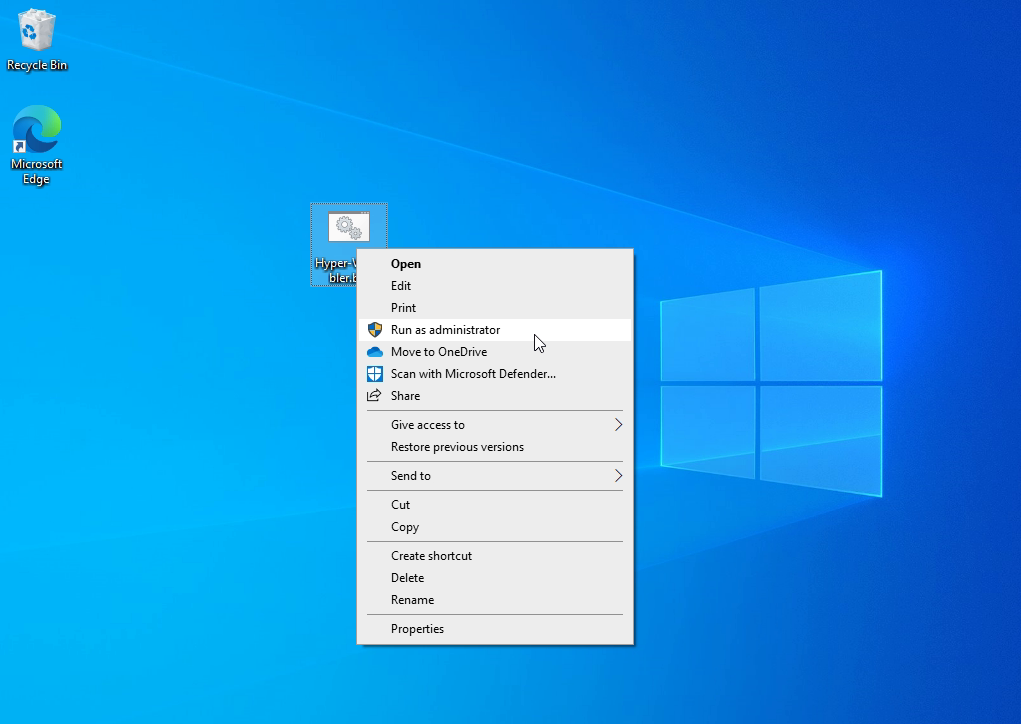
Download ‘Hyper-V Enabler’ from here. Once you’ve downloaded it, right-click on it and Run it as Administrator.
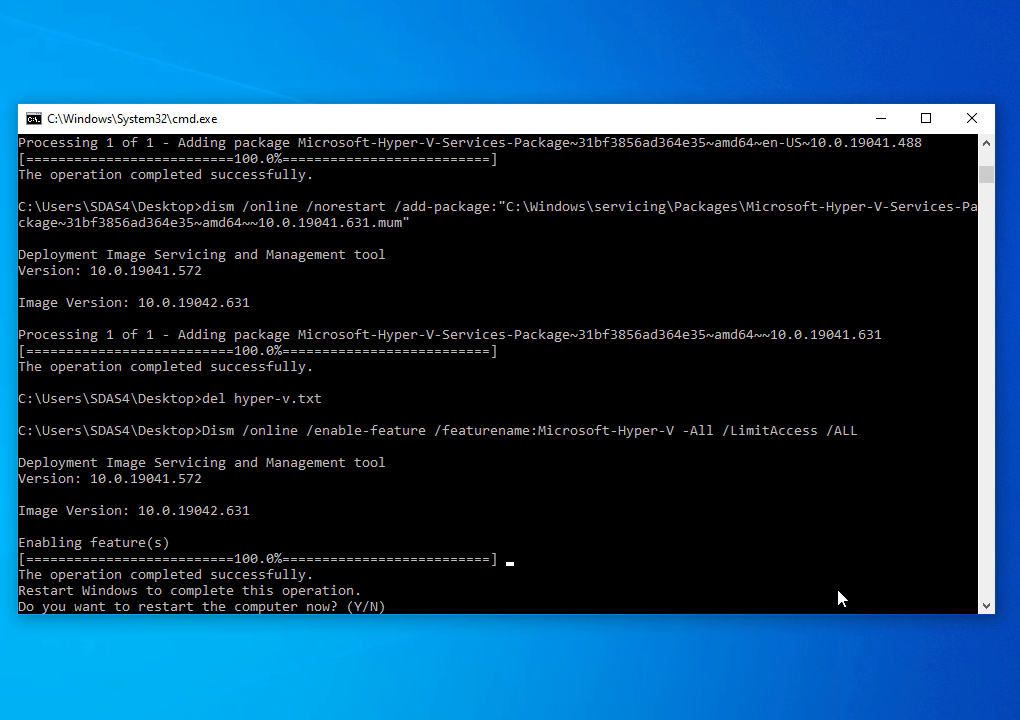
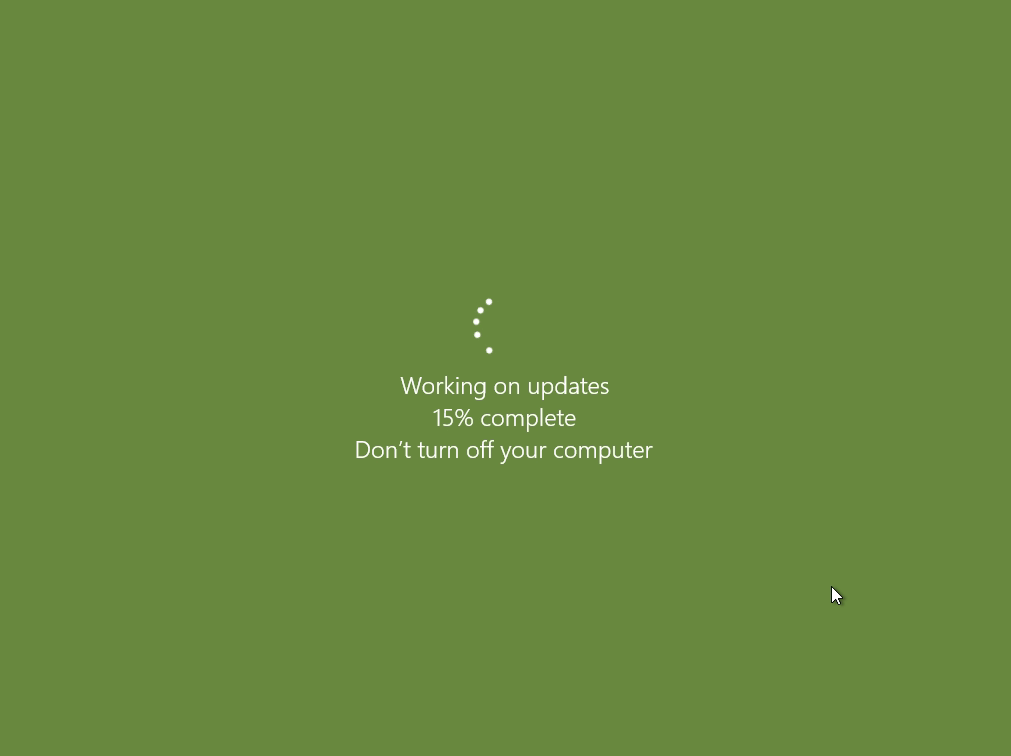
With this, the script activates and starts the installation process. This may take longer. Wait for it until it says ‘Do You Want to Restart The Computer?’. Now just press ‘Y’ from your keyboard to restart the machine.
Now the system will restart and you’ll see the Windows Update screen during restart.
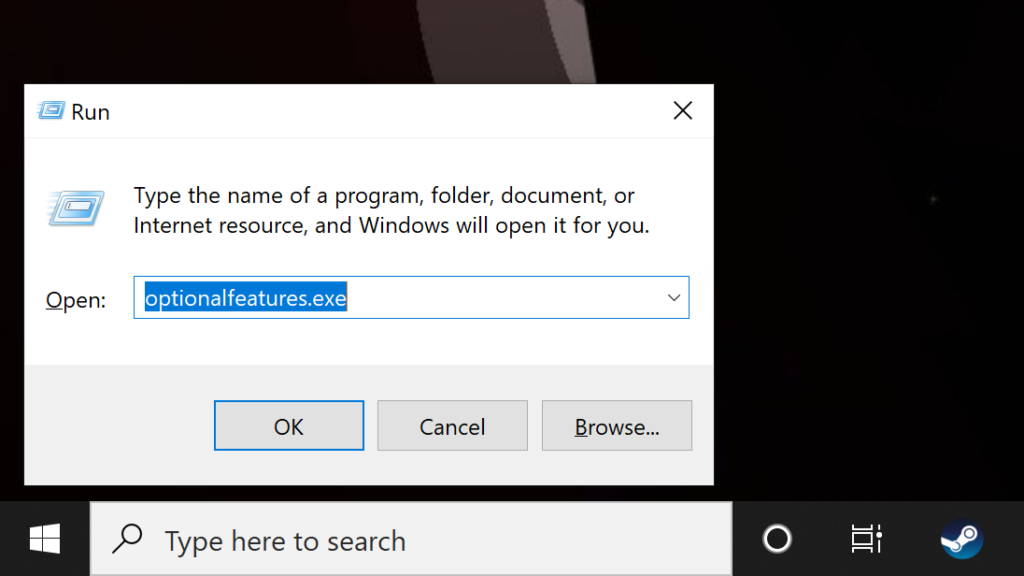
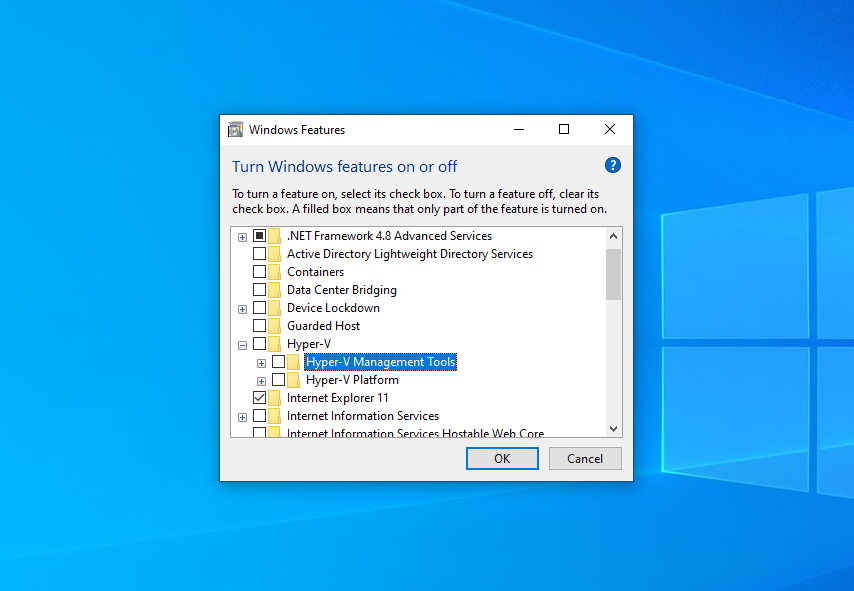
After the successful reboot, Windows boots up. Now press ‘Windows key + R’ from your keyboard. Now the ‘Run’ window appears. Type ‘optionalfeatures.exe’ and hit Enter.
On the ‘Windows Features’ window, scroll down and look for ‘ Hyper-V’. If it is available then the script has done its job. Hurray! You’ve successfully installed Hyper-V on Windows 10 Home!
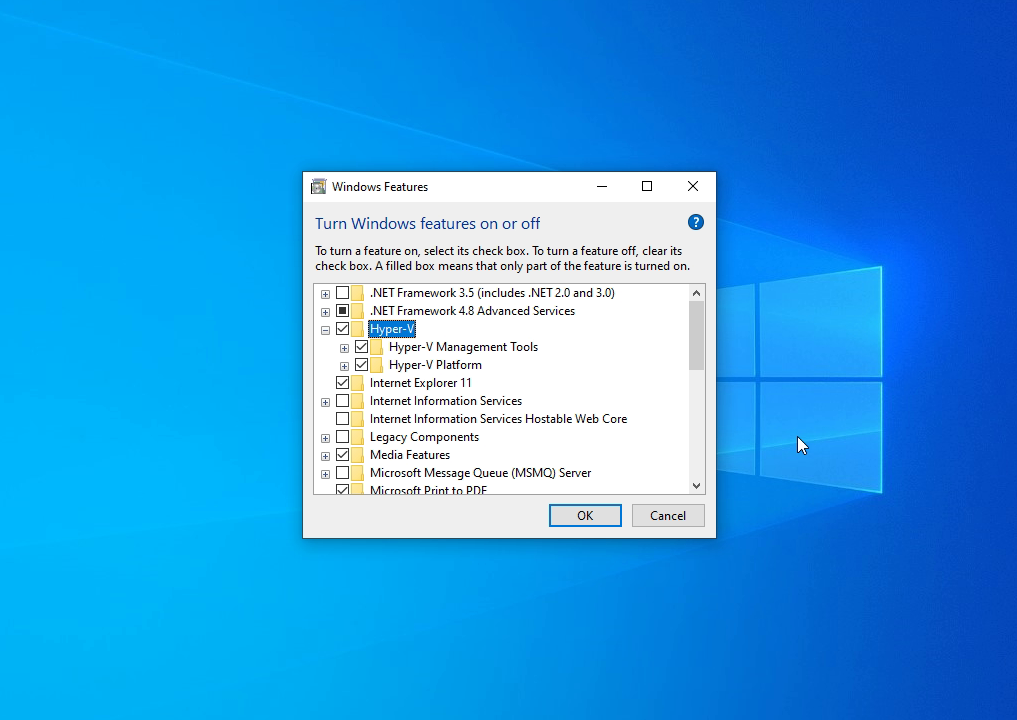
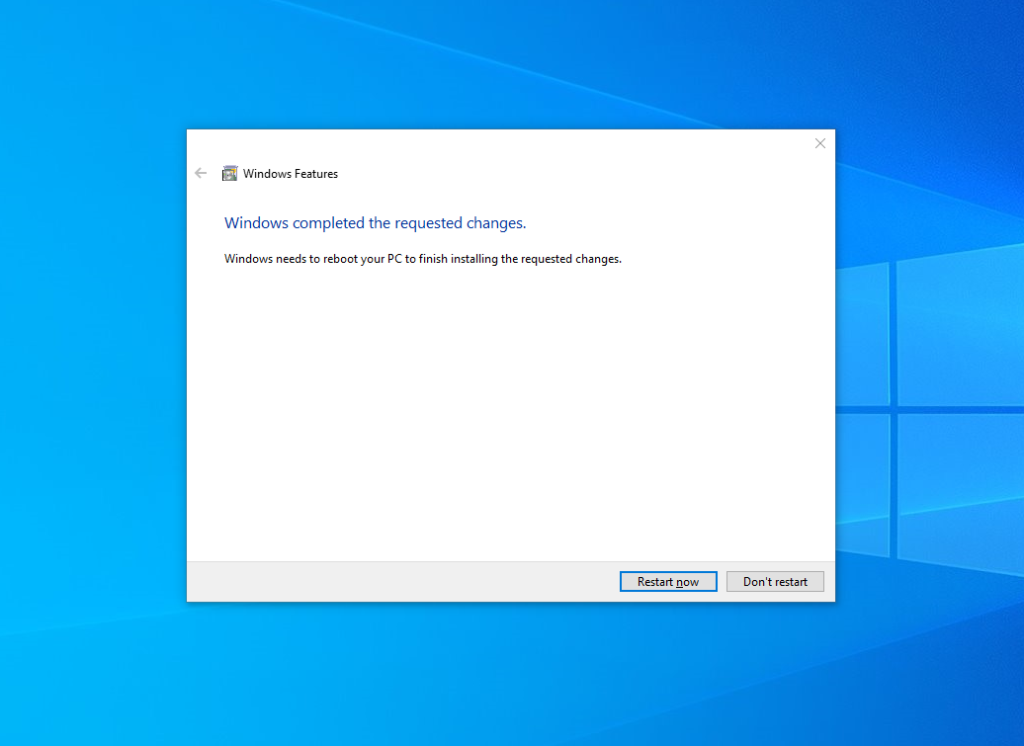
Now, enable all the checkboxes under Hyper-V and hit the OK button. It will start installing the necessary packages and will ask you to restart the computer once the installation is finished.
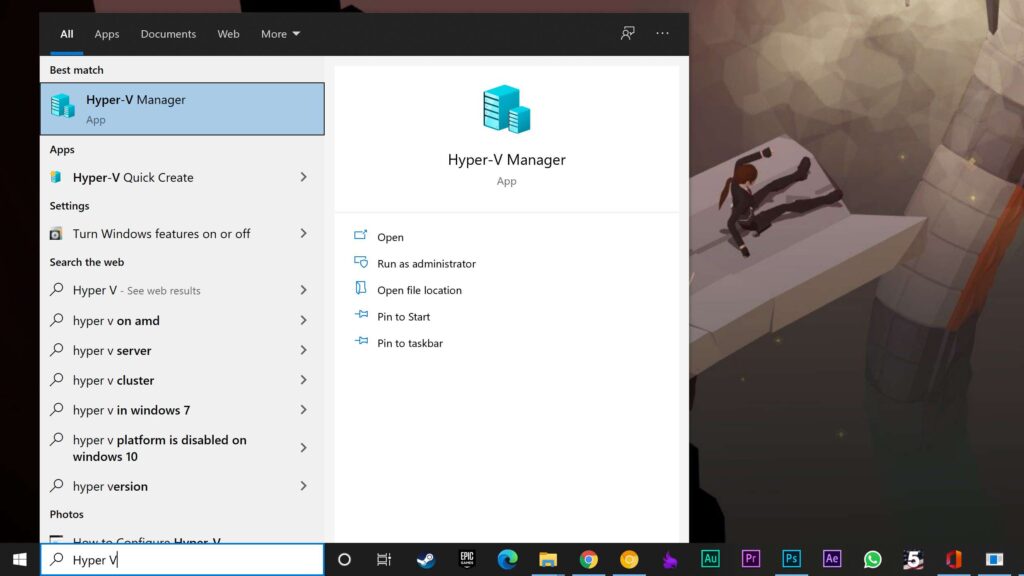
So, the Hyper-V is now successfully installed. Just search it, ‘Hyper-V’ in the start menu to start creating virtual machines on your Windows 10 Home computer.
Disable Hyper-V from Windows 10 Home
If you don’t need this feature anymore then it’s a good idea to disable it. Just go to Run > Type Optionalfeatures.exe > Find Hyper-V and uncheck Hyper-V and Hyper-V management tools.
Now click on ‘Ok’ and Restart your computer.
Do Windows 10 Home Users Really need Hyper-V?
It depends on what kind of ‘Home’ user you are. If you’re an enthusiast but stick with the Windows 10 Home because the laptop you have come with the original version of Windows 10 Home then the scenario is completely different. If you’re just a casual user then you may not need software like this. Though sometimes it is better to have Hyper-V because it can be used to test and evaluate new software without distributing the host system.
Therefore, this is the simple yet magical method to enable & use Hyper-V on Windows 10 Home. I Hope, you have really liked & understood this short article & it has really helped you to enable this surprisingly beneficial feature on your original version of Windows. If it really so then don’t hesitate to express your valuable thoughts in the comment section below. Thanks for visiting & appreciating our work.