Laptop users are sometimes frustrated with small screen size. It is mostly limited to 15.6 inches. Obviously, it’s not enough if you’re a content creator or a gamer. In this situation, if you are thinking of buying a new external monitor that can be connected to laptop’s HDMI or Type – C port then wait, do you know, you can use your laptop with an old VGA monitor? Many of us who are using computers over the years have many different old stuffs accumulated. If you have such a VGA monitor, you can easily connect it with the HDMI interface of the laptop. Without further ado, let’s know how to connect HDMI laptop to VGA monitor.
Must Read: Best TPS Games For PC That You Shouldn’t Miss!
What’s Required to Connect VGA Monitor To HDMI Laptop?
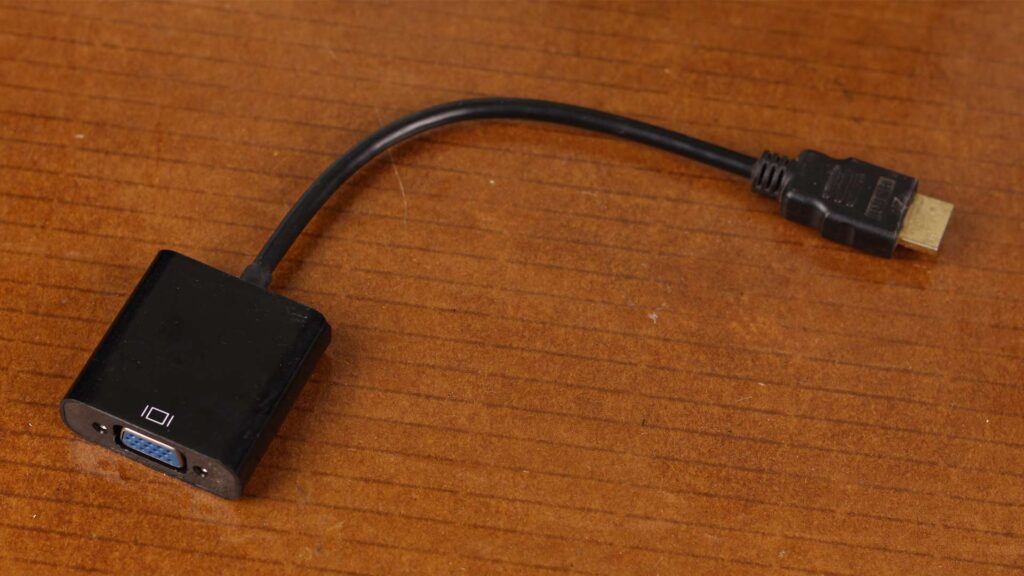
VGA monitors can’t obviously be directly connected with an HDMI port. We need some kind of converter. I have used this HDMI to VGA converter to do the trick. There are two different kinds of HDMI to VGA converters that you can find; with audio & without audio. Both are doing their job just fine. Obviously, converters with audio are a bit expensive and I think it’s pointless to buy because most laptop has their own audio-out port in which audio quality is way better than this cheap HDMI to VGA converters offer.
How to Connect HDMI Laptop to VGA Monitor?
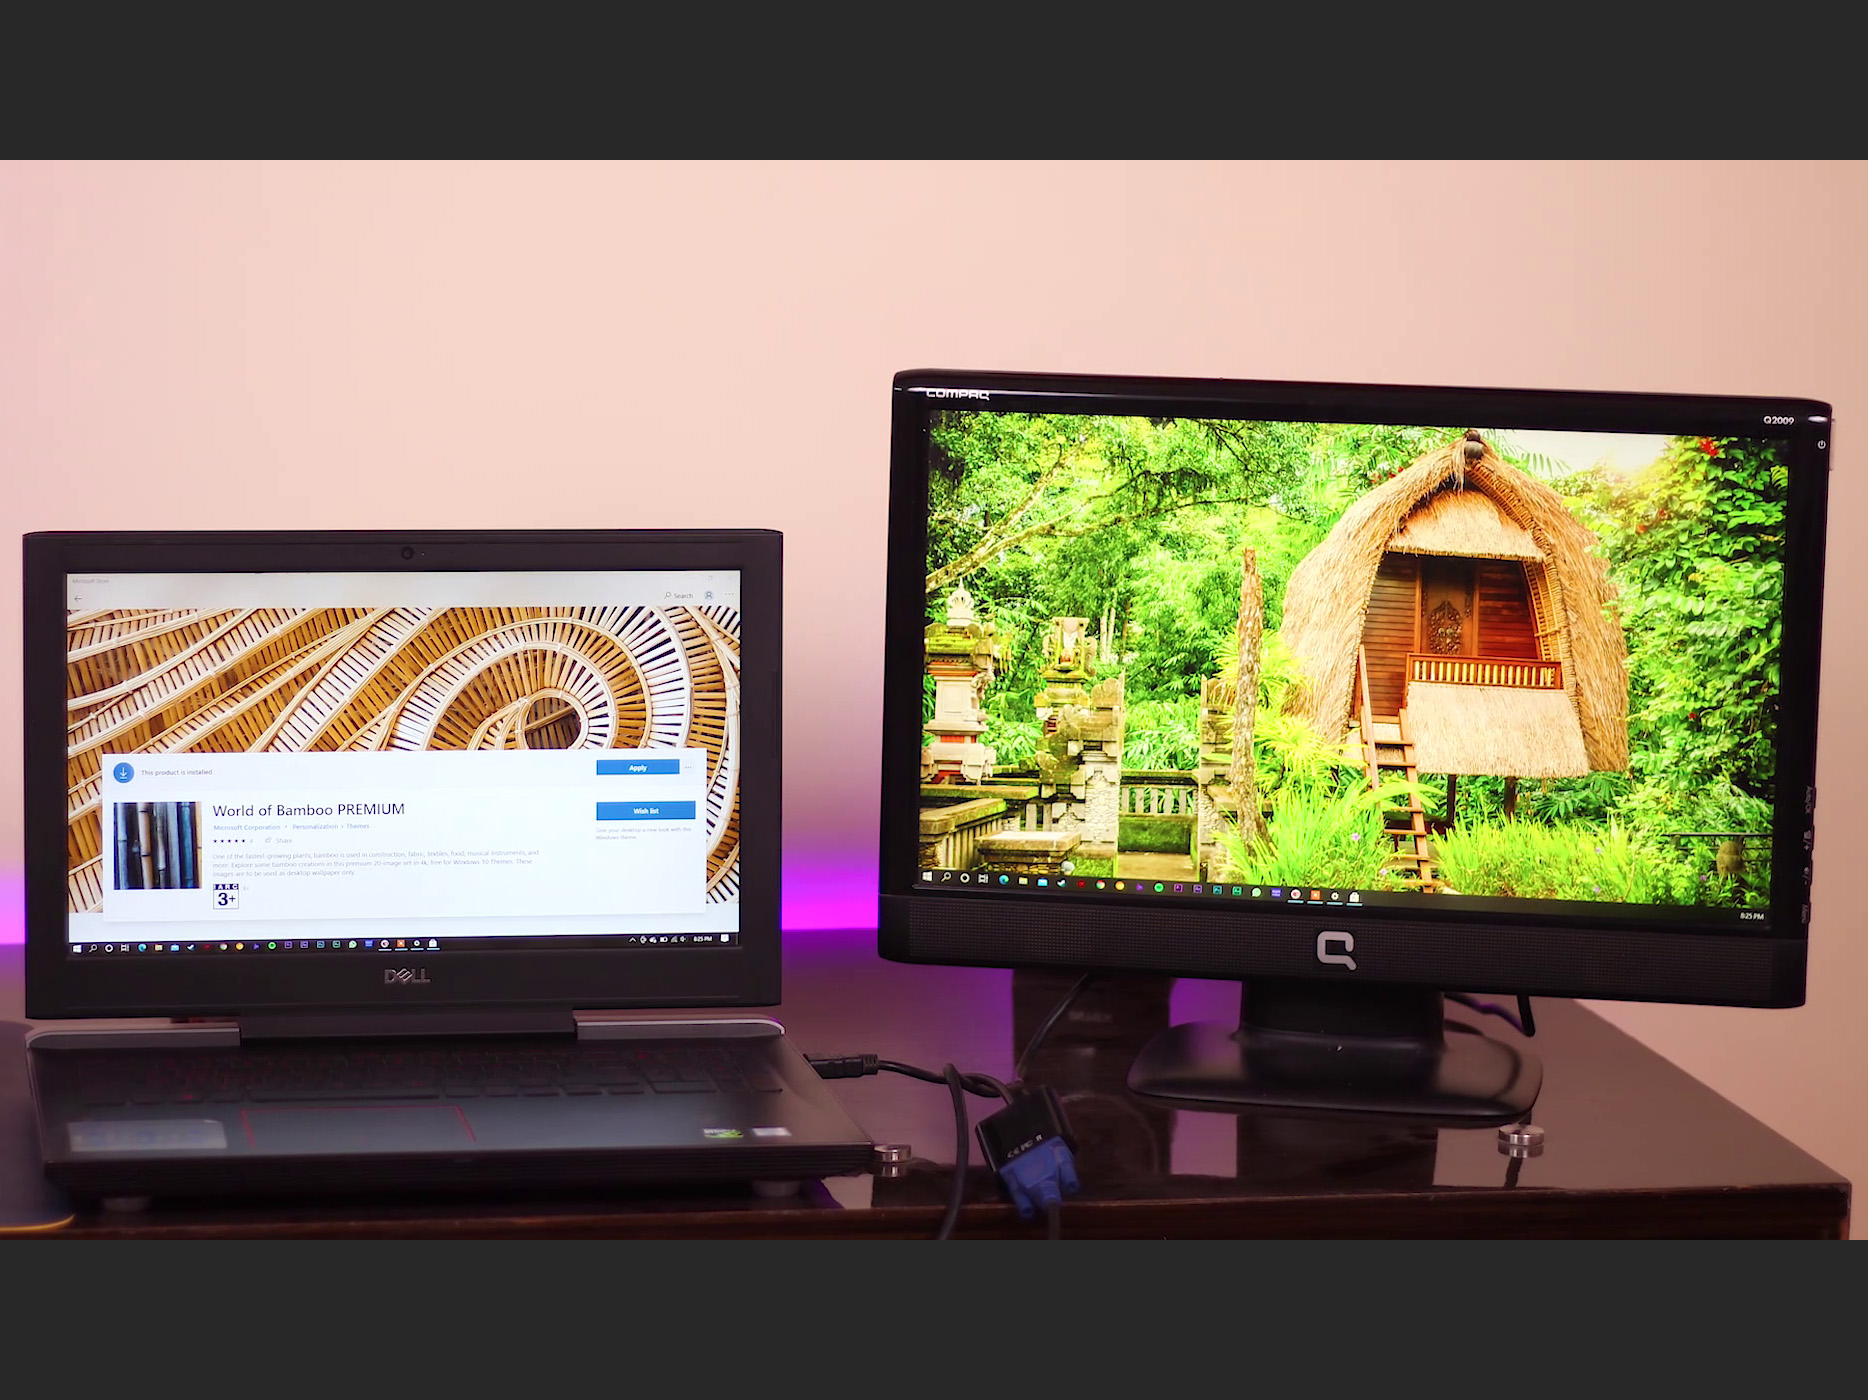
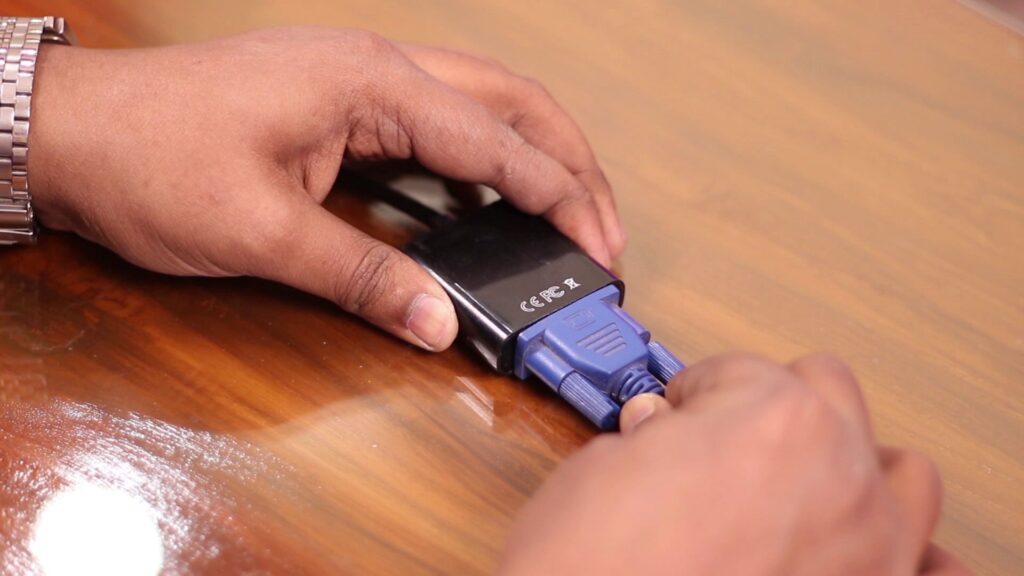
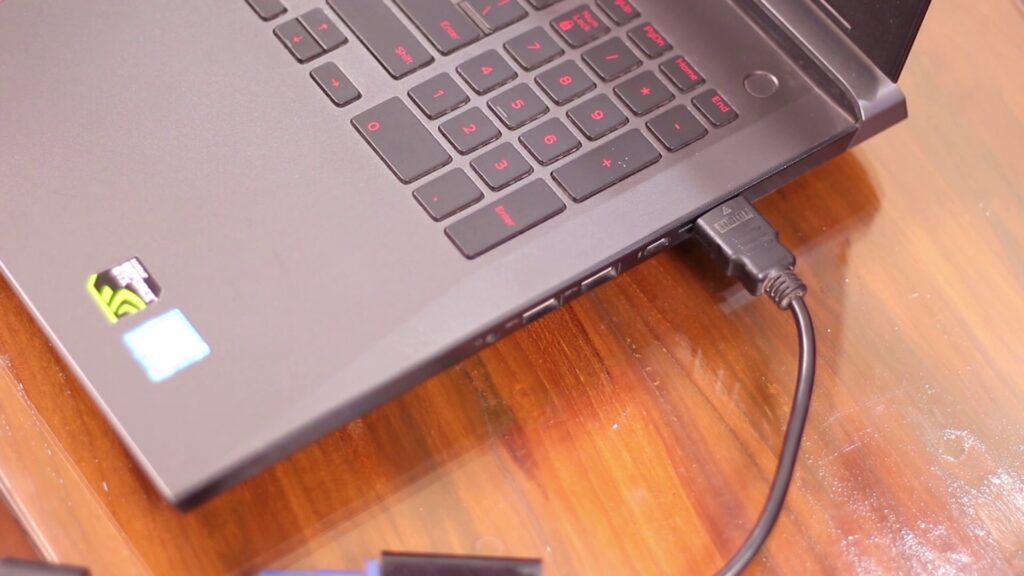
Connection is super easy. Just connect one side of the VGA cable to the monitor and the other side to the converter. The converter will be directly connected to the laptop’s HDMI port. That’s it.
If there is an audio port on the Converter then you can connect speakers or headphones with it to get the audio.
Problems You May Face after Connecting the VGA Monitor with the Laptop’s HDMI Port!
As you’re using HDMI to VGA Converters, your laptop can’t directly verify your monitor’s EDID information aka your monitor’s capabilities such as maximum resolution, Colour Space, Manufacturer, Model Name, etc. And because the laptop doesn’t have enough information about that connected monitor, it automatically sent the same signal with the same resolution that the laptop’s inbuilt display supports.
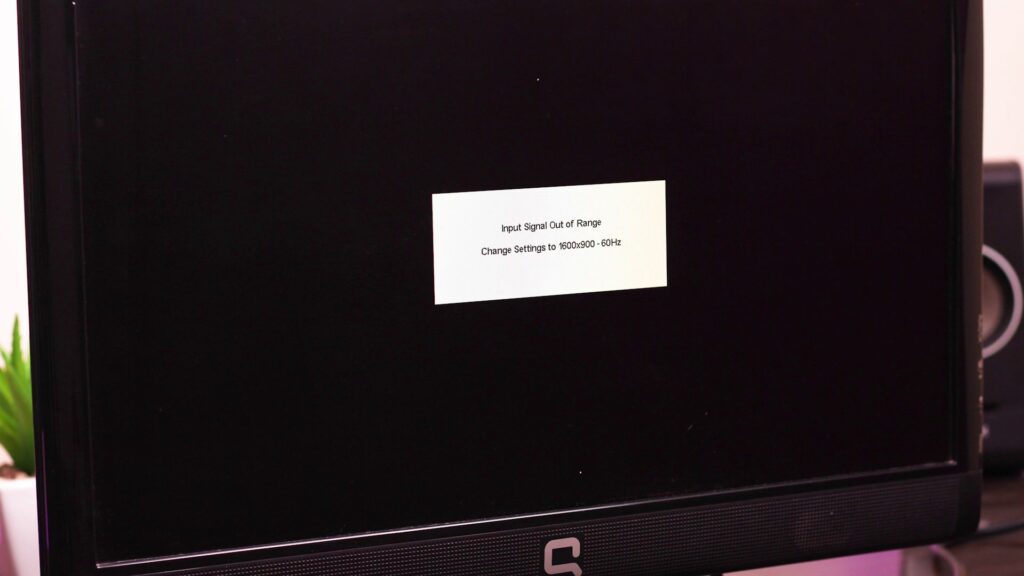
So if your monitor supports a lower resolution than your laptop’s display then your monitor may not turn on and shows ‘Input Signal Out Of Range’. To resolve this issue, you need to follow a couple of more steps.
Step 1
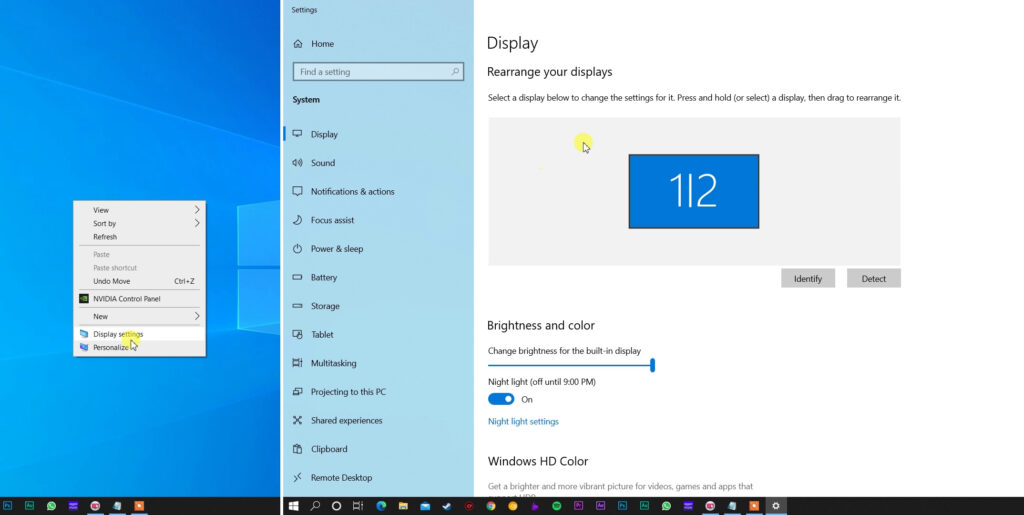
First of all, go to Display Settings by just simply right-clicking on ‘Desktop’ and clicking on ‘Display Settings’ or you may go to Settings and click on ‘Display’ to visit into ‘Display Settings’.
Next, scroll down a bit and select ‘Extend These Displays’ from the ‘Multiple Displays’ drop-down menu. Now, your laptop’s display is extended to the new monitor if the resolution of the monitor is as same as the laptop’s display otherwise monitor would still not turn on and show ‘Input Signal Out Of Range’.
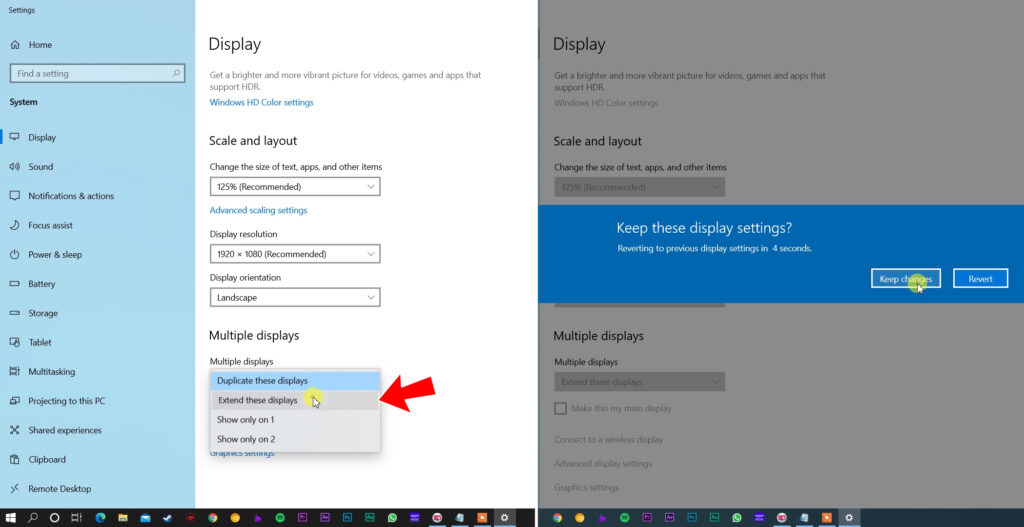
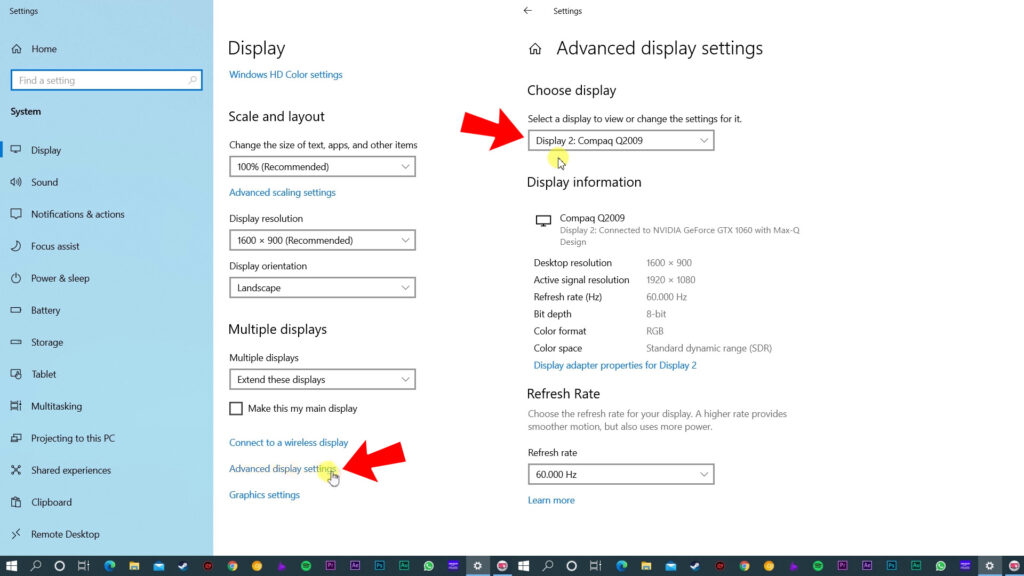
After that, you need to tweak the resolution settings of that monitor. For that from here (As shown in the image below). Select the second box which is basically that monitor you have just connected.

Now from the Display Resolution drop-down menu, choose the recommended resolution. I am selecting 1600×900 that is also the resolution of the monitor. Hopefully, your monitor should now function correctly if not then you need to make some more changes.

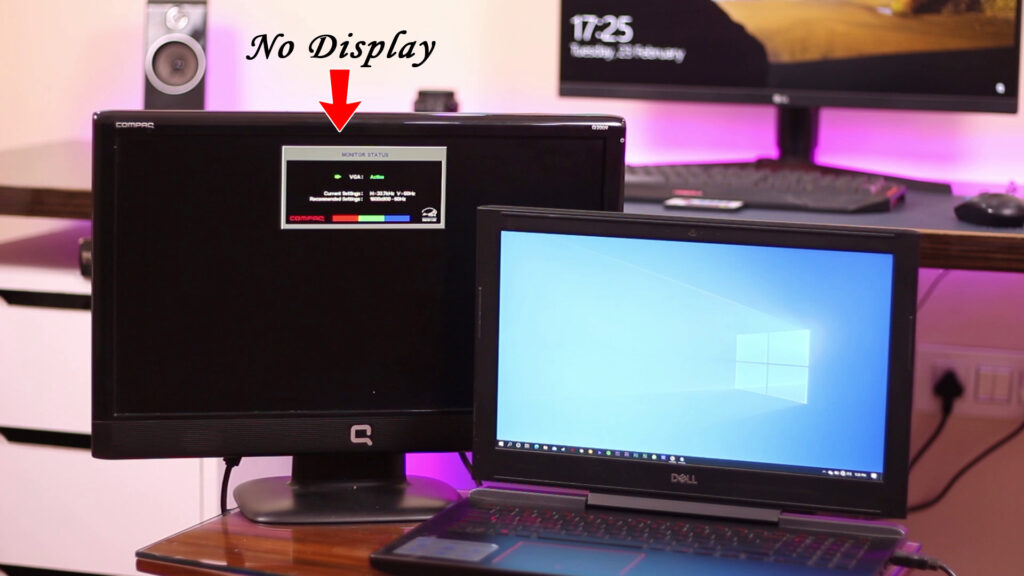
As you can see on my monitor, currently there is no message of input signal out of range instead there is no display in the monitor – complete black.
Must Read: Laptop Overheating! Do Cooling Pads Really Work?
Step 2
To solve the issue, head to the ‘advanced display settings and choose the monitor you have just connected from the ‘Choose Display’ drop-down menu.
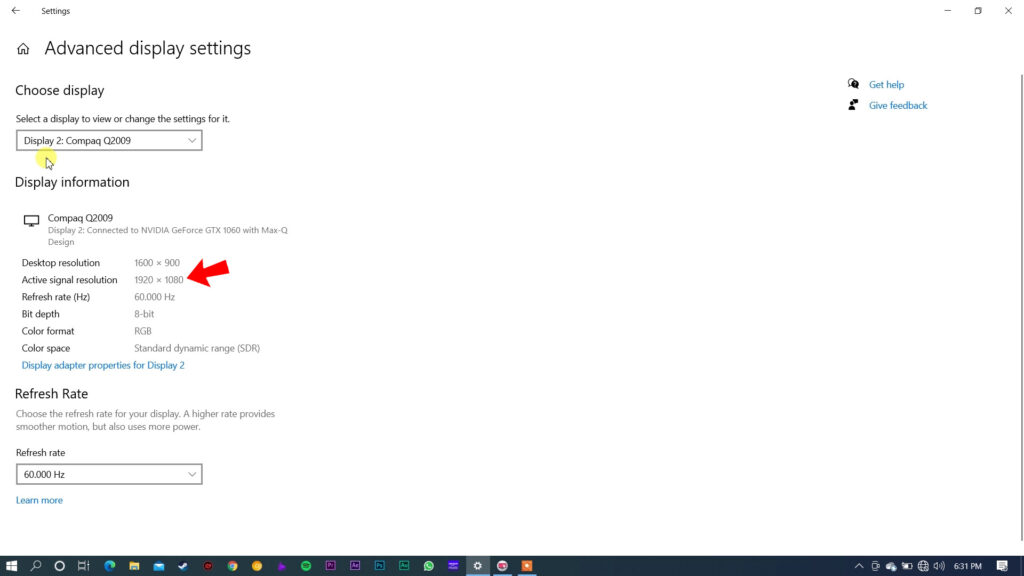
Here I have noticed that active signal resolution isn’t set properly as its 1920×1080 whereas my monitor is capable of displaying 1600×900.
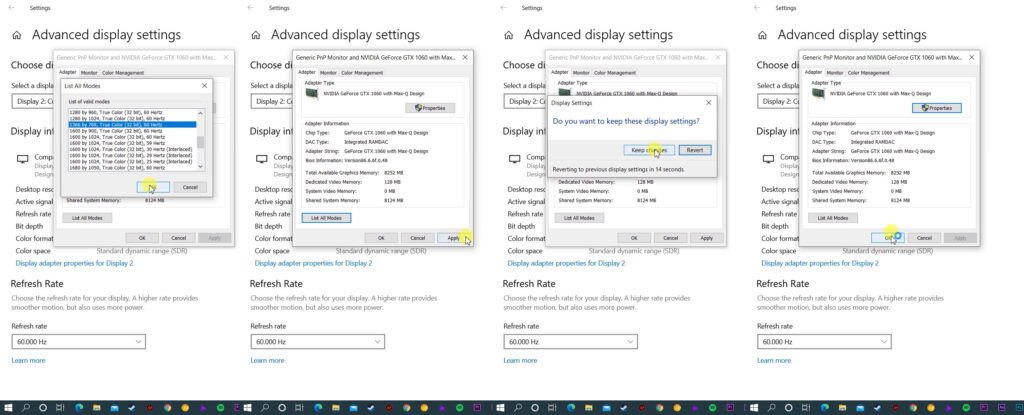
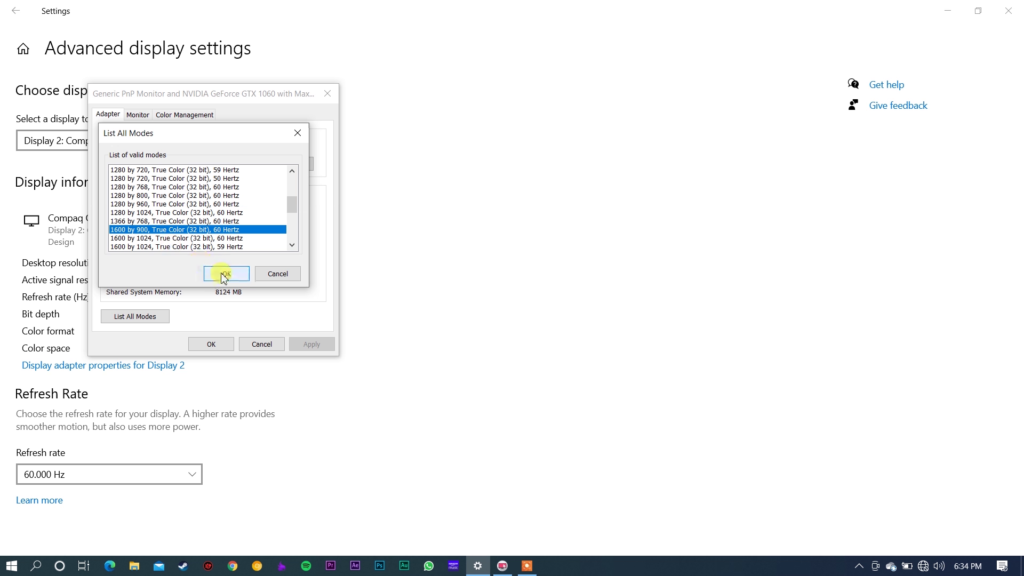
To fix this, click on display adapter properties. This will open a window as shown in the image below then click on ‘List All Modes’.

Here as you can see, lots of different resolutions are available to choose. By default monitor’s recommended resolution is set but what we have to do is to set smaller than recommended and respectively click on Ok, ‘Apply’, ‘Keep Changes’ & ‘Ok’.
Now the monitor is turned on without any issue. But here as you can see, Desktop Resolution is gone down along with the ‘Active Signal Resolution’.
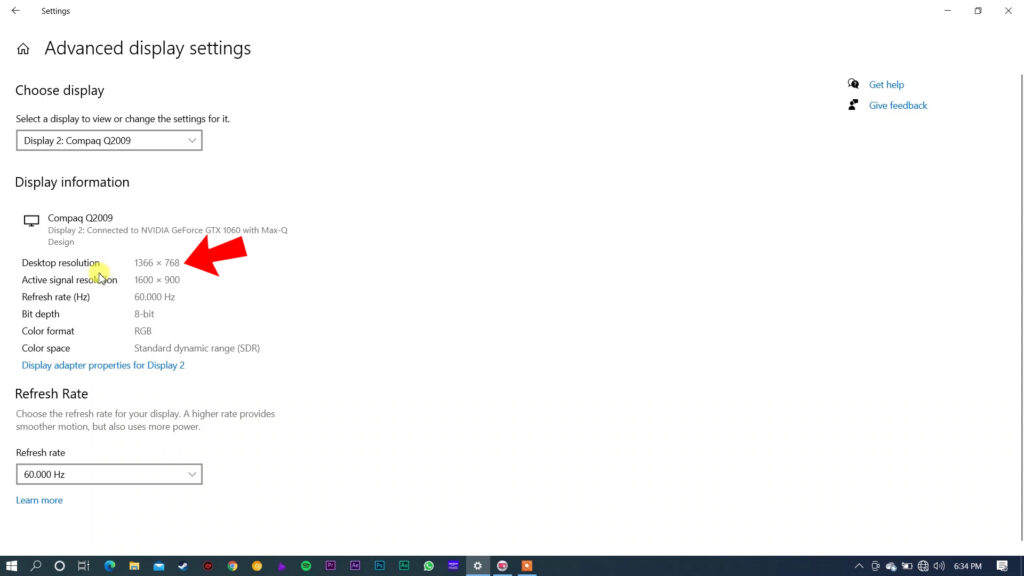
To fix this, all we have to do is to click again on display adapter properties > ‘List All Modes’ > set the monitor’s recommended resolution which for my case is 1600×900. Now everything is settled. Just need to click on apply & Ok.
Now, hopefully, your second monitor works flawlessly. It could be used for anything. You can even use the second monitor as a primary monitor. Or even you can use it to extend your laptop’s screen. The point is, yes you can connect an HDMI laptop to VGA monitor but my experience says that a directly connected HDMI monitor offers way better picture quick than this contraption offers. Anyway, if you really have found this article helpful then don’t forget to comment down below. Thanks for visiting and appreciating our work.