Owning a laptop is quite a headache when only the keyboard of the laptop doesn’t work or a few of its keys are just stopped working. To tackle the situation either you have to replace the keyboard which obviously doesn’t come cheap or have to use an external keyboard to do the job. If all the keys are just out of service then there is no option to carry on with the faulty keyboard but if just a few keys are not in the job, then there are few ways to use the laptop without replacing the keyboard.
How to Use Laptop With Faulty Keyboard?
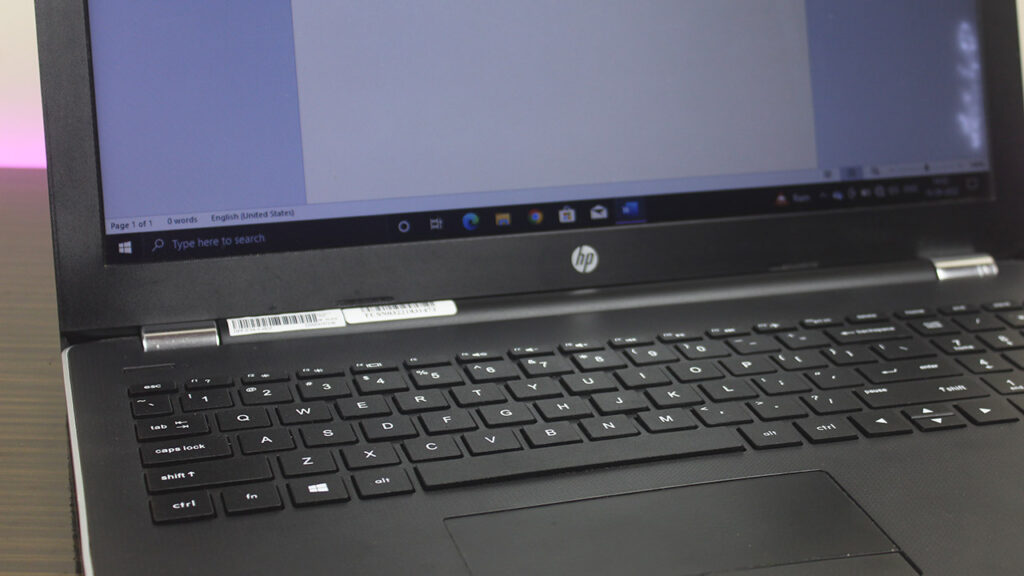
If a few of the keyboard keys of the laptop is getting faulty then you could replace those keys with the unused keys of the keyboard. As you might know in the standard-size QWERTY keyboard there are several keys whose use cases are quite rare. Yes, I am talking about ‘Insert, Page Up, Page Down, Home, End, Scroll Lock, and Windows Keys. These are the common unused keys of a keyboard. Additionally, if you’re not so much serious with typing then you even have one ‘Ctrl’, ‘Shift’, and ‘Enter’ keys. It is also possible to even use the ‘Numpad’ on the keyboard. If some of the important letters, numbers, or symbol keys are stopped working then you could use the unused keys of the keyboard as a replacement for those important keys.
Also Read: How are CPUs Made? Silicon Lottery! No, Two Processors are Same
How to Replace the Function of One Key with Another?
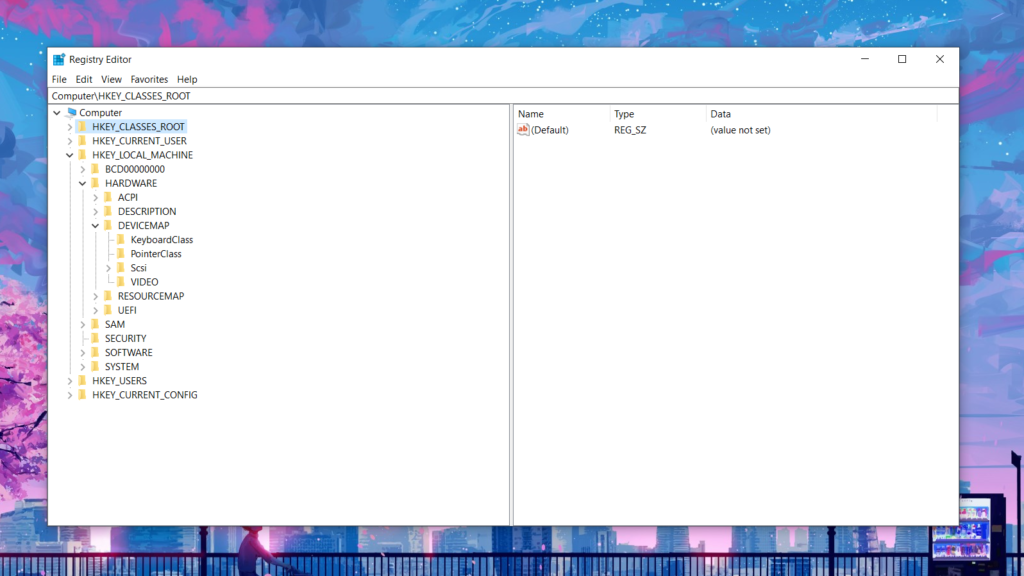
Replacing the function of a key in Windows OS isn’t quite hard with the introduction of the latest software but if you want to do it manually then you have to edit the registry of Windows which is definitely quite hard and not recommended method.
Replacing Keyboard Keys with AutoHotKey
AutoHotkey (AHK) is the answer to all of your keyboard customization needs. This program lets you remap keys, create custom shortcuts, run macros to automate repetitive tasks, and more but today we use AutoHotKey to replace the functionality of the keys.
First of all, what you need to do is to install AutoHotKey on your computer. You have to visit the official site of AutoHotKey and download it.
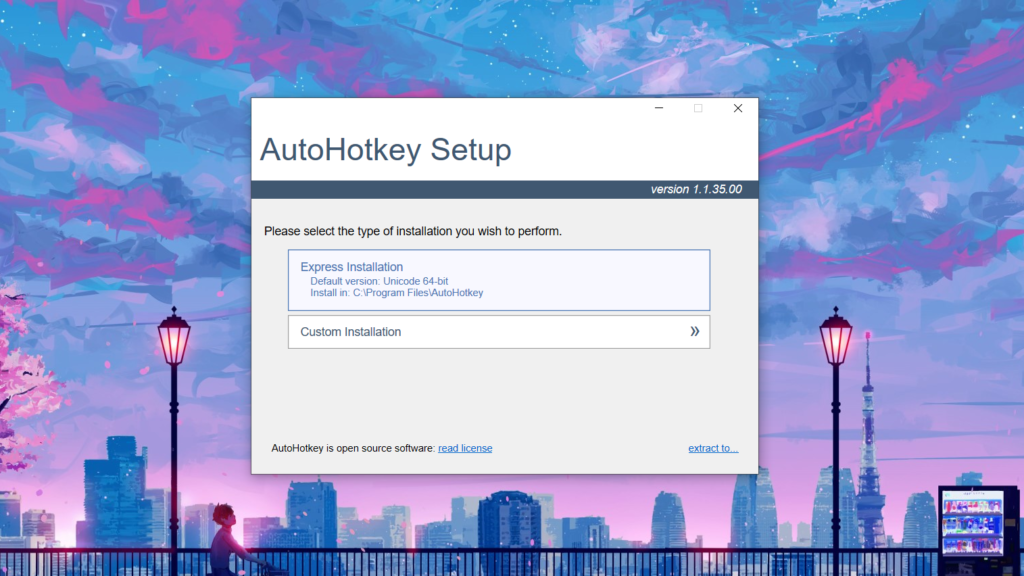
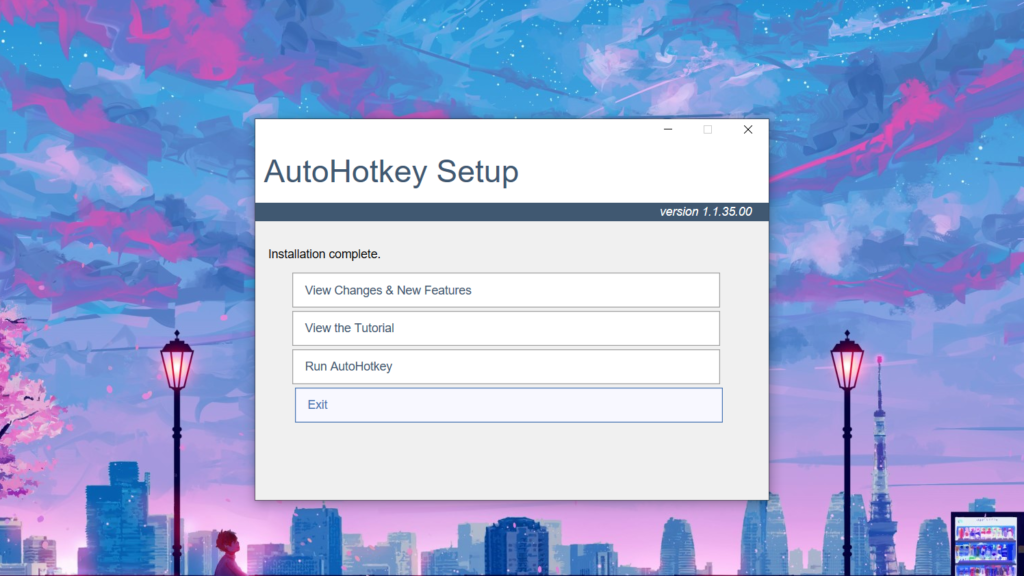
After installing, you will get the message shown in the image below. All you have to do is to click on exit.
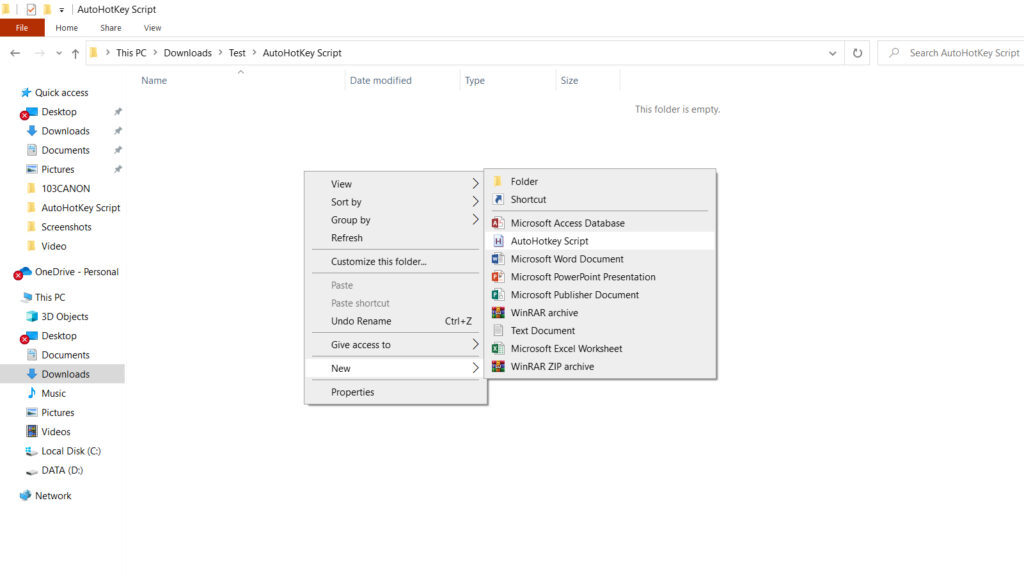
Next, you have to create a folder wherever you like. I have created this on ‘Downloads’ with the name of ‘AutoHotKey Script’. Now open the folder, right-click on the blank portion, move the cursor to ‘New’, and click on ‘AutoHotKey Script’ that will create a script where you have to write the key remap codes.
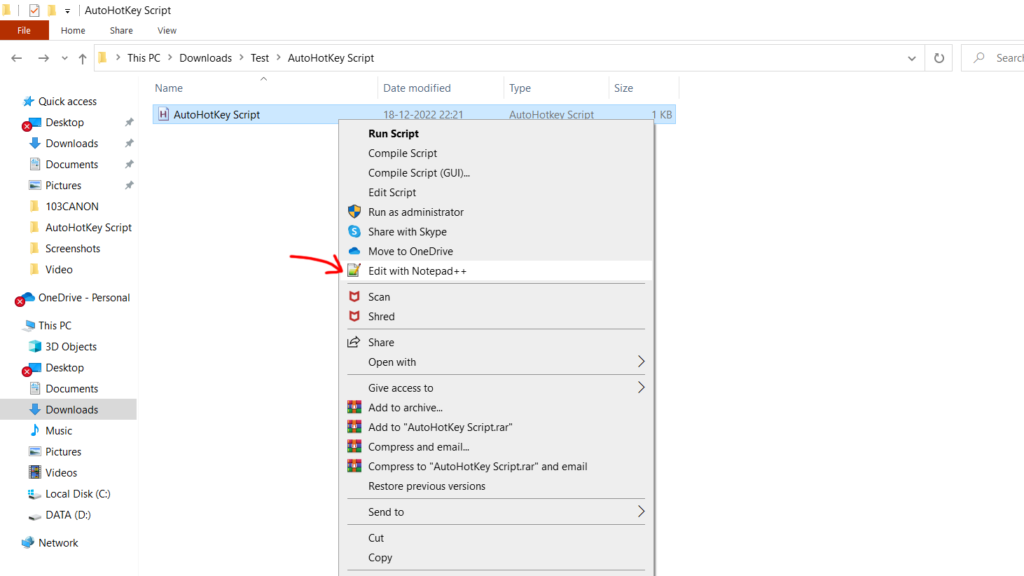
At this point, I would recommend you to install another well-known tool ‘Notepad++’. Just download it from here and install it. When it’s done installing, right-click on the previously created script and open it with Notepad++.
However, just to remap one or more keys to do the other keys’ job you don’t need to write your own code. Click Here to download my code and just replace the name of the keys and their jobs according to your needs. I have added comments on each line so that you can easily understand what a particular line does.
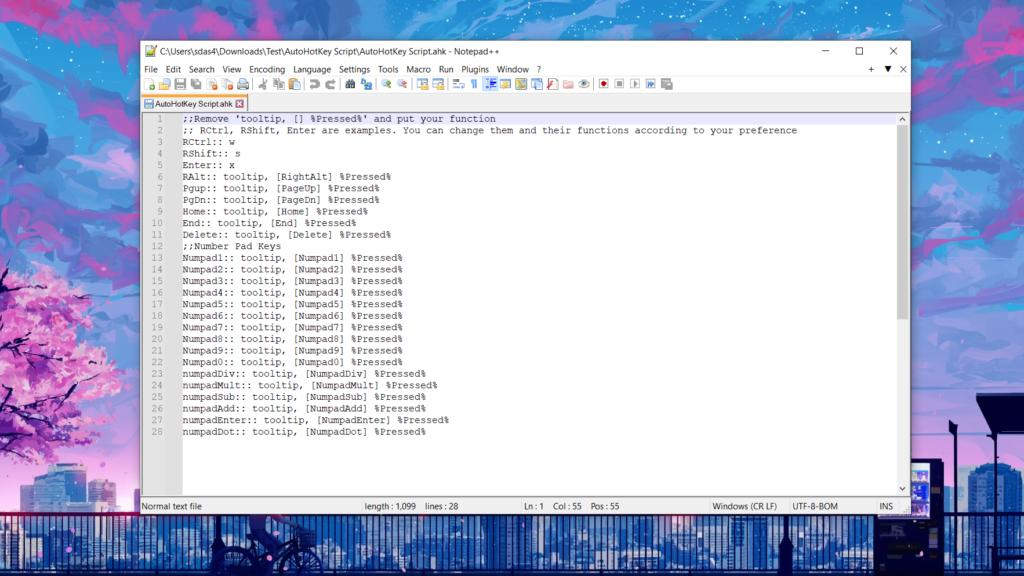
It’s important to note that AutoHotKey is not as simple as it looks so I would suggest you to read the documentation of AutoHotKey regarding the keyboard. I am attaching the link right here.
Don’t Miss: Improve Windows 11 Battery life with this Secret Trick!
After preparing the script save it by just using the keyboard shortcut ‘Ctrl+S’. Now just double-click on the script to run. For the current Windows log-in session, all the functions of the faulty keys are replaced with other keys. There’s a problem though, each and every time when you Log-in to Windows you have to run this script manually. There is a solution though. First of all, right-click on the script and create a shortcut on the desktop.
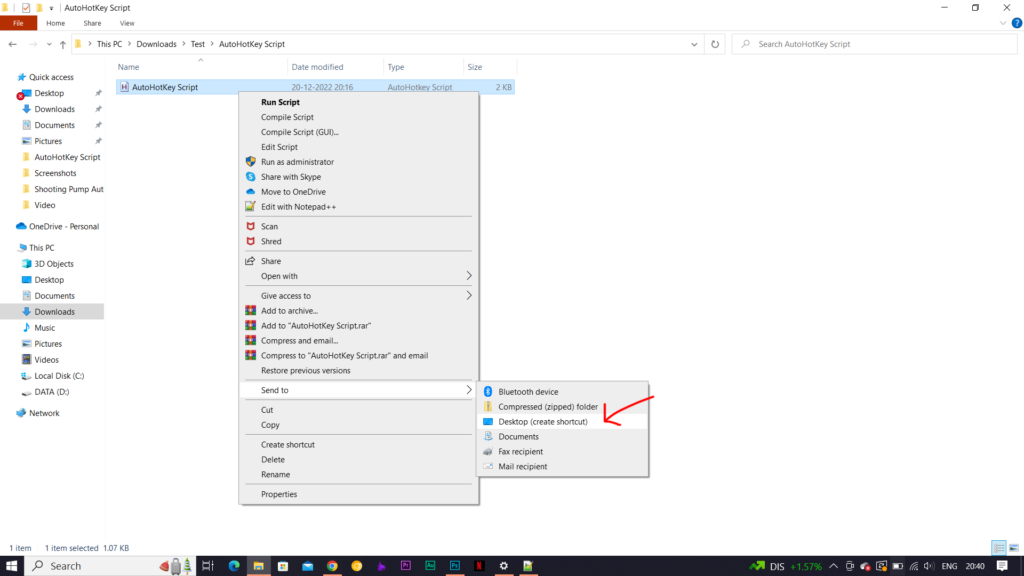
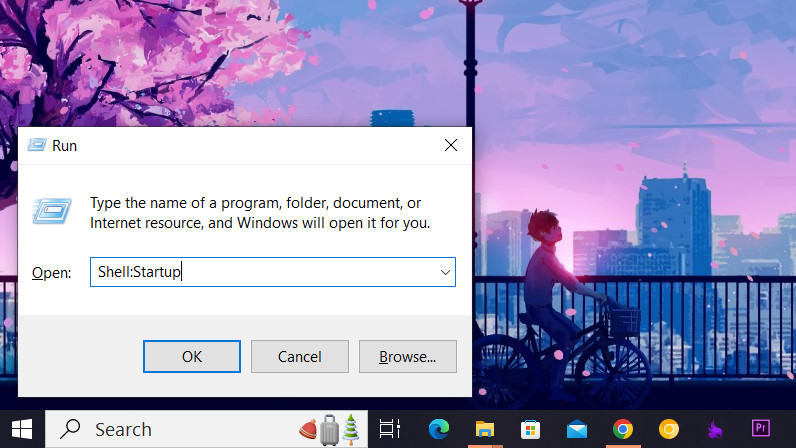
Now transfer the shortcut to the ‘Startup’ folder of Windows. To access the ‘Startup’ folder use the keyboard Shortcut Windows+R which opens Run. Type ‘Shell:Startup’ and hit ‘Enter’.
On the ‘startup’ folder copy the script’s shortcut.
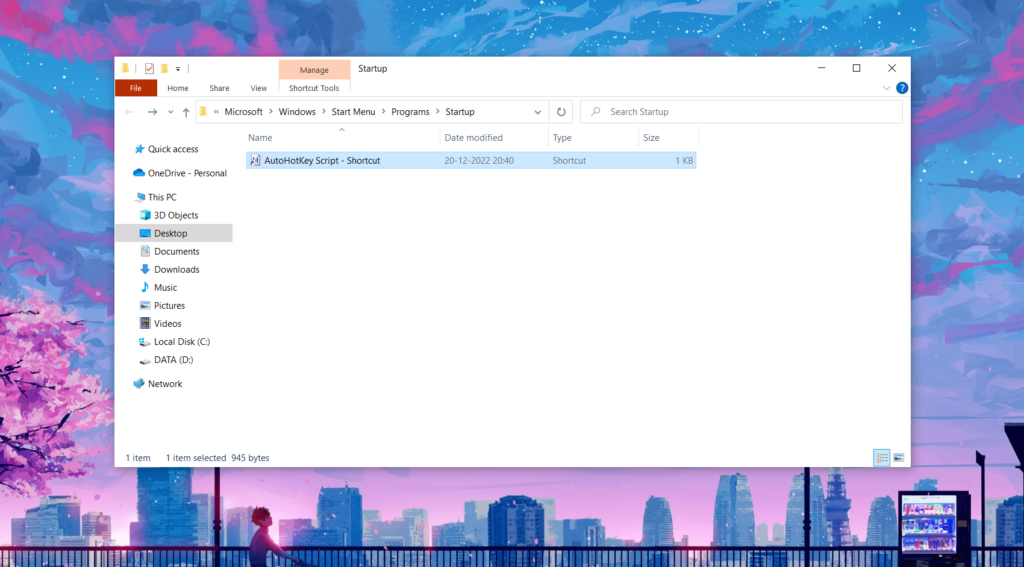
That’s all. Next time when you are logged into Windows the script automatically runs.

Definitely, AutoHotKey is a powerful tool and using the right function you could even create shortcuts that make your life easier. If you are thinking that AutoHotKey is complex then there is another tool whose GUI interface will help you to switch one key’s function with another one.
Remap Keyboard Keys with SharpKeys
SharpKeys is devolved by a GitHub user RandyRants. As I have mentioned, by editing Windows Registry you could control the function of a particular key of the keyboard. SharpKeys basically does all the complicated Registry editing for you. It basically is a Registry hack that is used to make certain keys on a keyboard act like other keys. If few keys of the keyboard of the laptop don’t work you can use this tool.
To download this software Click here which redirects you to the RandyRants GitHub page from where you could download this tool. Or You Can Just Download the ZIP file from here.
After installing just open the program from the start menu. This is the simplest Interface.

To replace the function of individual keys you have to click on the ‘Add’ button. This will open another window of SharpKeys named ‘Add New Key Mapping’ from where you could control the function of the keys. There are two individual columns where all the keyboard keys are listed- ‘Map this Key (From Key)’ and ‘To this key (To Key)’.
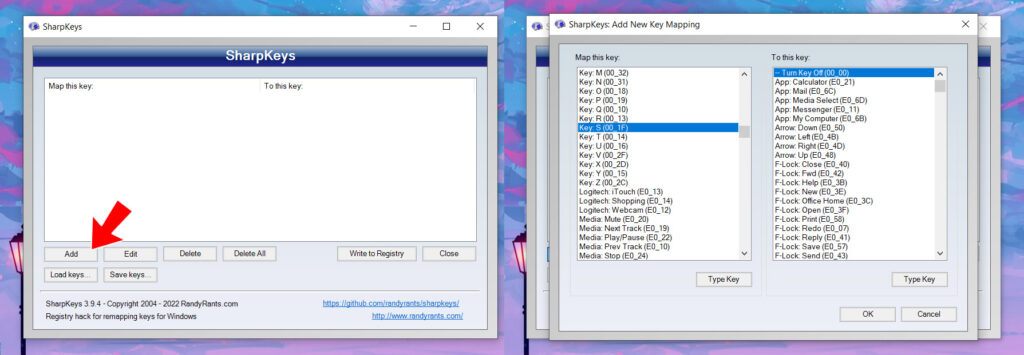
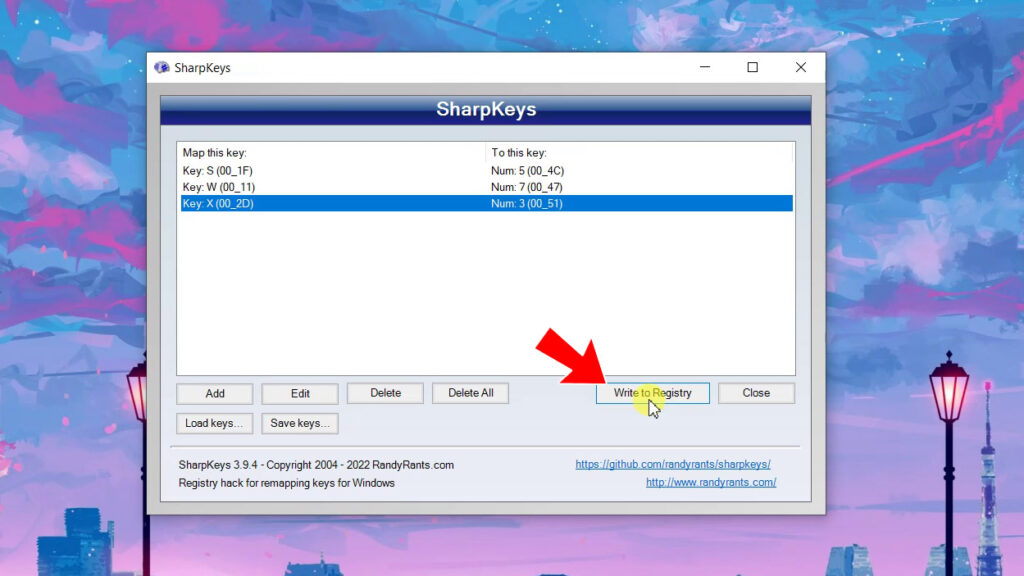
You have to find the damaged key of your keyboard from the left side column. Let’s say in my case Key ‘W’, Key ‘S’, and Key ‘X’ are stopped working. I want to assign their function respectively on Numpad keys – 7, 5, and 3.
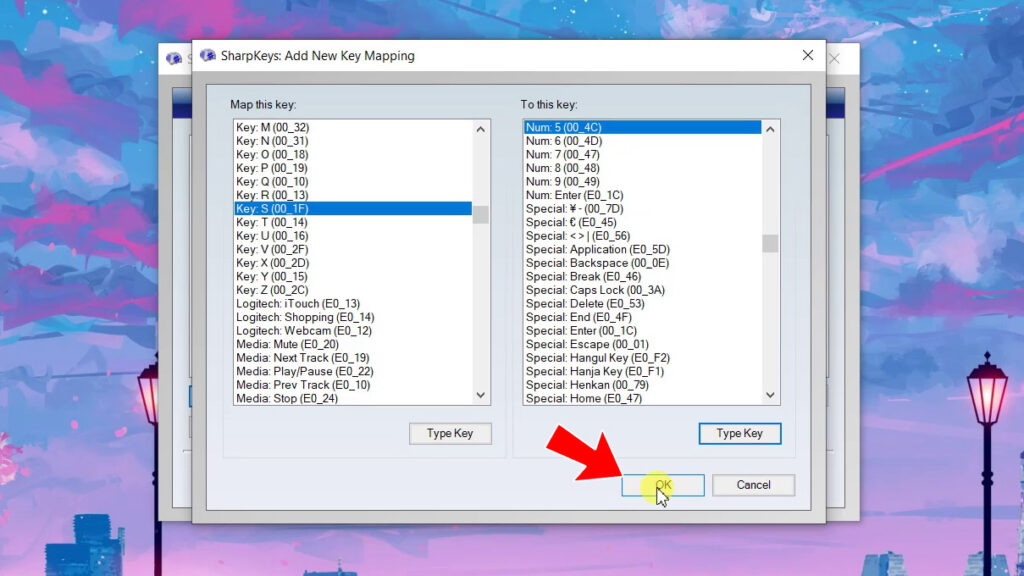
Let’s find ‘S’ first and select it. On the right side column, you can though find the Numpad key ‘5’ from the list but I would prefer to click on ‘Type Key’ at the bottom of the right column. As soon as the dialog box appears just press the key to which you want to assign the function of the broken key. In my case, it’s ‘5’ from Numpad, and hit ‘Ok’ to close this dialogue box.
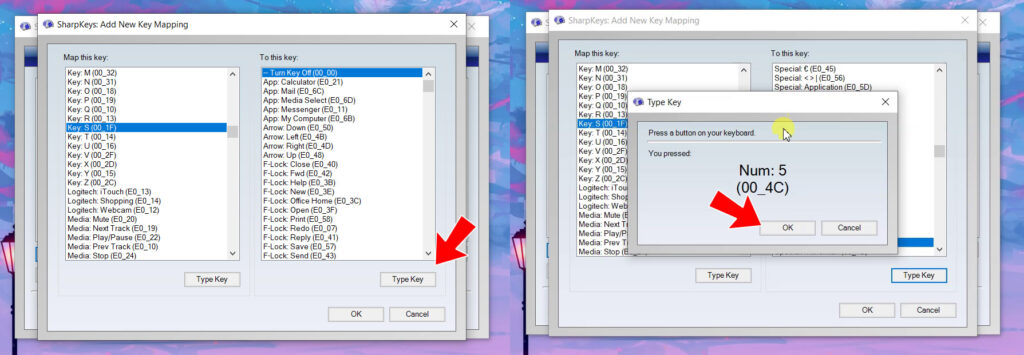
With that being done we have to close the ‘Add New Key Mapping’ Window by clicking on ‘Ok’.
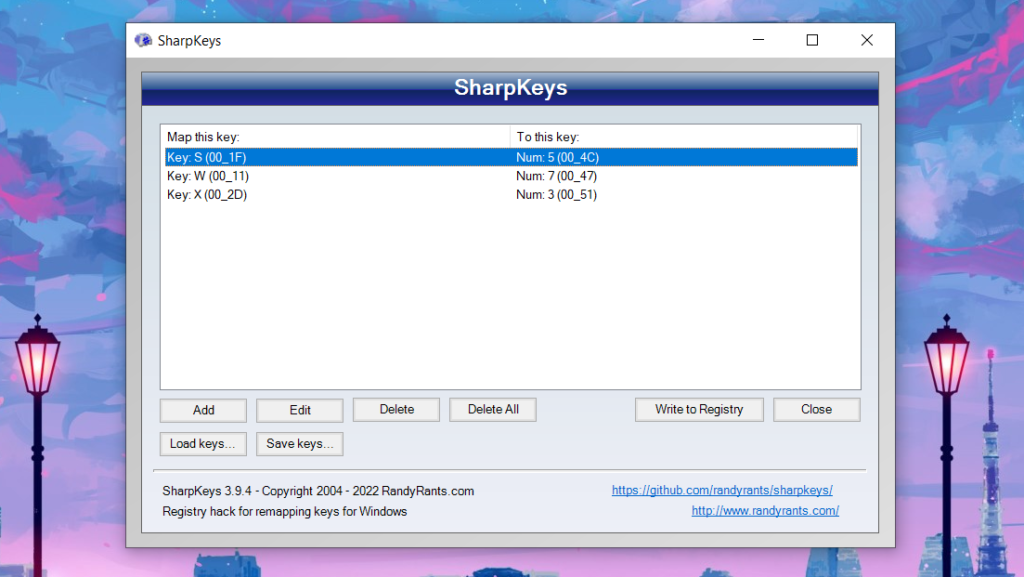
I have done this same process for all the broken keys and assigned Key ‘W’ to Numpad ‘7’ Key ‘S’ to Numpad ‘5’ and Key ‘X’ to Numpad ‘3’. Now all you have to do is to click on ‘Write to Registry’.
This will open a dialog box that says to Reboot or Log-out from the Windows. Just hit ‘Ok’ to close the dialog box.
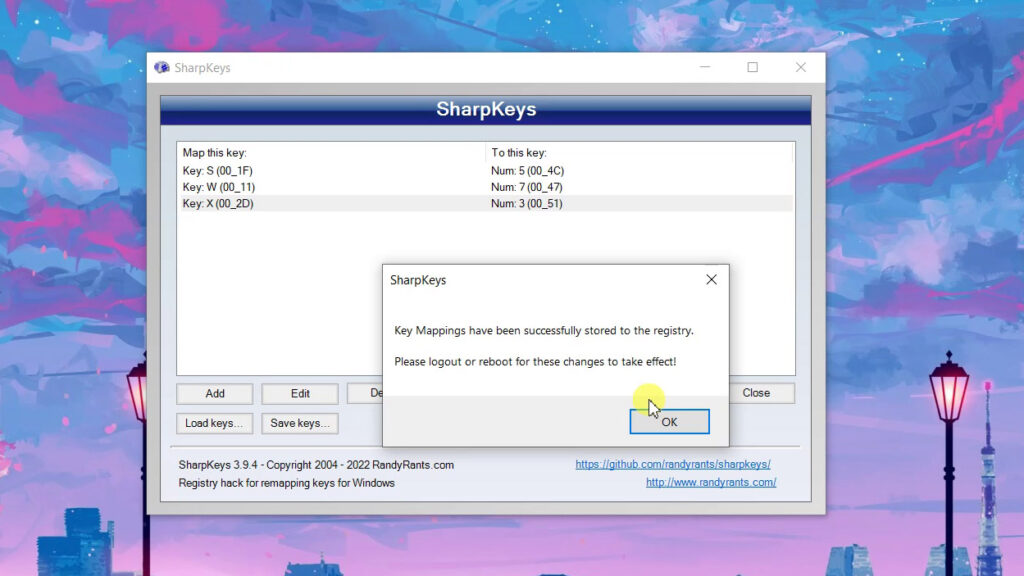
Now, Restart the computer. With that being done you will find that the function of all the damaged keys can easily be accessible by other unused keys of the keyboard.
In the Concluding Lines….
Definitely, none of these processes is a permanent solution you can though use unused keys of your keyboard as a replacement for damaged keyboard keys but if you type a lot or more than 10 or 15 switches are gone then the replacement is the only way to go. Keyboard replacement of laptops nowadays is not that much expensive in India most replacement keyboards can be found between 900Rs to 1200Rs. If we add the service charge then hardly it could go up to 2500Rs. Hope you guys have enjoyed this article and learned something new. If so then don’t forget to express your thoughts in the comment section below. Thanks for visiting.
