If you find yourself stuck with an old and sluggish computer or laptop but still want to make the most out of it, today’s article is just for you. In this guide, I’ll share some techniques to breathe new life into your aging device, making it faster and more usable. Don’t worry if you are struggling with slow laptop or PC. These tips will make your laptop or PC faster.
Upgrading Your Hardware
Let’s start by discussing which parts you can upgrade in your computer. If your computer still boots from a traditional hard disk drive (HDD), the first step is to swap it out for a solid-state drive (SSD). SSDs have become quite affordable nowadays, offering significant performance improvements over HDDs.
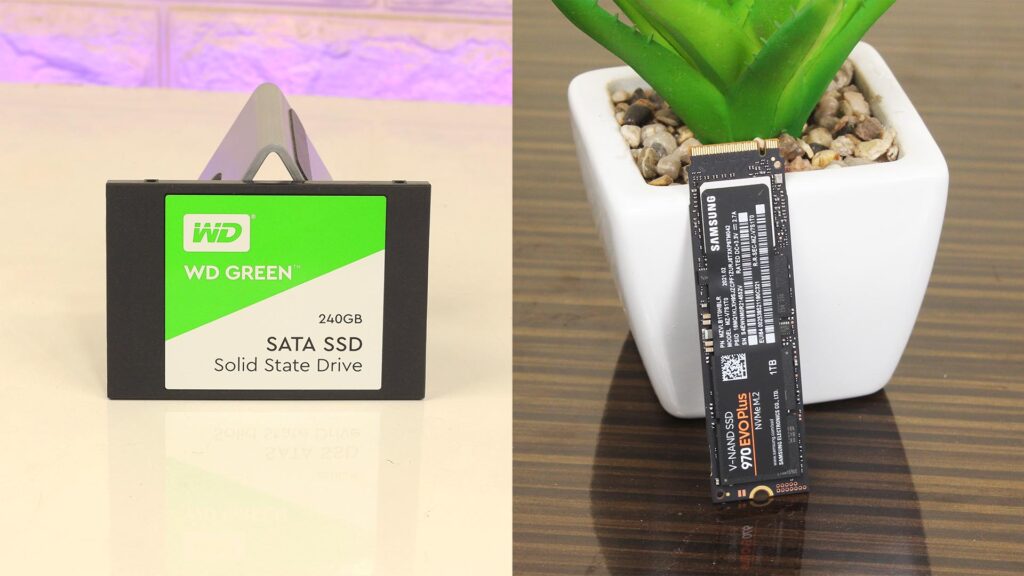
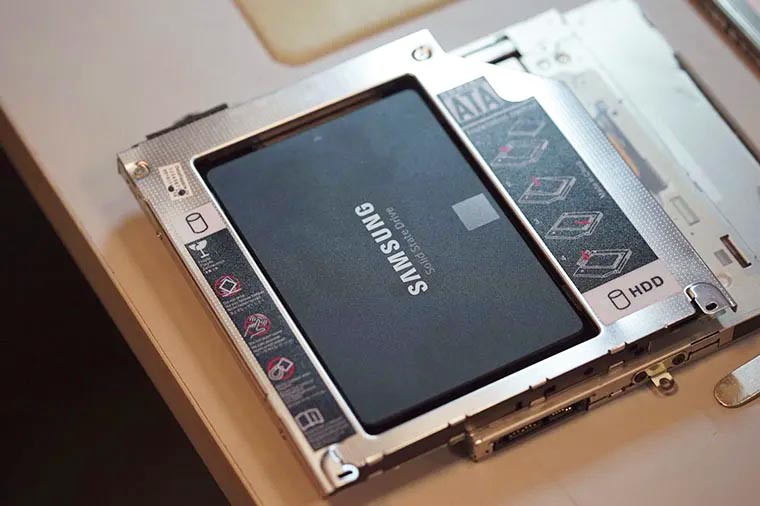
If you have a laptop that supports M.2 drives, you can add an SSD without replacing the existing hard drive. Alternatively, if there’s no M.2 slot available, you can replace the CD drive with an SSD using an SSD caddy.
For desktops, upgrading to an SSD is straightforward – simply install it alongside the existing hard drive for a noticeable speed boost.
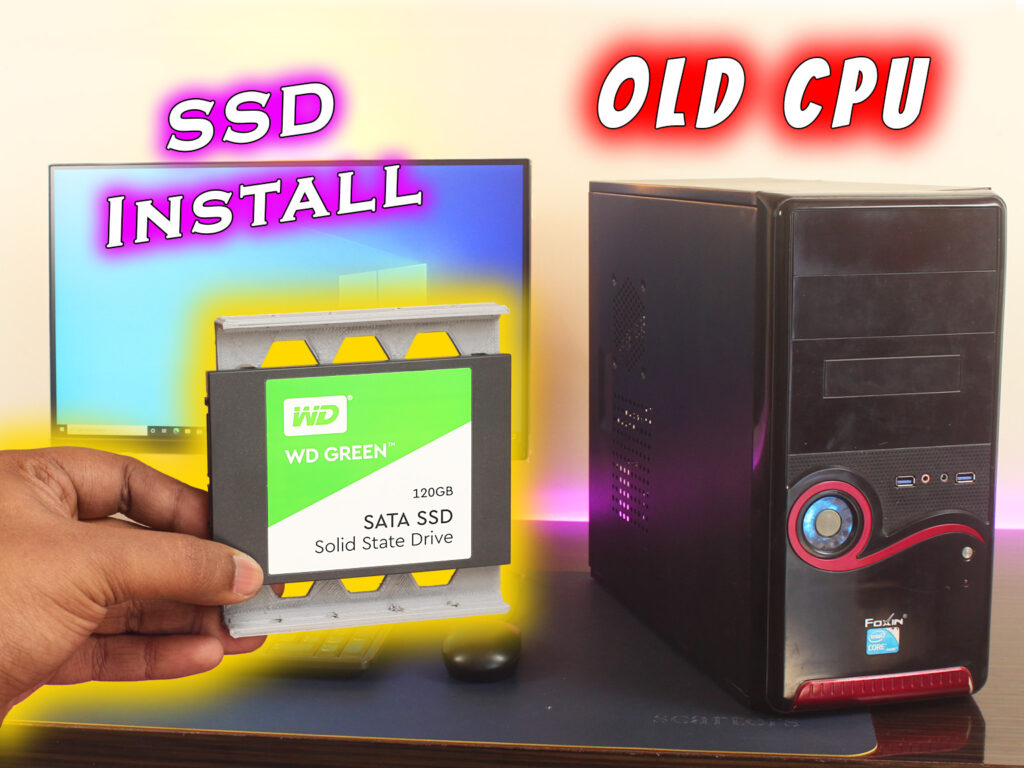
Don’t Miss: How to Install SSD in Unsupported CPU aka PC Case?
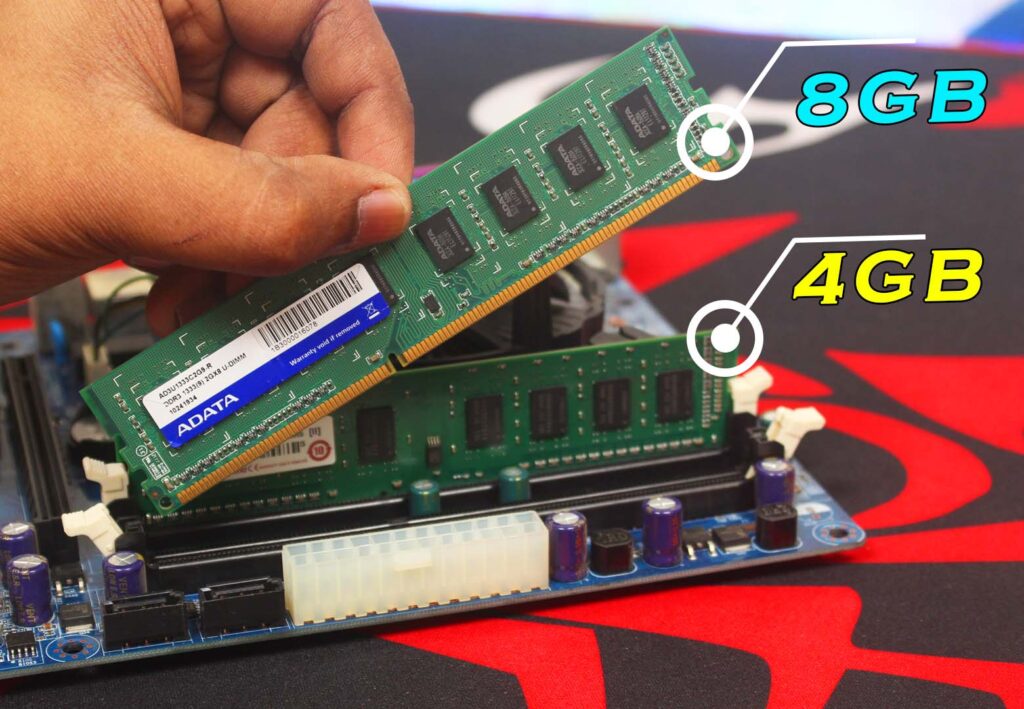
Next up is upgrading your RAM. Older machines often come with minimal RAM, usually around 4 gigabytes. Aim to upgrade to at least 8 gigabytes for smoother performance. RAM upgrades can be a bit tricky, so I recommend reading our dedicated article “Can You Use 4GB And 8GB RAM Together?!” for essential tips and guidance.
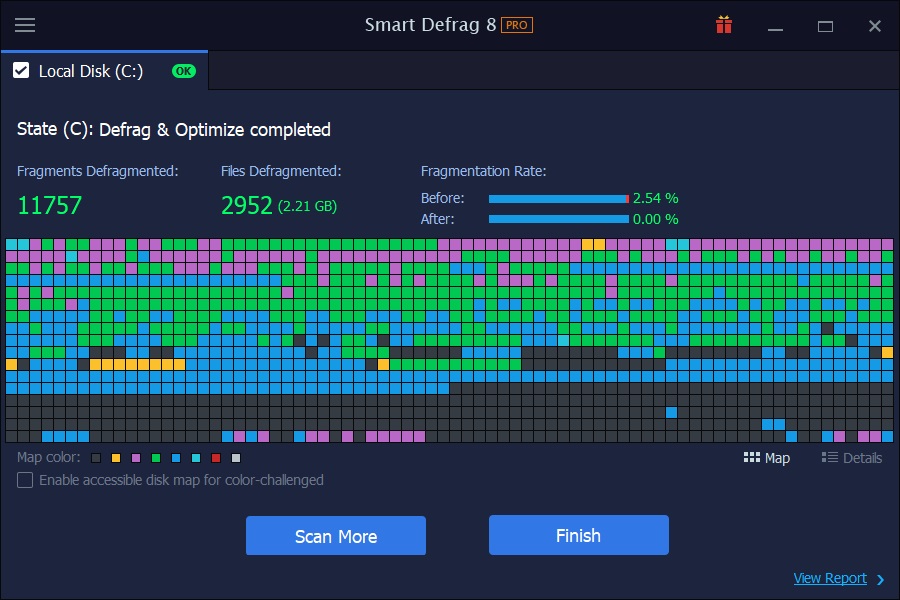
If upgrading SSD and RAM isn’t feasible, you can still improve performance by regularly defragmenting the hard drive using tools like IOBit’s Smart Defrag.
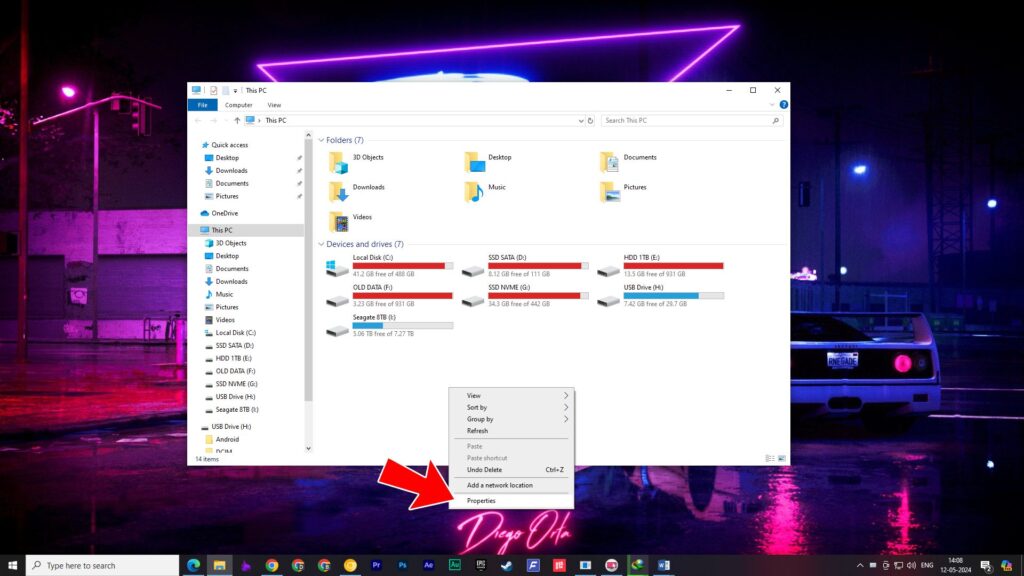
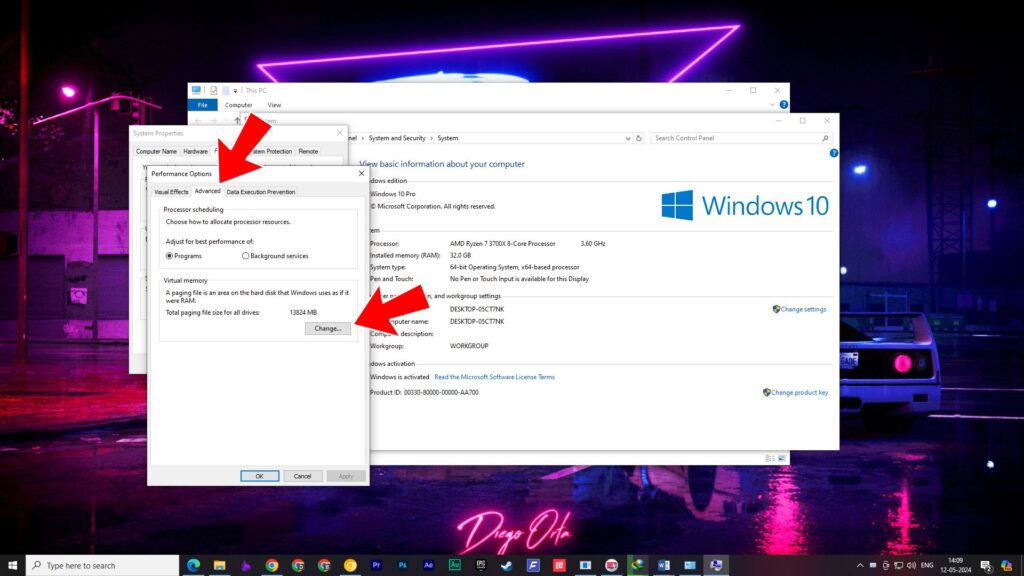
Additionally, turning off the page file for HDDs can help, reducing unnecessary read/write operations. For this, go to “This PC,” right-click on any blank area, then go to “Properties.”
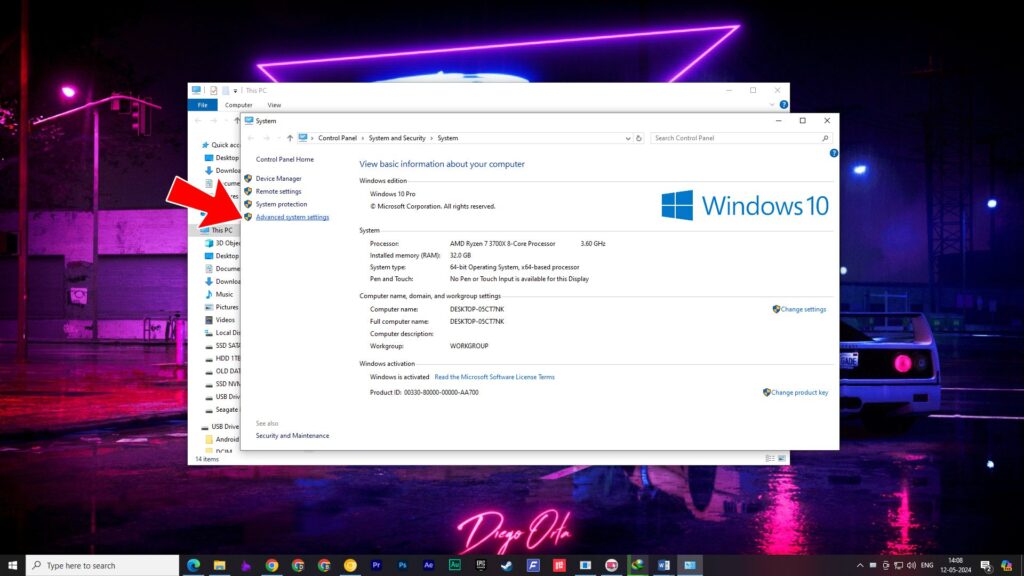
After that, click on “Advanced system settings” on the left side.
Then, in the “Advanced” tab, under the “Performance” section, click on “Settings.”
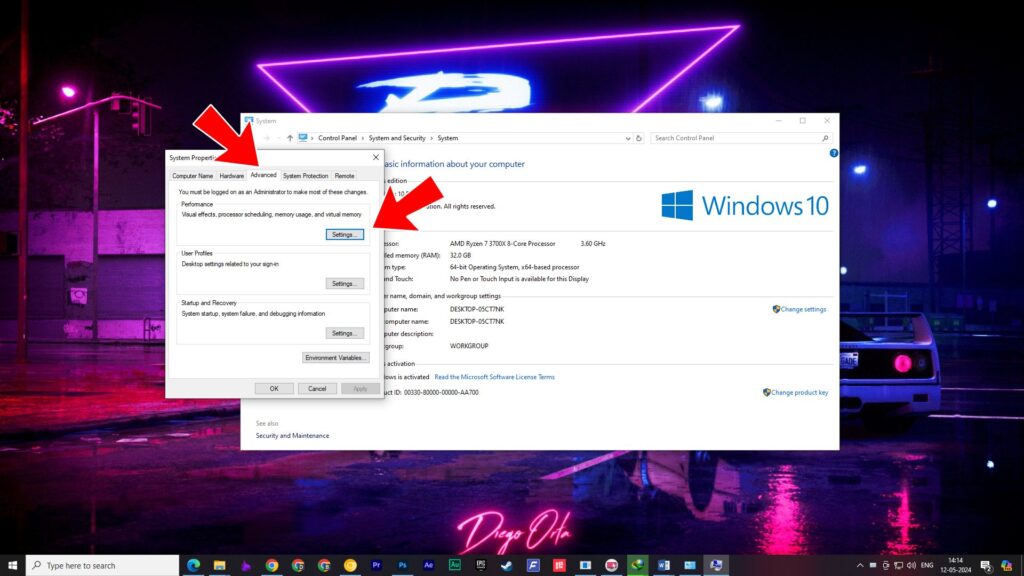
Then, go to the “Advanced” tab here, and look for “Virtual memory.” Click on it, then click on “Change.”
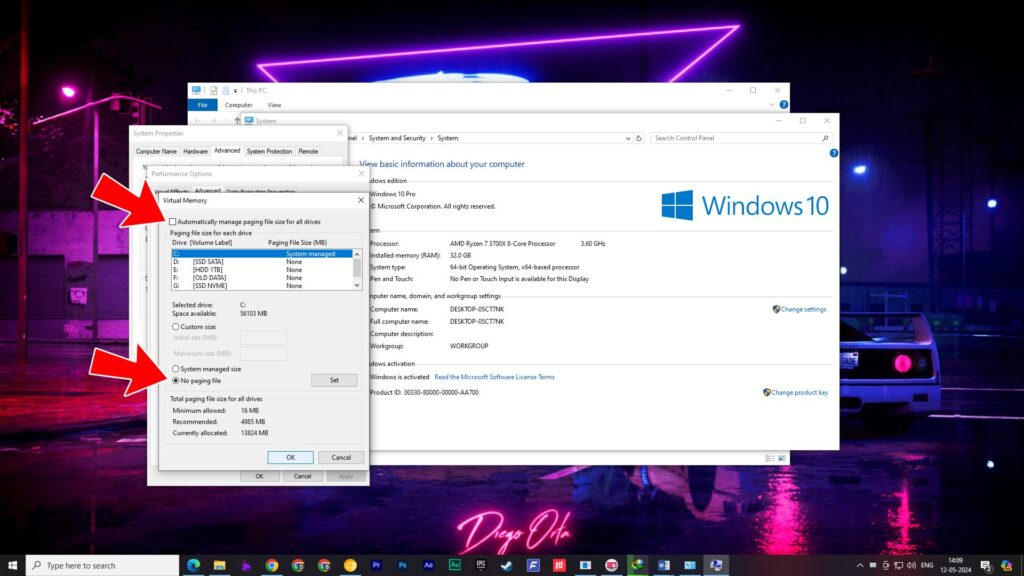
Here, uncheck the option “Automatically manage paging file size for all drives.” Then, go down and select “No paging file.” After that, click on “Set.” Then, click “OK,” “OK,” and “OK” again, and you’re done.
If you’re a laptop owner then you can’t upgrade your CPU and GPU but for a desktop owner you have the option to upgrade the CPU or the graphics card. Keep in mind that CPU replacement might sometimes require to change the motherboard which cost a lot of money.
Cleaning and Maintenance
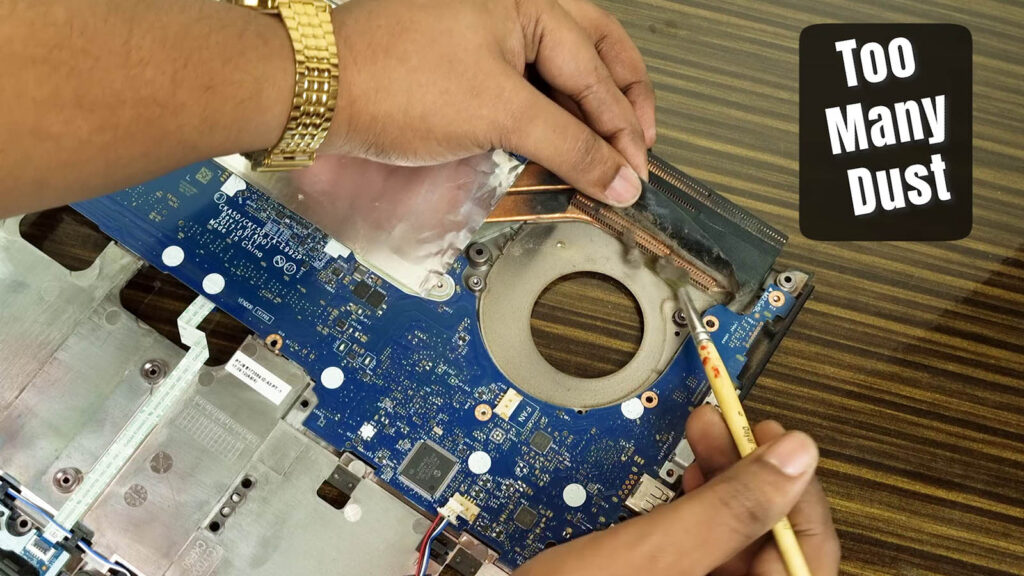
Old computers tend to accumulate dust, hindering airflow and causing overheating. Open up your laptop or desktop computer, clean out the dust, and consider replacing thermal paste or pads for better heat dissipation.
After ensuring physical cleanliness, it’s time to clean up the software side. Start by formatting the old Windows installation, reinstalling a fresh copy of Windows, and updating all drivers to the latest versions. Keep in mind the fresh windows installation should be done on the SSD not on the HDD.

Overclocking
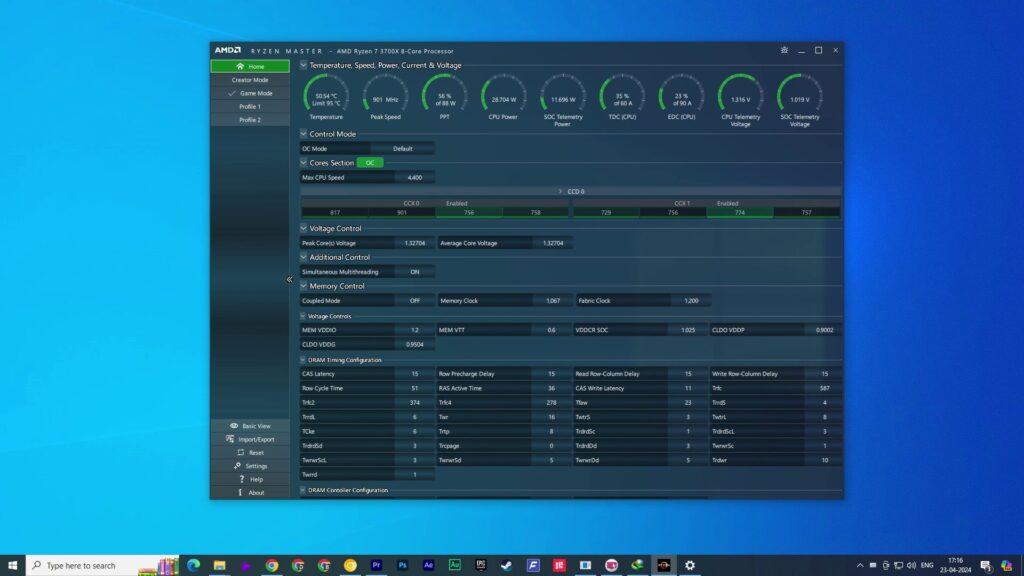
For those looking to squeeze extra performance, overclocking your CPU and GPU can provide a significant boost. However, not all processors support overclocking, so verify compatibility before attempting. With Intel processors, generally, the “K” lineup, indicated by the suffix “K” in the product line, allows for overclocking. Not all AMD processors are overclockable, so you should search for your CPU model on Google to determine if it’s an unlocked processor. If it is unlocked, then you can overclock it.

There are tools available in Windows as well as through BIOS or UEFI for overclocking. You can search on YouTube for tutorials on how to overclock your specific processor. It’s not feasible to cover all the details in one article, but there are plenty of resources available online.
Graphics cards can also be overclocked, and MSI Afterburner is one of the best tools for this purpose. You can find numerous tutorials on YouTube on how to use it.
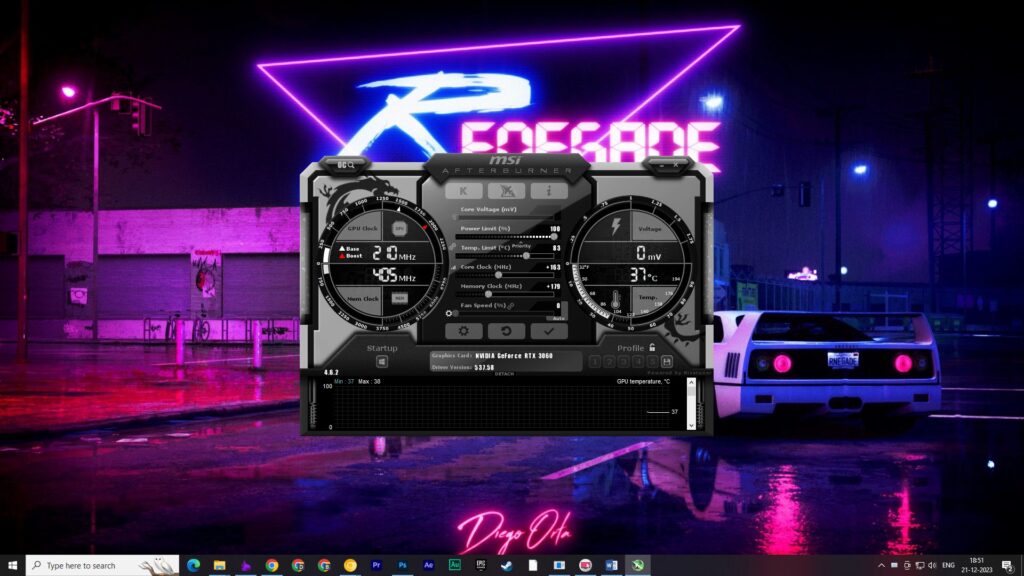
When overclocking, remember to stress test your components afterward to ensure stability. I’ve created a dedicated article on “How to Benchmark Your PC or Laptop?”. During testing, it’s essential to monitor temperatures, and HWmonitor is an excellent tool for this purpose.

Optimizing Windows Settings
Uninstall Unnecessary Programs
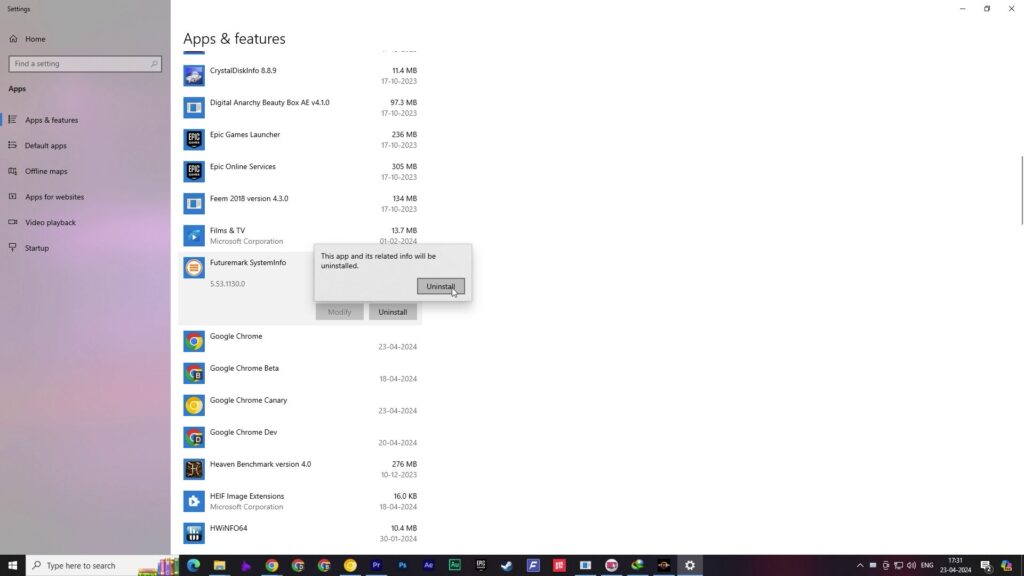
Now let’s talk about some settings you need to adjust on Windows. First, go to the “Add or Remove Programs” section. You can do this by simply searching in the Windows search box. Uninstall any unnecessary software that you haven’t installed yourself or you don’t need anymore. If you’re unsure about a particular software, make sure to Google it before uninstalling to understand its purpose. Often, when installing different drivers, unnecessary bloatware gets installed along with the drivers. So, during installation, don’t just click “Next” without reading each page to see what’s being installed.
Disable Start-up Programs
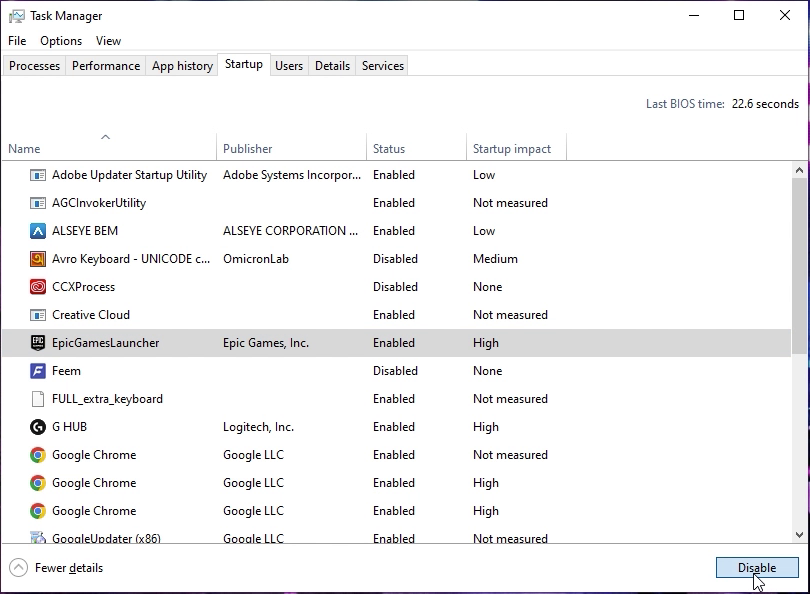
After that, you need to disable startup programs in Windows. You don’t have to disable all of them, just the ones that aren’t important. To do this, press Ctrl + Shift + Escape on your keyboard to open Task Manager. Then, go to the “Startup” tab, and selectively disable programs. For example, I’m currently selecting Avro Keyboard, then I’ll just disable it click on disable button on down right. I’ll do the same for other programs like the Epic Games Launcher and Steam.
Disable Windows Visual Effects
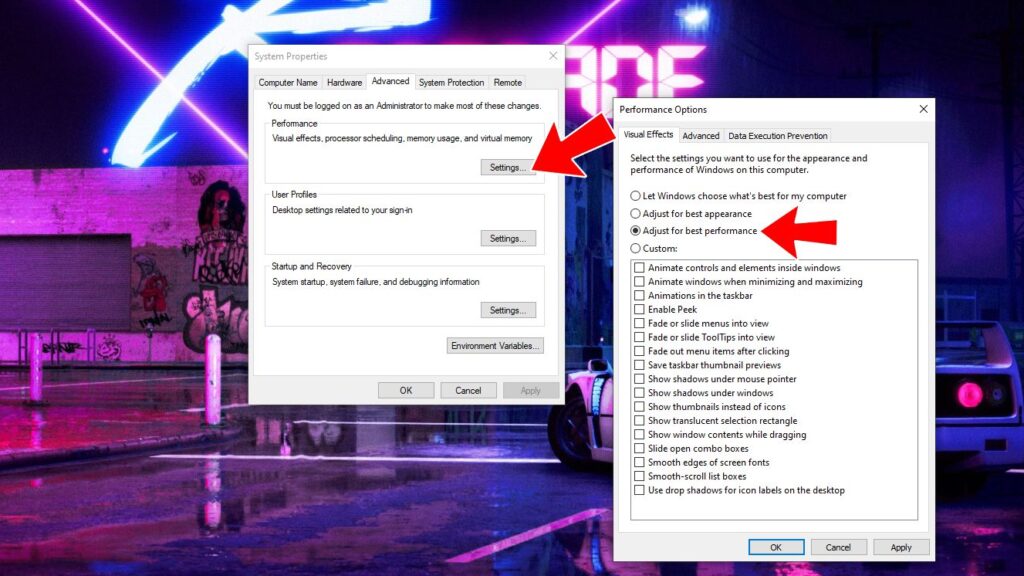
Next, you’ll want to disable Windows’ visual effects. This won’t cause any problems with your computer; it’ll just turn off fancy animations. To do this, right-click on “This PC,” then go to “Properties.”

Click on “Advanced system settings” on the left side, then go to the “Advanced” tab and click on “Settings” under the “Performance” section.
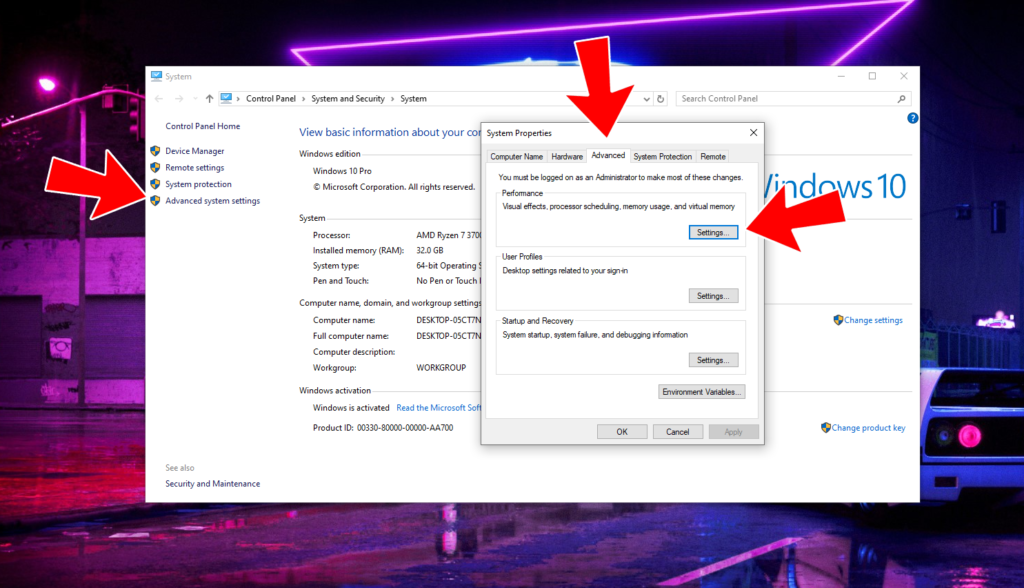
Here, select “Adjust for best performance,” then click “Apply” and “OK.” This will make Windows’ appearance look quite basic, but you can manually tick the options you still want. Remove the ones you don’t need, then click “Apply” and “OK” again.
Uninstall Windows Bloatware
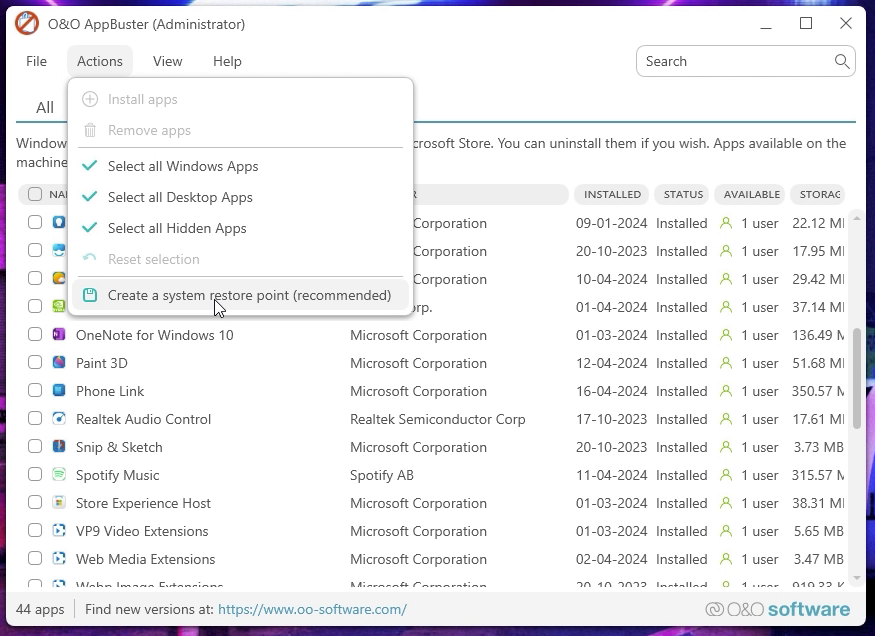
Apart from these, you know that there are always pre-installed bloatware on them. These bloatware run background processes that can significantly slow down an old computer. One tool for dealing with this is called ‘O&O APP BUSTER‘. It has an interface like this. First, go to the “Action” tab, then click on “System Restore Point” to create a restore point.
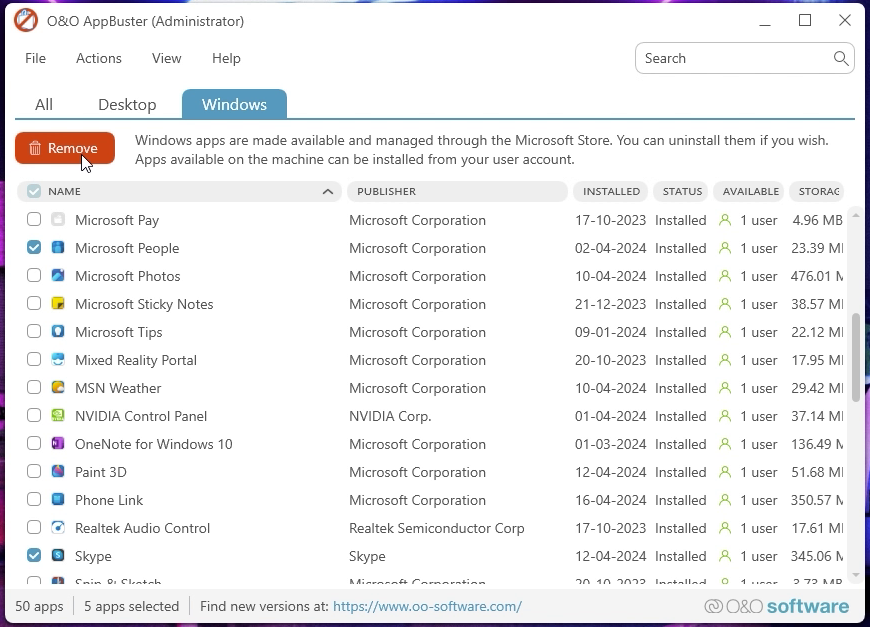
Next, go to the “Windows” tab, then select any unnecessary programs that you think you’ll never use and click on “Remove”.
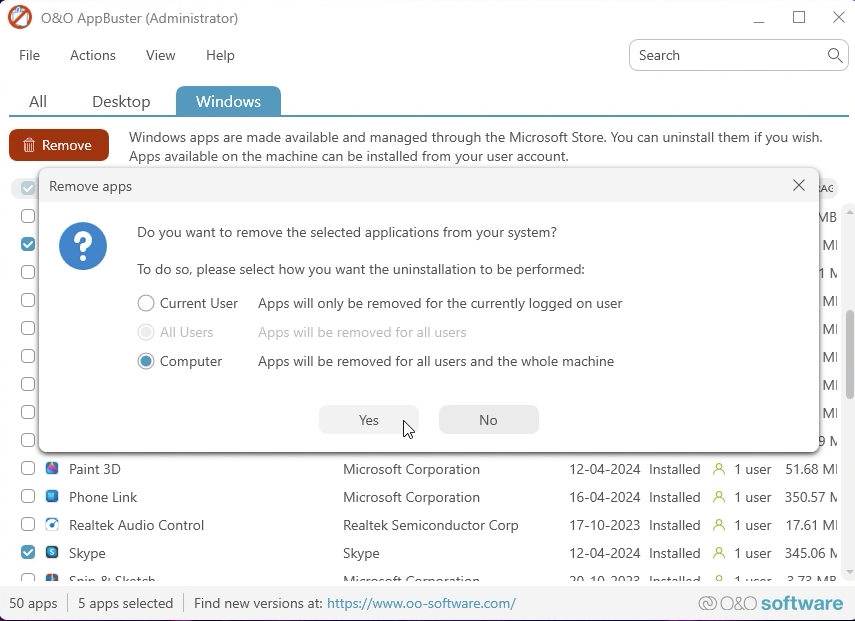
A pop-up will appear. Choose “Computer” and then click “Yes”.
Clean Up Storage in Windows
Next, you’ll want to clean up your storage. Remember, there should be at least 20 GB of free space on your C drive. If your C drive gets too full, your computer will slow down and become glitchy. To clean up storage, type “storage” in the Windows search box.

Then click on “Storage settings” that appears. Click on “Temporary files”, and it will show you all the unnecessary files on your computer. Select all except downloads and click on “Remove files”.

Turn Off Windows Features
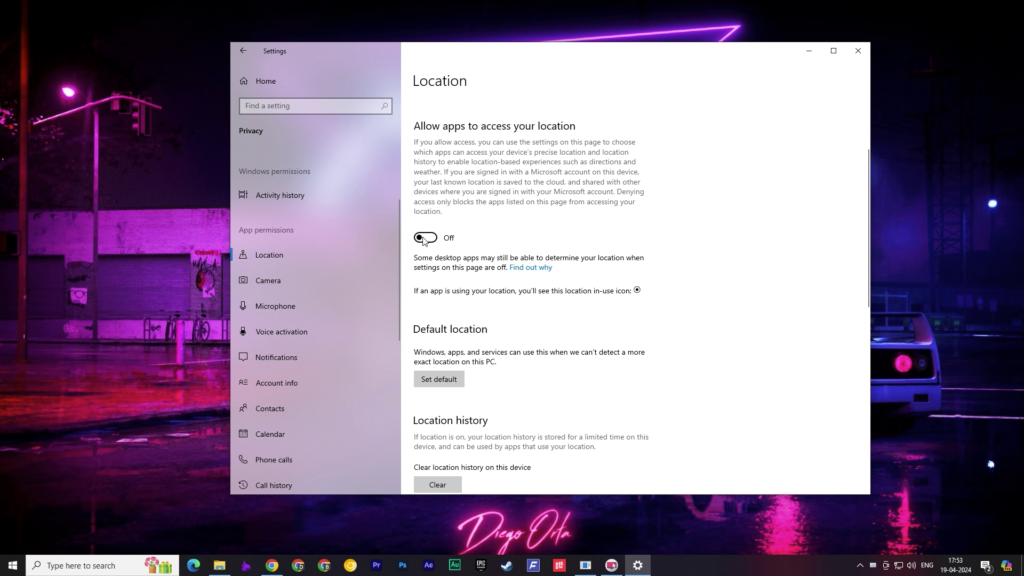
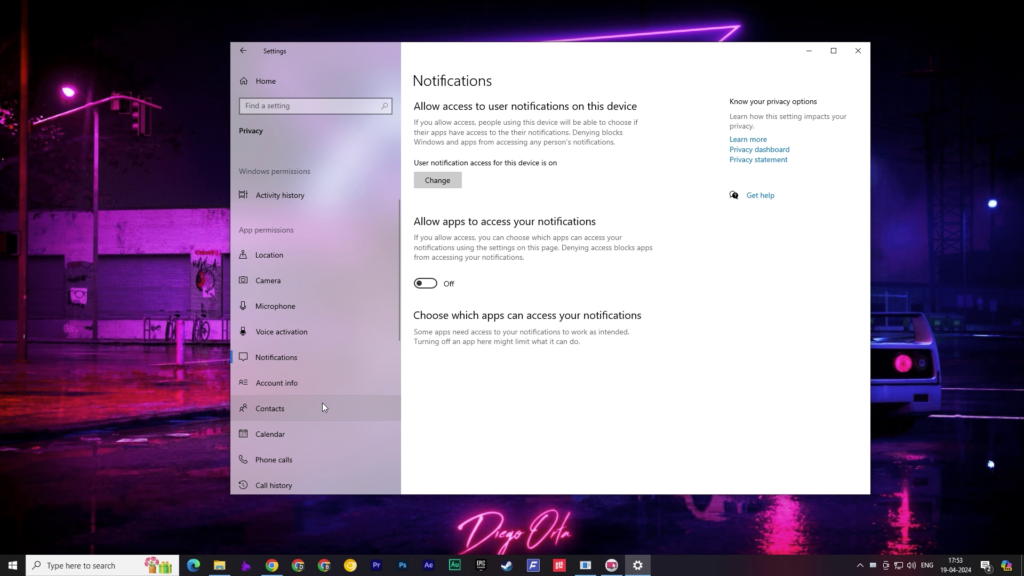
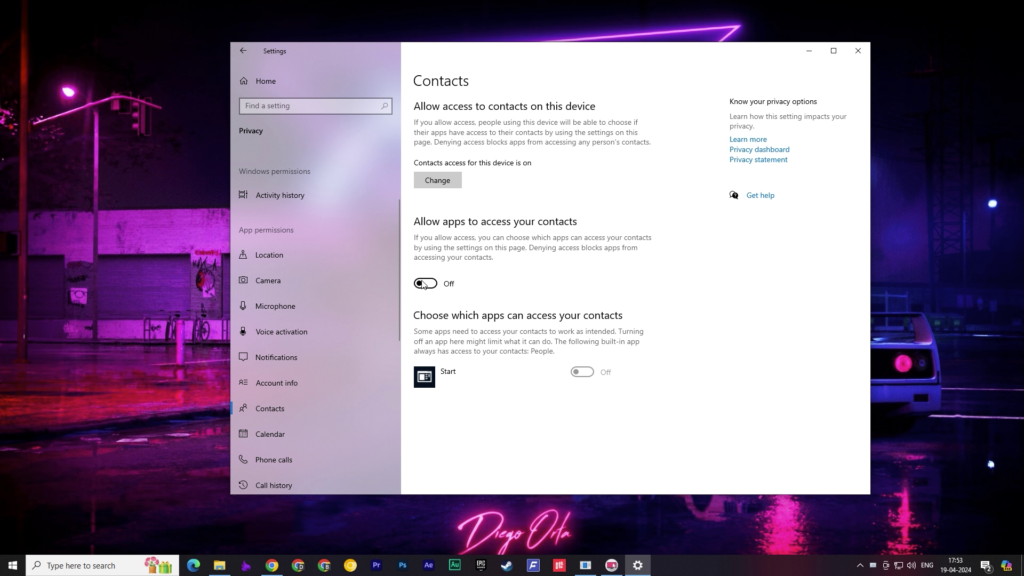
Now, type “settings” in the Windows search box, then go to “Privacy”. On the left side, you’ll see “App Permissions”. Go to “Locations” and turn off the toggle, then do the same for “Notifications” and “Contacts”.
Don’t Install 3rd Party Antivirus Program
Finally, if you’re using Windows 10 or Windows 11 and have a third-party antivirus software installed, uninstall it and rely on Windows Defender, which is now called Windows Security. It’s better than most third-party antivirus software and consumes fewer system resources. Whether you believe it or not, third-party antivirus software can slow down your computer.
Also Read: Does Antivirus Detect and Remove All Malware?
Change Windows Power Mode
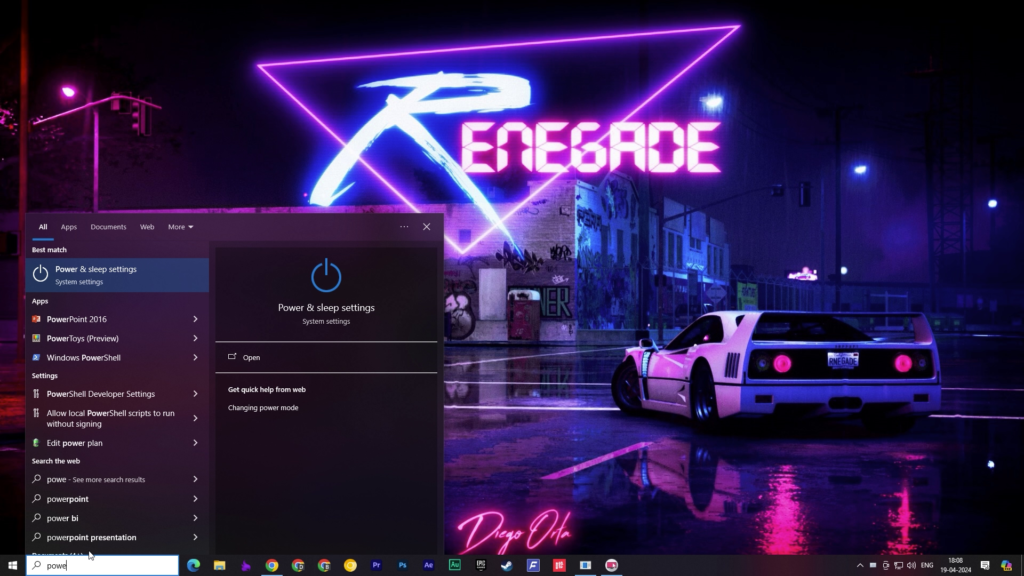
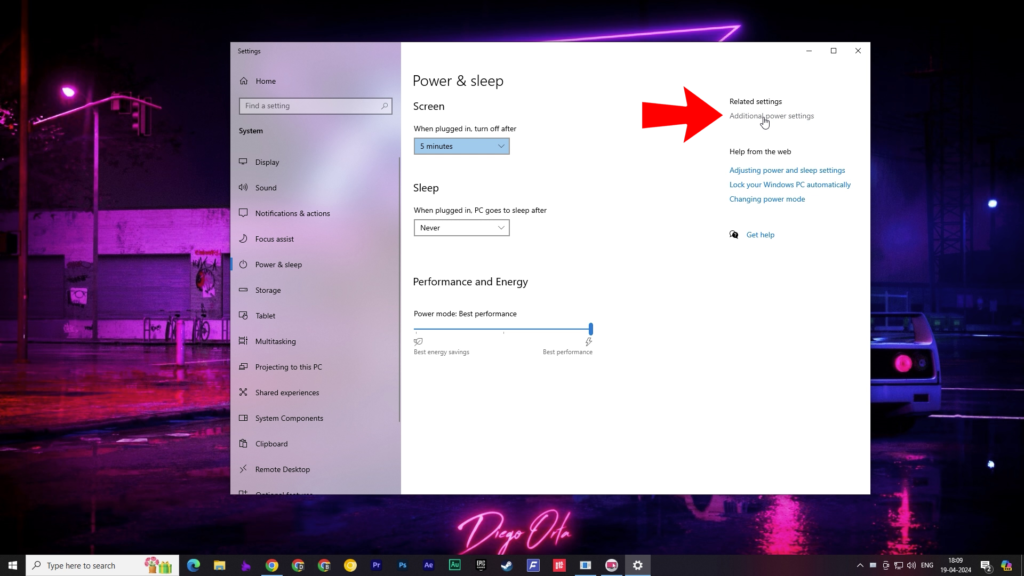
Now you want to change your computer’s power mode, which generally stays set to balanced, but you want to set it to high performance. To do this, simply search for “Power and Sleep settings.”
Then click on “Additional power settings,” and select “High performance.”
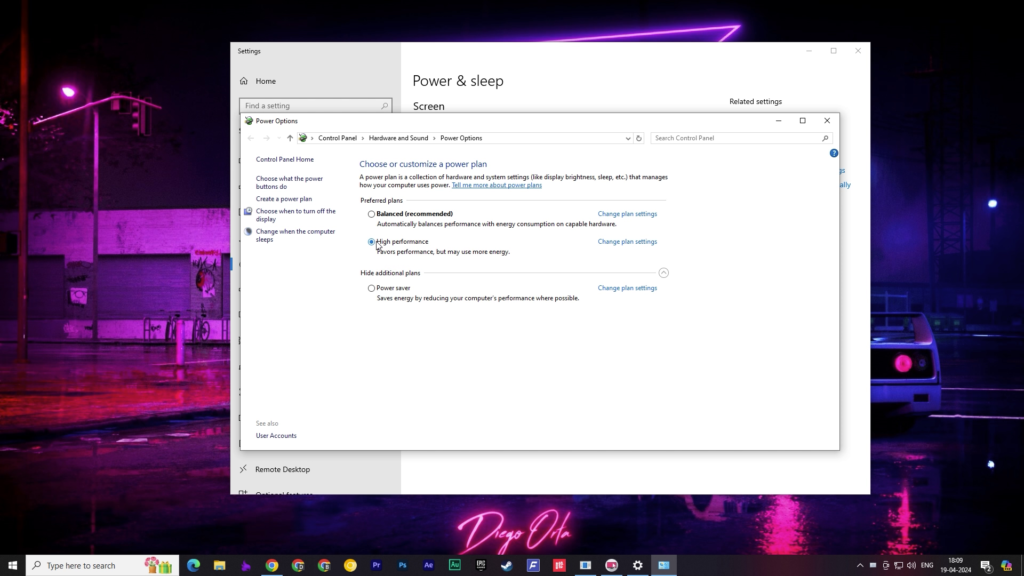
This will make your computer or laptop consume more electricity, but if it’s a laptop, it will drain the battery faster, while offering better performance.
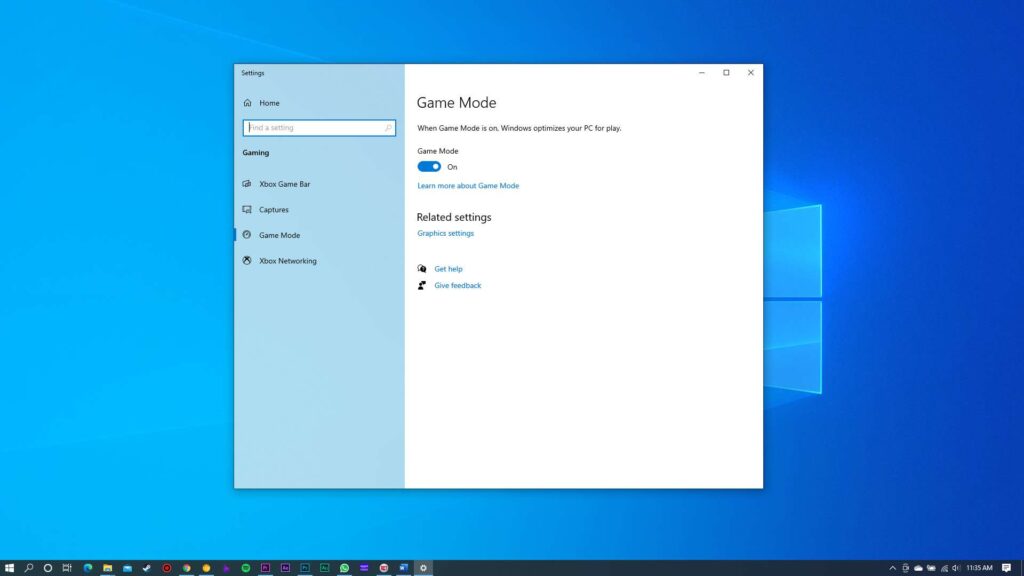
Turn On Windows Game Mode
Furthermore, if you want to game on your potato PC, you can also utilize the Game Mode, which provides a 5 to 10% performance boost during gaming. This happens because Game Mode prioritizes background tasks, doesn’t allow notifications to disturb you, and offers other features beneficial for gaming.
Don’t Miss: Windows Game Mode: A Blessing or A Curse for Gamers?!
Conclusion
With these tips and tricks, you can breathe new life into your old computer, making it suitable for everyday tasks or even gaming. Whether you’re upgrading hardware or optimizing software settings, a little effort can go a long way in improving performance and extending the lifespan of your device.
Don’t hesitate to explore alternative operating systems like Linux or Chrome OS for lighter usage, or consider Windows LTSC for a streamlined Windows experience on older hardware. With the right approach, your old computer can still serve you well in today’s digital world.
Thank you for the auspicious writeup It in fact was a amusement account it Look advanced to more added agreeable from you By the way how could we communicate