Windows 11 comes with a host of new features. Ot’s ability to customize the Start menu and Taskbar’s appearance, making it more personalized. The user interface is also adorable and it’s enhancing as it is receiving significant updates. According to Microsoft performance of this OS is also enhanced. Microsoft making improvements to memory management, disk usage, app prioritization, and various other CPU and battery-related factors to speed up Windows 11 and make it more efficient.
However, it is not the case for everyone. I have seen many users including me constantly complaining about the poor performance of Windows 11. Maybe you can say it’s because of the old hardware but that’s not the case for me. I am using the latest CPU R7 3700X powerful GPU RTX 3060 32GB ram but still, the performance of Windows 11 is not so adequate. It is freezing frequently, applications are taking forever to load, and many more. I have tried almost everything to fix I think you should do them too. For me, I am not that lucky guy but for you, they may work and you successfully speed up Windows 11.
Restart & Update
Optimizing the performance of Windows 11 can be achieved through various means. One of the simplest and most effective ways to do is to restart your computer. Sometimes in flow of works we just hibernate or sleep the Windows. Which in long run creates problems. Windows needs to shutdown correctly to function better. While you shut down or restart the PC the corrupted files are mostly fixed automatically, drivers can reload themselves, and Kernel of the OS reload and ultimately fixes all the slowdowns. To speed up Windows 11 first of all restart your machine.
If restart doesn’t help then ensure that you have the latest updates installed. Sometimes update helps to speed up Windows 11. Maybe the previous build has a bug and Microsoft have already spread the new updates but for some reason it’s not automatically installed that’s why you are facing the slowdowns.
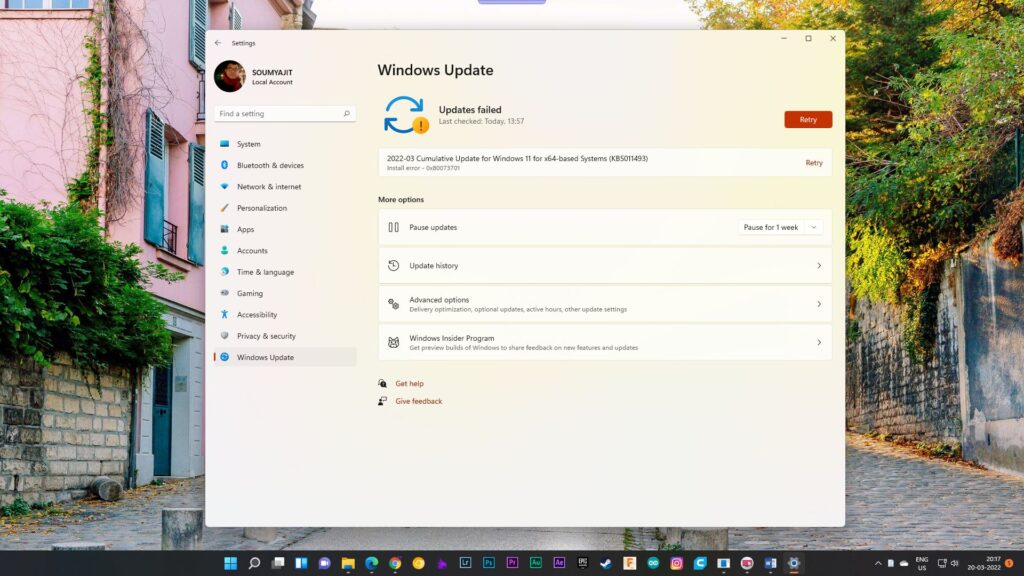
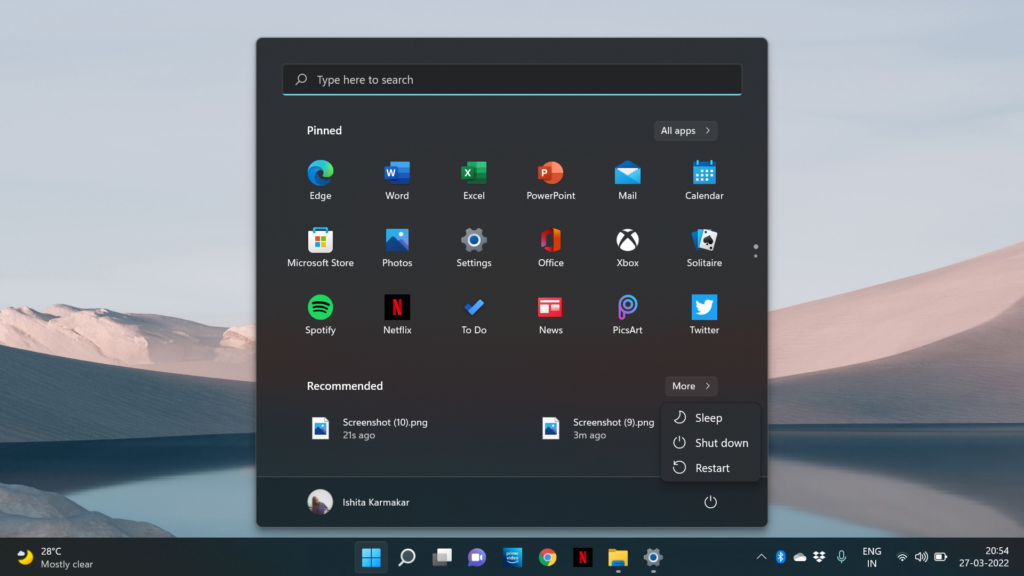
To begin, navigate to the Settings menu and select “Windows Update,” then choose the option to “Check for updates.” If there are any new updates available, install them and restart your computer. This straightforward step can go a long way in enhancing the overall speed and functionality of your Windows 11 operating system.
Disable Startup Programs
Start-up programs are cool sometimes for some applications for your convenience it’s essential but if an unnecessary application starts up with the boot then it is obviously a waste of resources.
To boost the boot time of your Windows 11, you can disable unnecessary startup programs. Here’s a step-by-step guide on how to disable them:
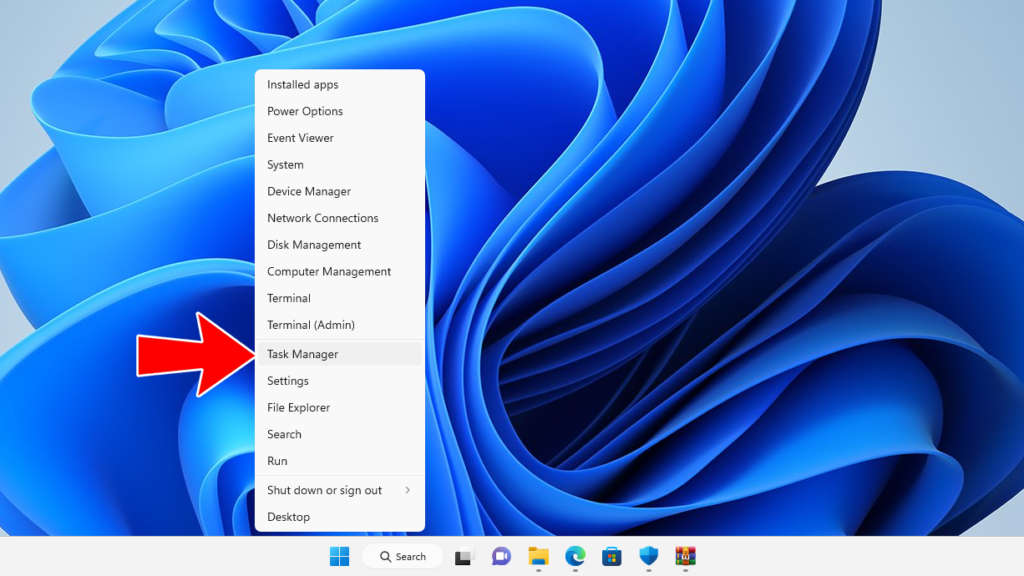
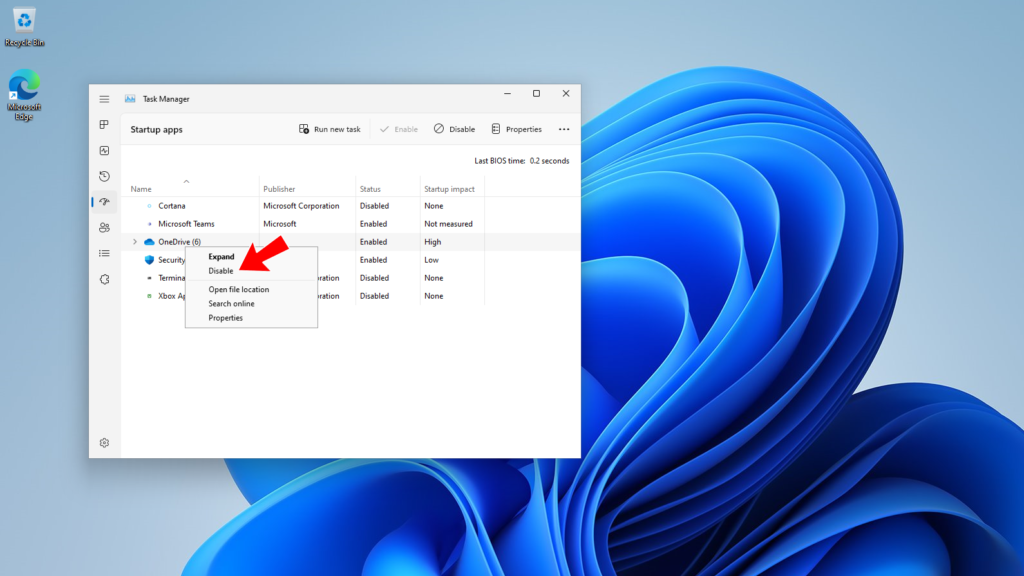
Select the Task Manager option by right-clicking on the Start menu or using the keyboard shortcut “Ctrl + Shift + Esc.”
Next, select the “Startup” option, where you will find a list of programs that can be disabled.
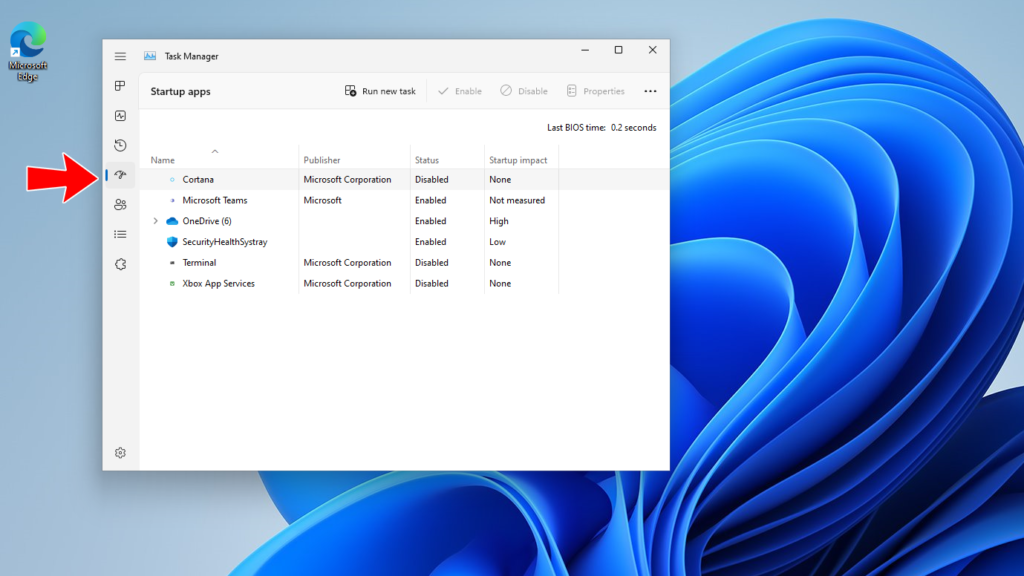
Right-click on the program you want to disable and select “Disable” from the menu.
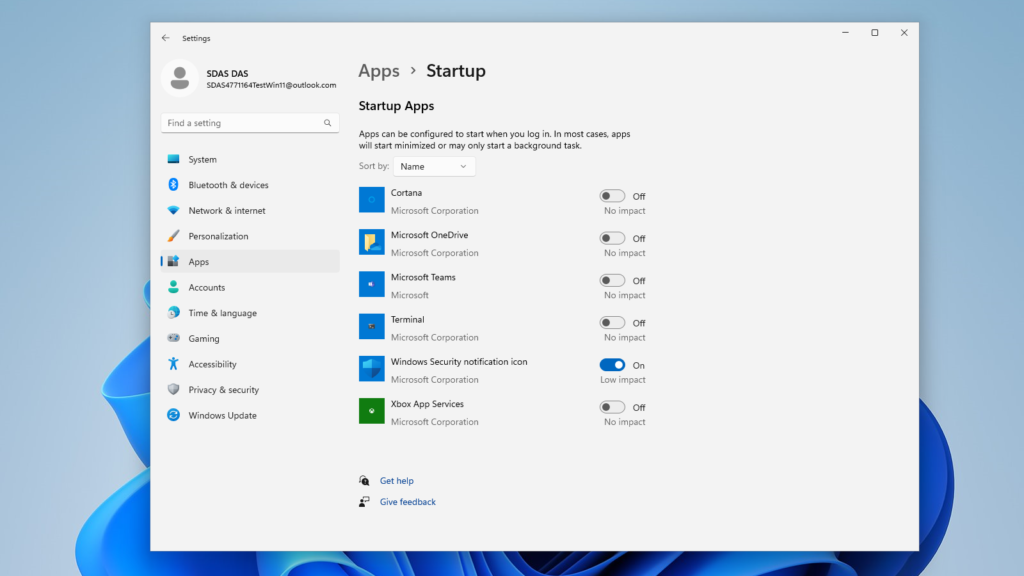
In addition to disabling startup programs, certain apps such as Microsoft Teams, OneDrive, and Skype can’t be disabled from task manager and they consume significant resources during startup. To address this issue, follow these steps:
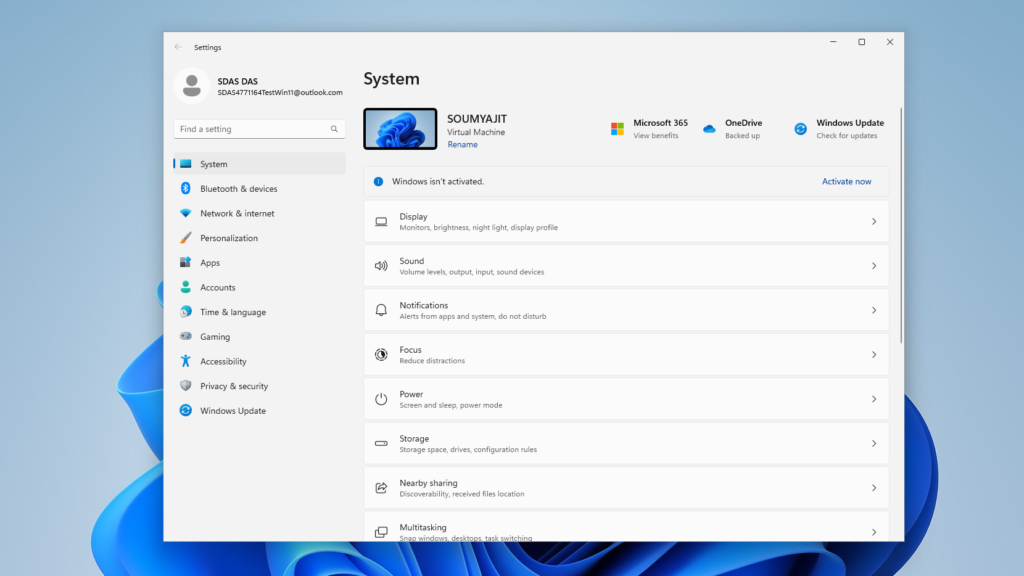
Click on the Windows button or press “Windows + I” to open Settings.
Select “Apps” and then click on “Startup.”
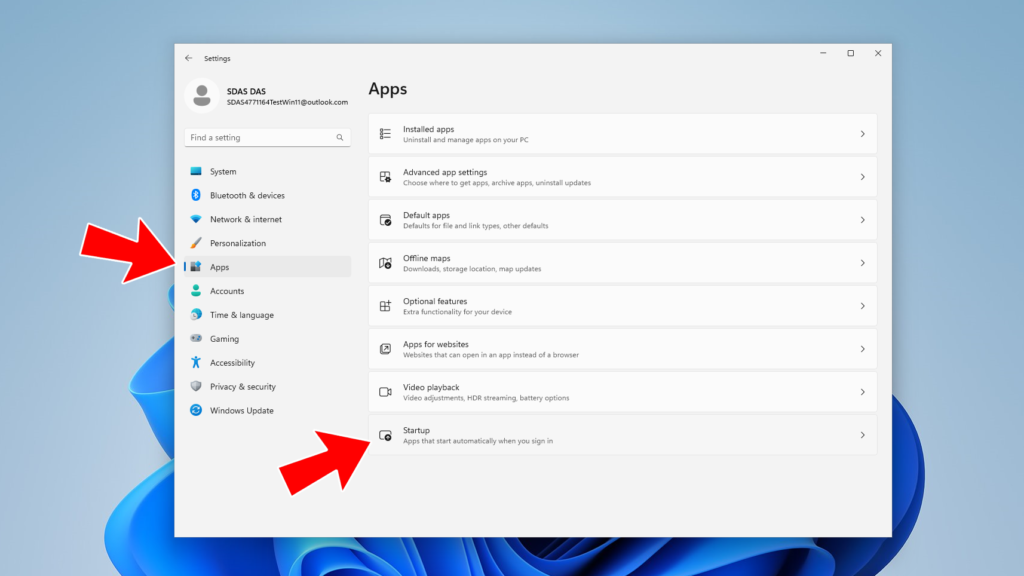
From there, turn off all the apps that you do not want to run during startup.
It is essential to note that as you install more applications over time, the list of startup programs will grow. Therefore, it is crucial to periodically check and if it’s necessary then disable any unwanted apps that are launching during startup to maintain the speed and performance of your Windows 11 system.
Debloat Windows 11
Optimizing the performance of your Windows 11 system can also be achieved by debloating it. This involves disabling unnecessary features and services that may be consuming system resources. This process involves disabling Cortana, uninstalling unnecessary packages and apps like OneDrive, and removing services that may be slowing down your system, all with just a click.
Just open Microsoft PowerShell by searching it on the Windows search box and type the command below:
iwr -useb https://git.io/debloat|iex
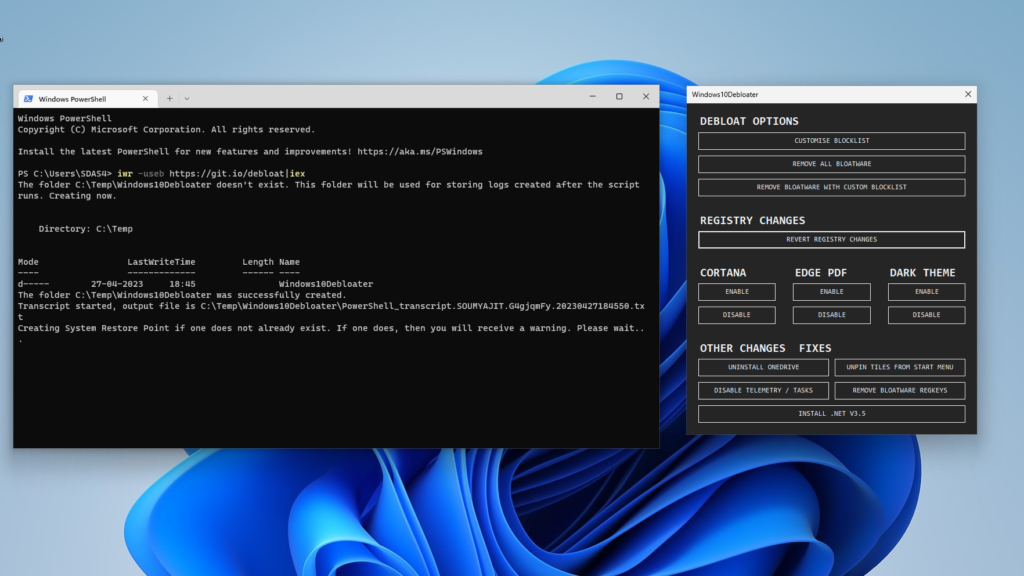
This command will download a tool from GitHub. From the tool disable/uninstall whatever you’re thinking that you don’t need. In that tool everything is self-explanatory but keep in mind before using Debloater create a system restore point. In any case if something goes wrong.
Changing the Power Modes
Another way to speed up Windows 11 is by changing the power mode settings. By doing this, you may achieve little extra performance from your machine at the expense of battery life.
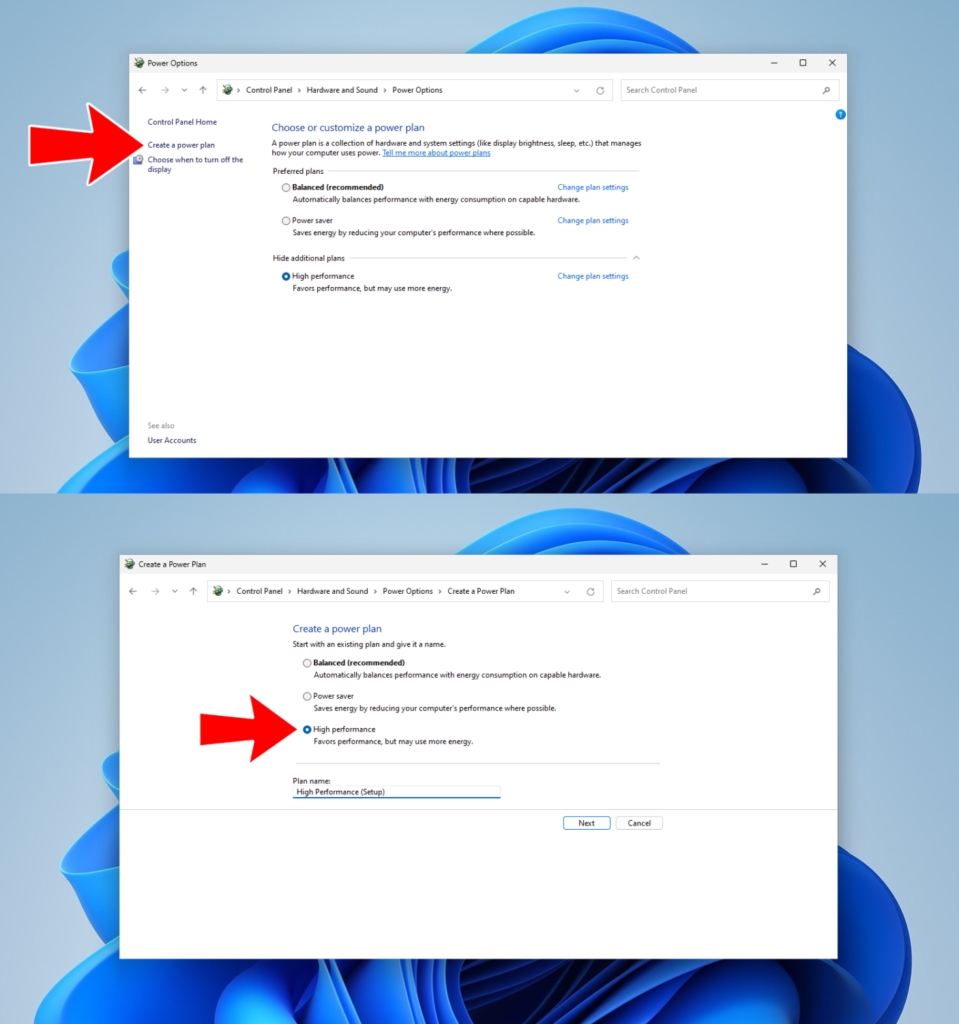
To configure this search on Windows 11 search box ‘Control Panel’. Here move to ‘Hardware & Sound’ > ‘Power Options’. From here choose ‘High Performance’.

If you’re unable to find the option from the left side pen choose ‘Create a Power Plan’ here you’ll find the ‘High Performance’ option. Select it, name the plan, and click on Next.
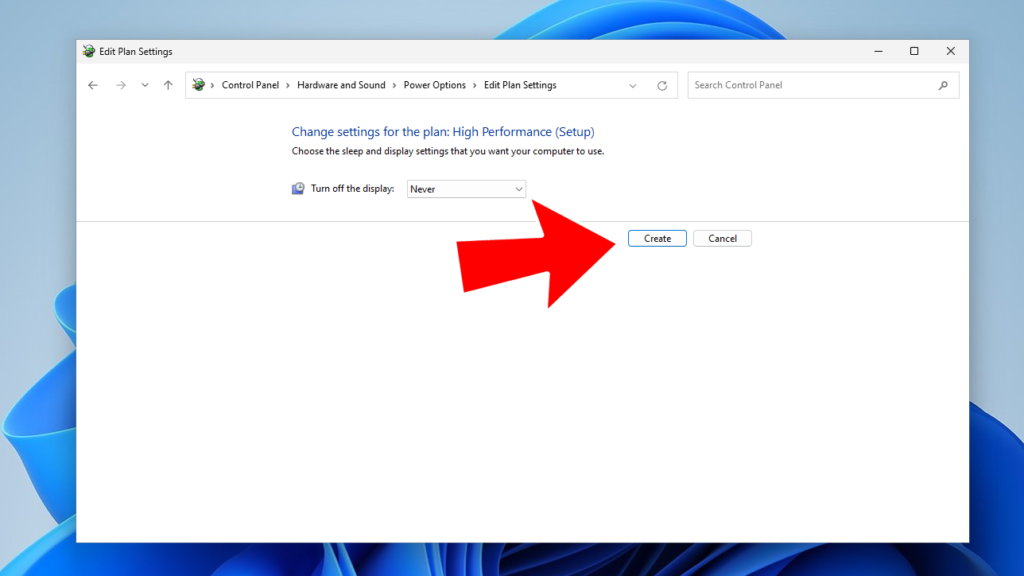
On the next screen, you can select sleep timer and display off time – do whatever you want to then click on ‘Create’.
Adding a Fast Storage Might Speed Up Windows 11
Upgrading the storage with SSD will significantly enhance its performance and speed. The difference in SSD and HDD performance is remarkable, and you’ll notice it immediately. Even with a 3rd-gen Intel i3 processor, I’ve had a flawless experience with Windows 11 thanks to an SSD. A standard 5400 RPM hard drive has a read/write speed of 100MBps, while a SATA SSD offers a read/write speed of 500MBps, a massive 5x improvement. You’ll see the difference in boot time, app loading, and overall OS interaction. However, the Interface speed is important. If your machine is old and don’t have SATA 3.0 support then you might not achieve that kind of speed but still, it will help.

Don’t Miss: NVME SSD vs SATA SSD Vs PCIE SSD: Which SSD Type You Should Choose?
Defragment the Hard Disk
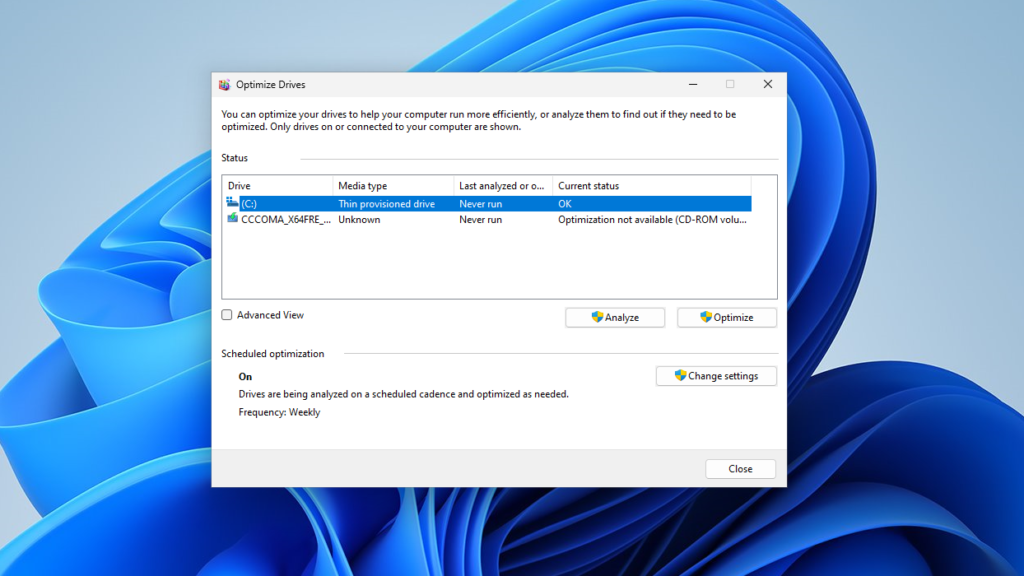
If your Windows 11 system is still based on a hard drive then you may need for defragment. Even if you only access the files from the hard drive but your main boot drive is SSD still you need to defrag your drive. As time passes, the files on your hard disk can become fragmented and this can adversely affect your system’s performance. You can resolve this issue by using the defragmentation tool.
Note: Remember that defragmentation is not recommended for SSDs as it can shorten their lifespan.
To defragment the hard disk, you can use Windows integrated defragment tool but I reconnected to use the IObit SmartDefrag tool. It’s mostly free and can smartly detect what’s SSD and What us hard drive. With this tool, you will not defrag a SSD accidentally. The user interface is also pretty straightforward. I think you’ll figure it out how to use this software. You can download it from here.
Disable Restartable Apps in Windows 11
You may have noticed on Windows 11, if you have shut down or restart your PC by opening application them most of the time after shutdown or restart when you sign in to Windows the application back to ‘On’ again. While this feature can be extremely handy for some PCs, but not every computer gets benefited from this feature. So ii would be a great idea to disable the feature if you want to speed up Windows 11. To disable restartable apps, follow these steps:
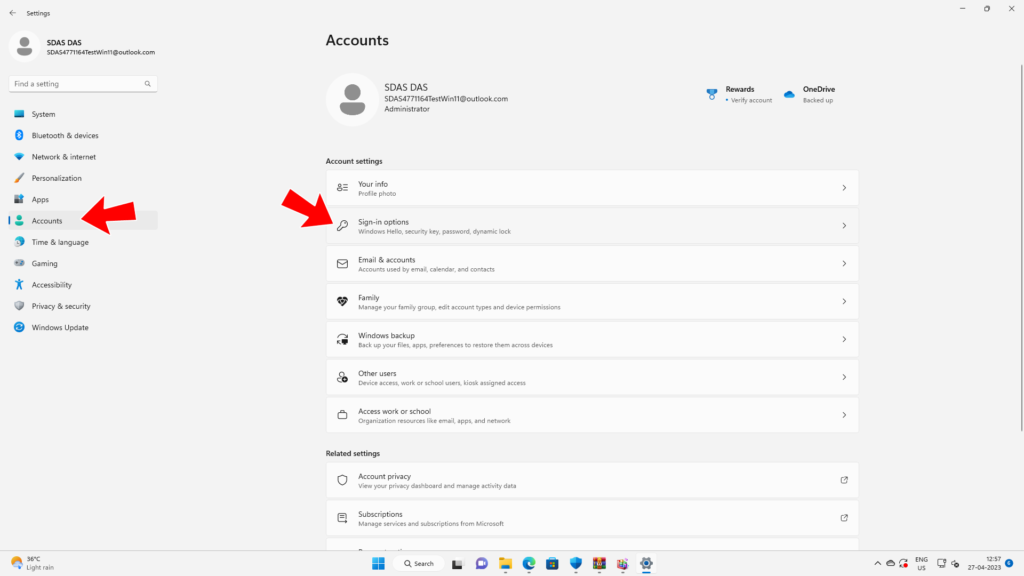
Open the Settings app and go to the Accounts section. Select the Sign-in options.
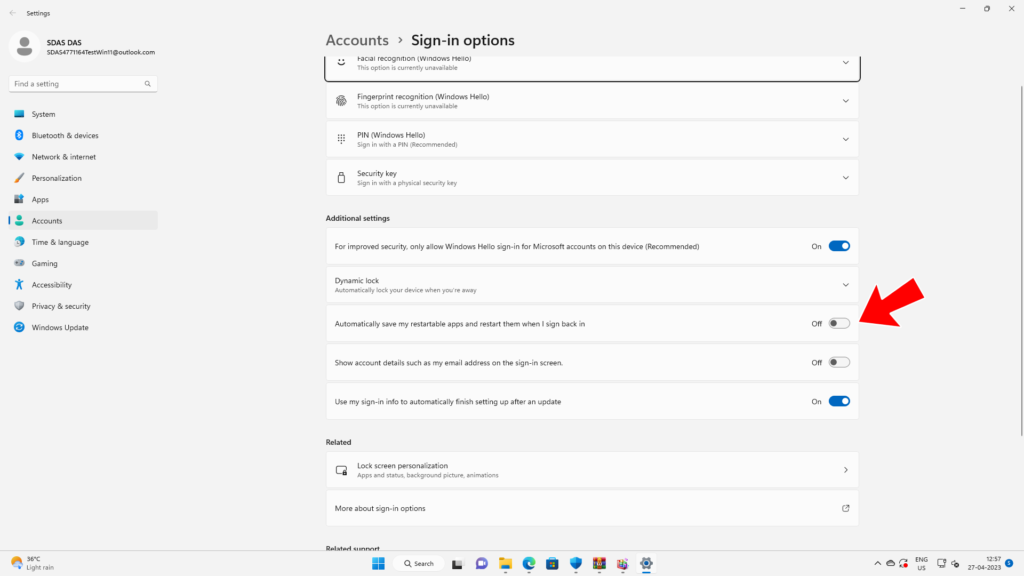
Disable the toggle for “Automatically save my restartable apps and restart them when I sign back in.”
With these simple steps, you can turn off the restartable apps feature and improve the speed and performance of your Windows 11 PC.
Uninstall Unwanted Softwares
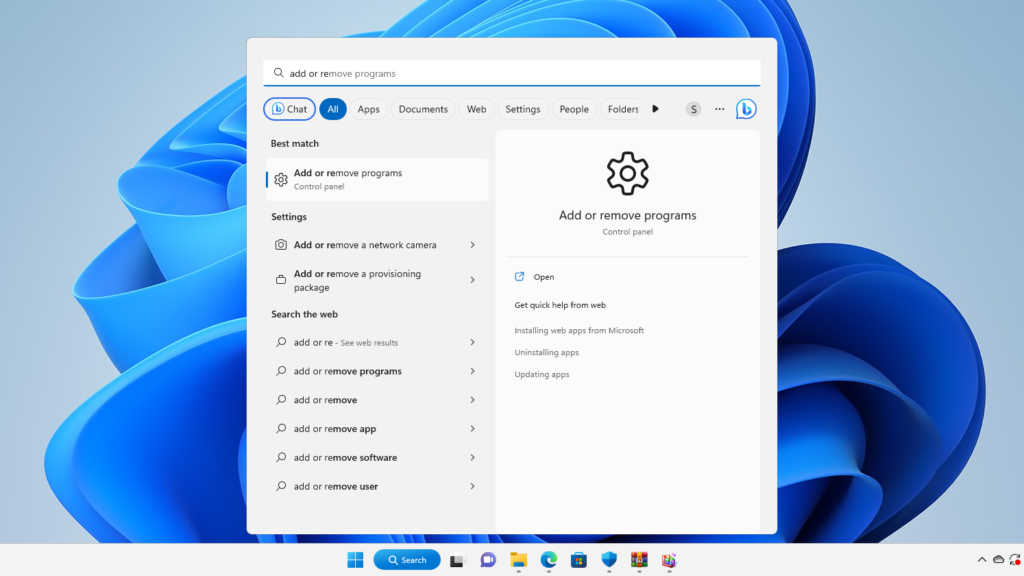
Everyone says this. If you have installed something in your computer that does not come in use then uninstall it. That not only free up space but also you can prevent the software to work in the background and eat up resources. So to remove unnecessary applications just search on Windows search box ‘Add or Remove Program’.
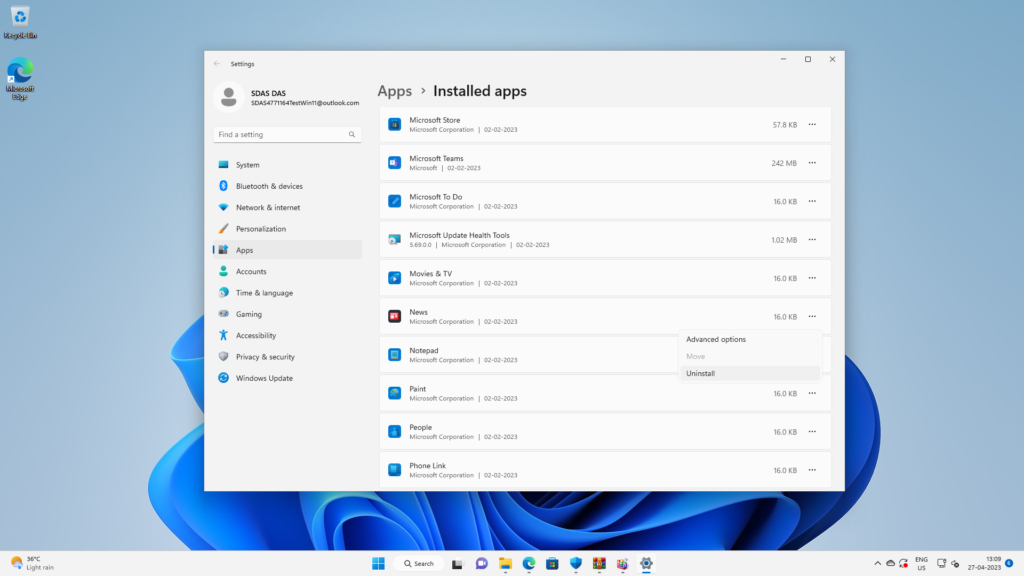
Once you’re there, you’ll see a list of installed apps. Remove the ones you don’t need by clicking on the three-dotted menu and selecting the Uninstall option.
Disable Background Apps
To speed up Windows 11 device, you have to disable unnecessary background apps that run automatically to stay updated. While some apps, like mailing and calendar apps, may not pose any problem, disabling other unnecessary background apps can help speed up your device. Here’s how to disable them:
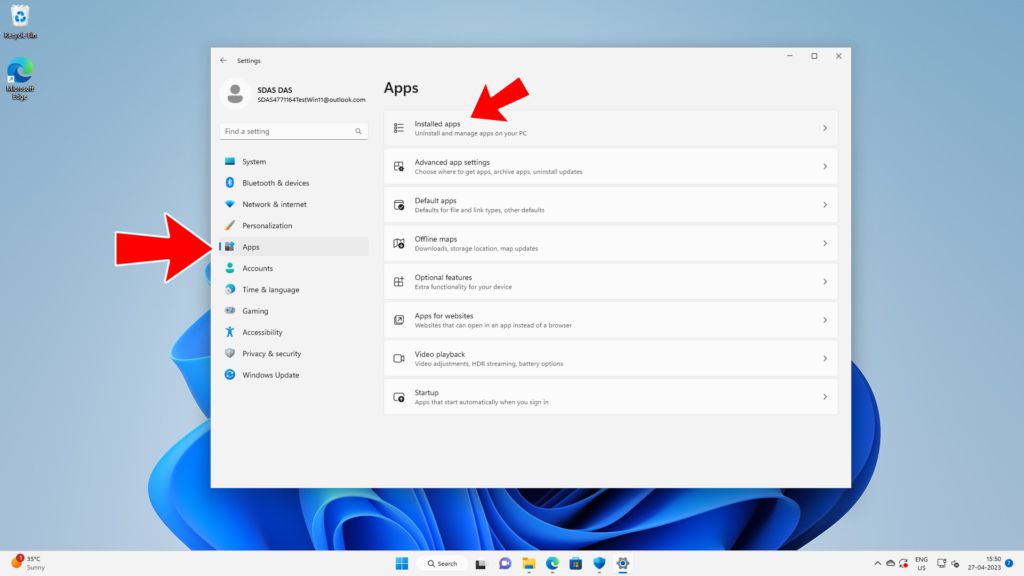
Right-click on the Windows icon and click on ‘Setting’.

From the left side pen select ‘Apps’. Now click on ‘Installed Apps’
You will find a list of apps. Click on the three-dot menu icon next to the apps you want to disable from running in the background.
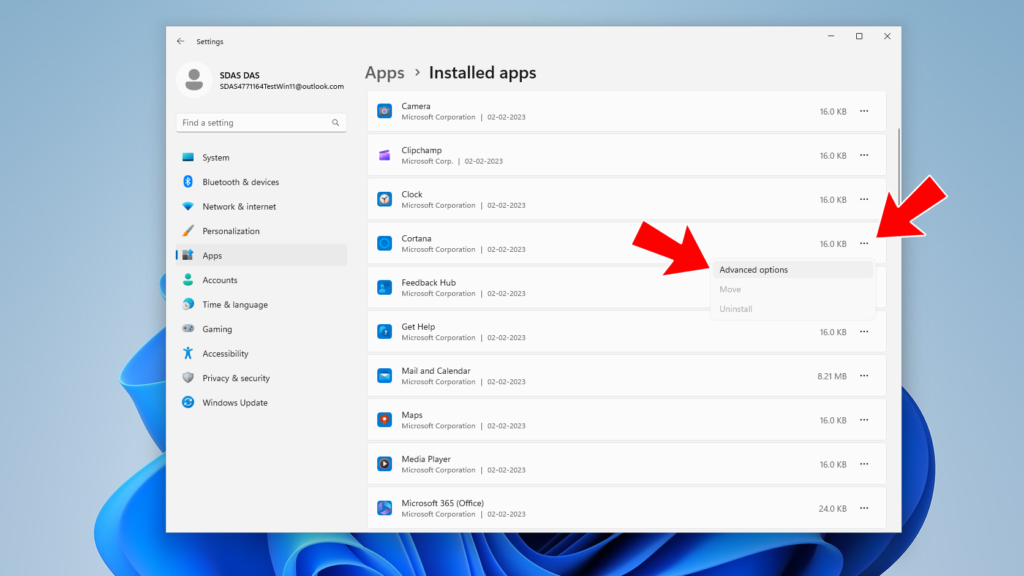
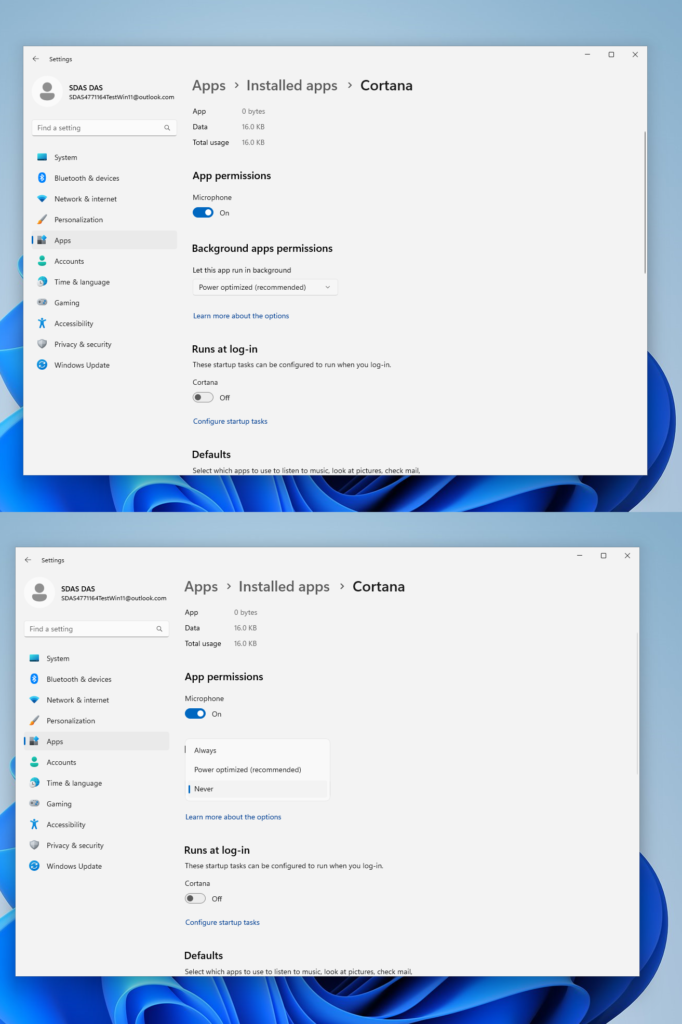
Select “Advanced options” and scroll down to get to the Background apps permissions option. Select “Never” to disable them.
If you want to quit an app that’s already running in the background, right-click on the Windows icon and select the Task Manager option, or press Ctrl + Shift + Esc. Select the apps you don’t want in the background and click the End Task option.
Remove the temporary files
To improve the performance of your Windows 11, you should remove temporary files that get stored on your PC or laptop when apps perform tasks. These files occupy a lot of space, and removing them will help. To remove the temporary files:
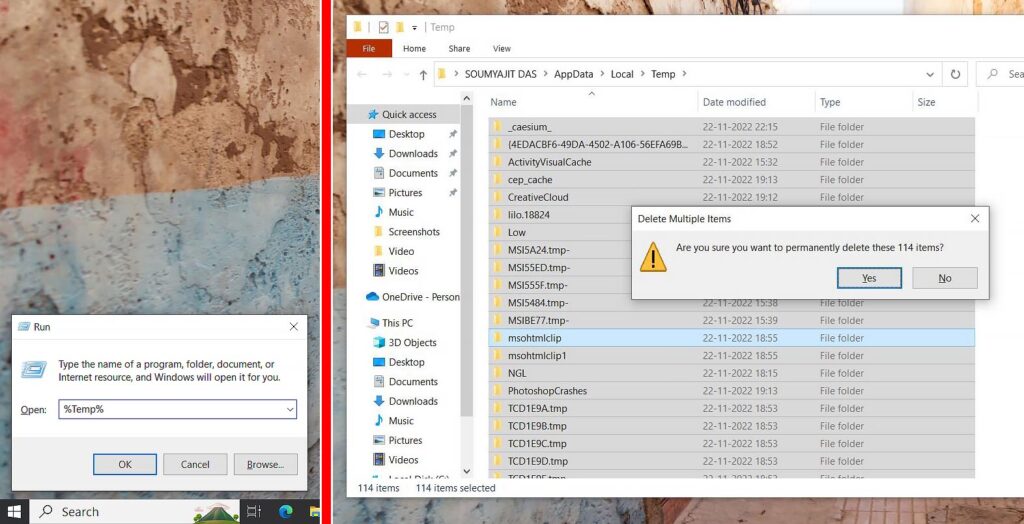
Press Windows+R hotkey to get into the ‘Run’. Type “%temp%” in the Run dialog box and select OK. You will be taken to the temporary files folder. Select all the files and delete them.
Alternatively, you can use the built-in Disk Cleanup app to easily clean temporary files. Just open the app and from the Files to Delete list select the ‘Temporary Files’ check box and click ‘Ok’.

Free Up Disk Space
If you have recently upgraded to Windows 11 from Windows 10, there may be leftover and temporary files from Windows 10 on your system. These files don’t serve any purpose normally but incase if you change your mind to move back to Windows 10 then these files help. If you have made up mind that you’ll not move back then these files are just taking up valuable disk space, which can slow down your Windows 11. It is worth noting that Windows 11 keeps the old Windows 10 files for 10 days.
If you have decided to stick with Windows 11 then just hit Windows + I to move into settings. Now find ‘Storage’ from the search box of the settings. In the storage section click on ‘Temporary Files’. On the next page click on ‘Remove Files’. If you also want to clean the ‘Downloads’ folder you can check it from the list.

Use Storage Sense to make Windows 11 Faster
To further speed up Windows 11, you can activate Storage Sense, which periodically cleans up your system. We have detailed in-depth articles about storage sense. Check it out. In which I have described how to enable it and how to use Windows Storage Sense.
Disable Animation & Visual Effects
Windows 11 has many impressive animations and visual effects that can enhance the overall user experience. However, if you are using an older computer or want to prioritize performance over aesthetics, disabling these features can help speed up Windows 11. Here’s how to do it:
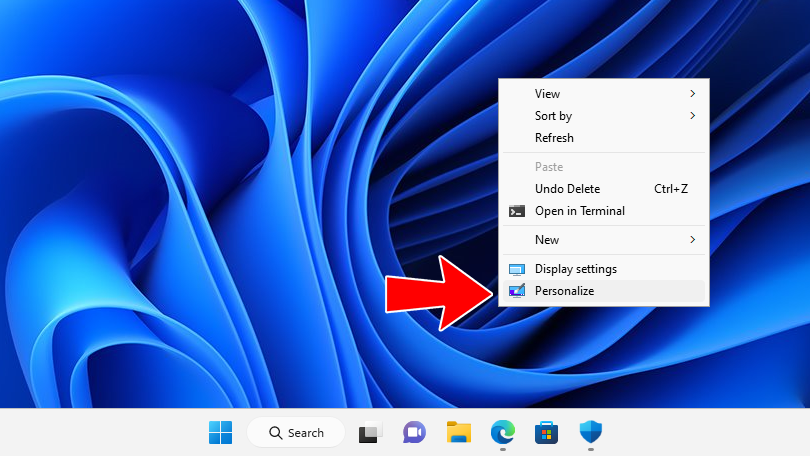
Open the Settings app and go to Personalization.
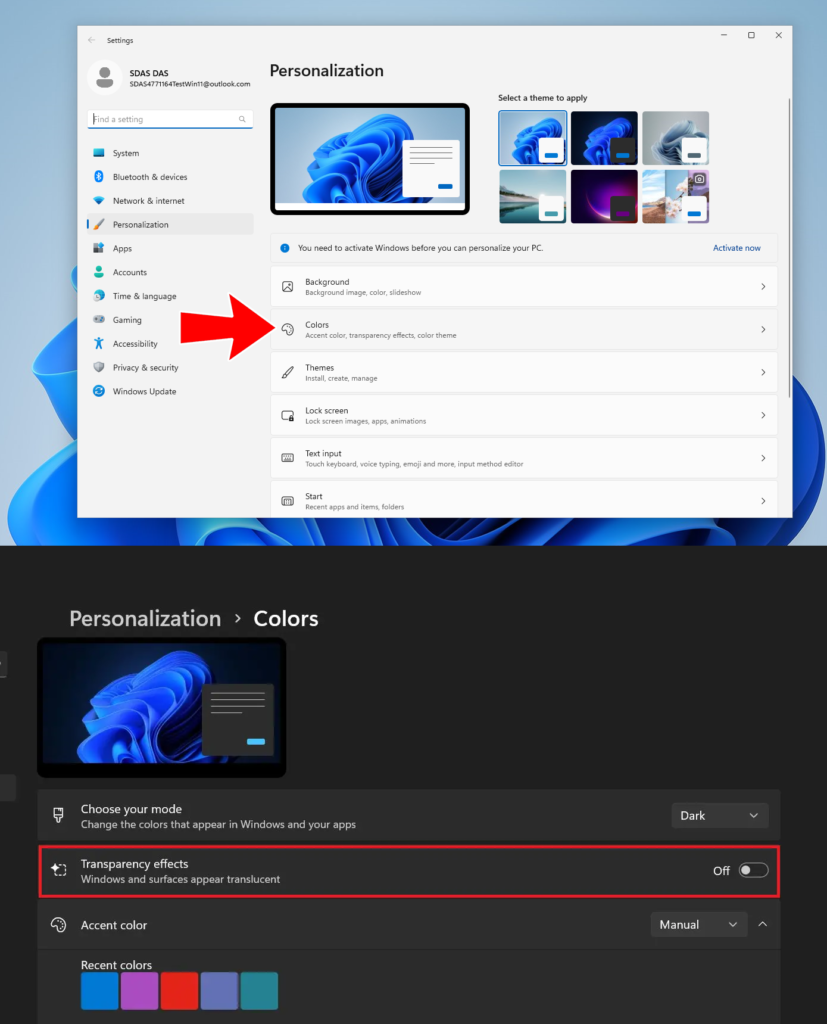
Click on Colors and disable “Transparency effects.”
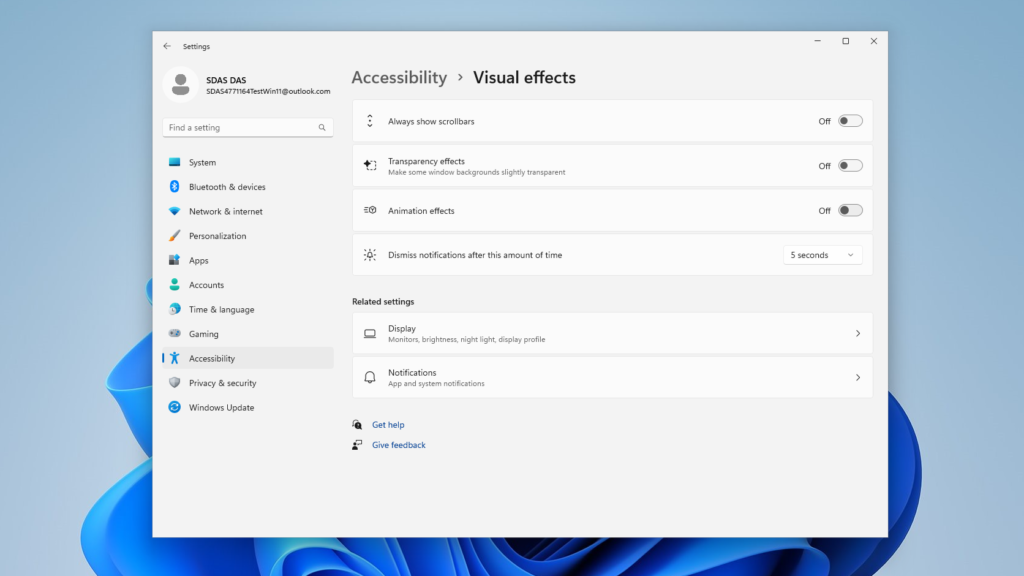
Next, go to Accessibility and select Visual effects. Disable “Transparency effects” and “Animation effects.”
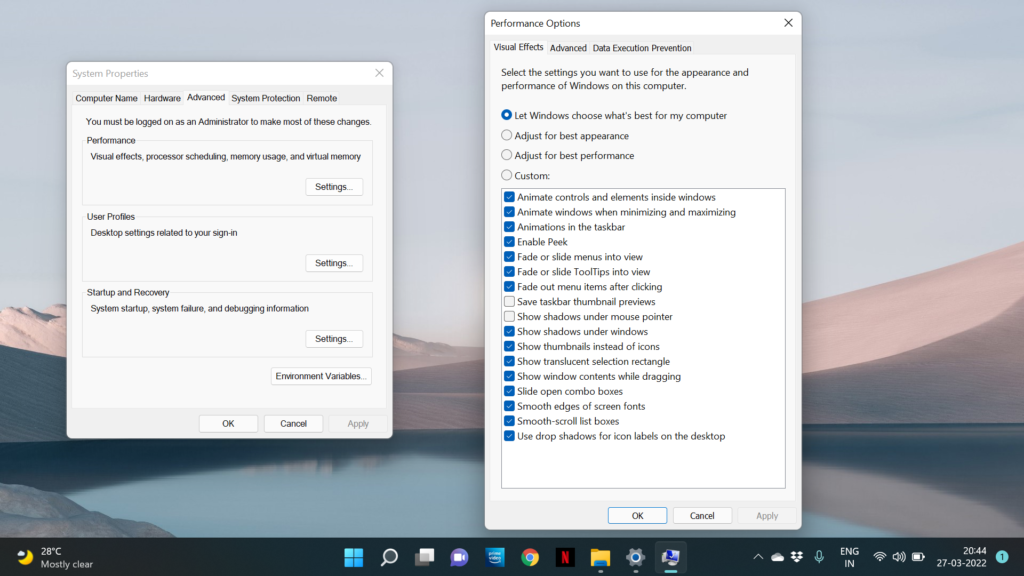
Press the Windows key and search for “View advanced system settings.”
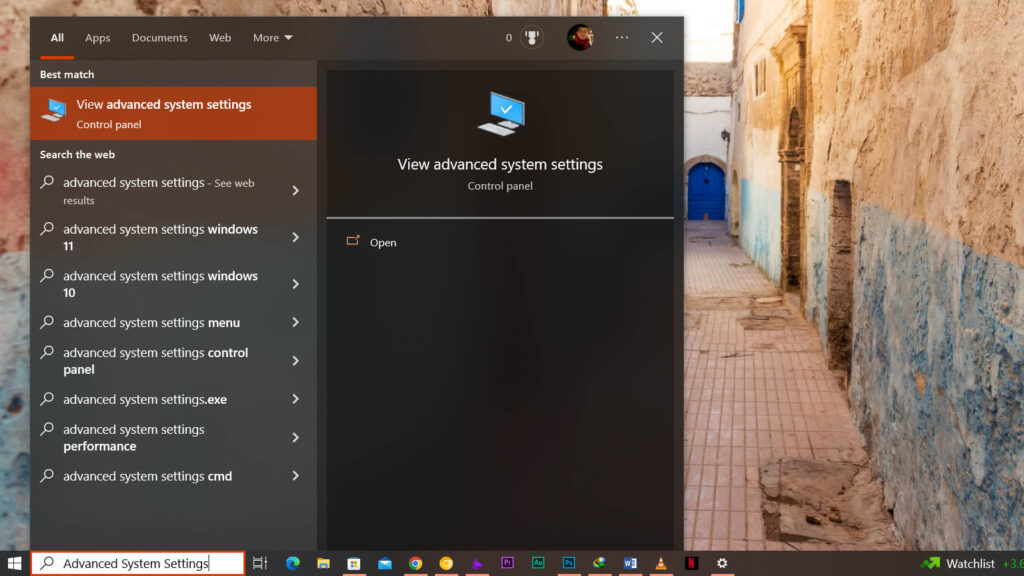
Open it and click on “Settings” under the “Performance” section. Choose “Adjust for best performance” and click on OK.
Disable Game Mode
If you are not a gamer, you may also want to disable Game Mode, which can stop DVR and other Xbox-related services running in the background and speed up your Windows 11 PC. To do this, go to Settings and select “Gaming.” Disable the toggle for “Game Mode.” Also, open “Xbox Game Bar” and “Captures” and disable all the toggles under both menus. We have an in-depth article about Windows Game Mode in case you’re interested.

Disable VBS
If you are a gamer, you might want to disable Virtualization-based security (VBS), a new feature in Windows 11 that protects the operating system from unsafe code and malware. Recent reports indicate that this security feature can reduce game performance by 5% to 25%. Microsoft even suggests that gaming laptops “may choose to ship with HVCI disabled.” Disabling VBS can improve your gaming experience on Windows 11.
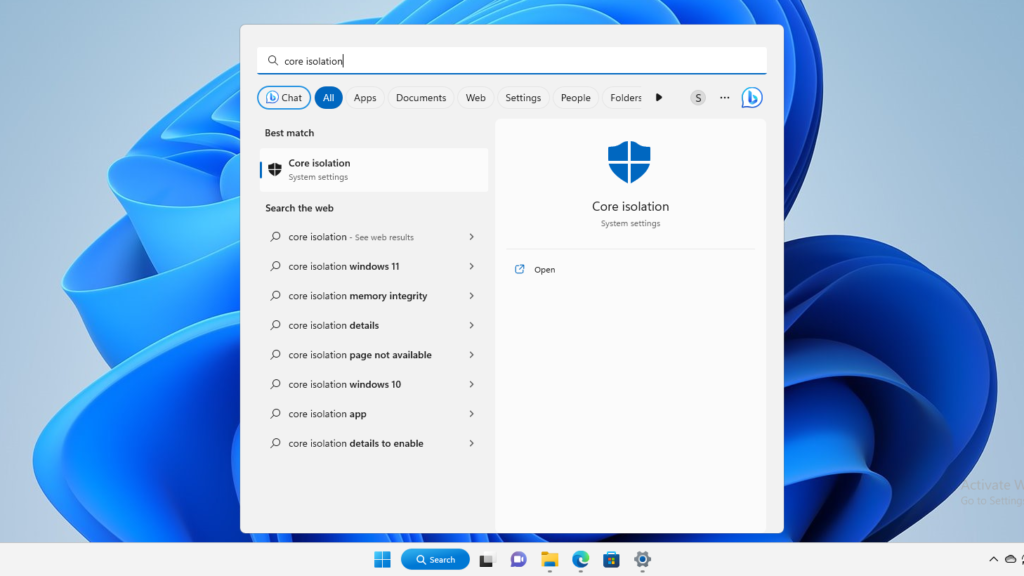
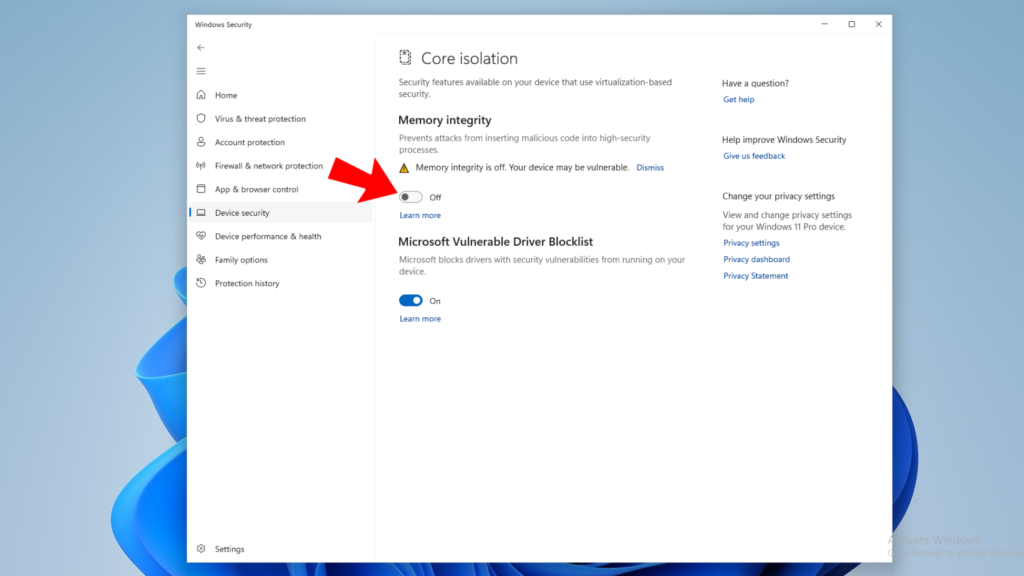
To turn off VBS, press the Windows key and search for “Core Isolation.” Disable the ‘Memory Integrity’ toggle and restart your PC.
In the Concluding Lines…
optimizing your Windows 11 PC for speed can greatly improve your productivity and overall computing experience. By following the tips and tricks mentioned in this article, you can easily boost your PC’s performance and say goodbye to slow startups, lagging programs, and frustrating delays. Hope you guys have enjoyed the article and learned something new. If so then don’t forget to express your thoughts in the comments below. Thanks for visiting.