
Monitoring a CPU temperature is very crucial when it comes to overclocking, stress testing a CPU cooler, or just want to stress test your computer to troubleshoot stability issues. In each and every case, gauging the CPU thermals is very important. If the temperature exceeds the critical values then you need to think about it. It may bring permanent damage to the CPU. So, without further ado, let’s discuss 5 different tools that you can use to monitor the CPU temperature. These tools not only visualize the CPU temperature but also showcase every single details that you should know as a PC tinker.
What Is the CPU Safe Operating Temperature?
It’s almost nearly impossible to pretend a safe CPU temperature. Every processor is different. There are also some mobile processors whose heat production is different from each other. But don’t worry, experts have determined approximate values depending upon what the CPU is doing. When your computer isn’t doing anything, it’s just in its ideal state and in that time, the temperature profile should be between 40 to 45 degrees Celsius (104 to 113 degrees Fahrenheit) – lower is better. If the computer is handling some programs and lot of multi-tasking then we could expect that the temperature should not exceed 70 degrees Celsius (158 degrees Fahrenheit) but if you’re rendering a video file or gaming then 80 degrees Celsius (176 degrees Fahrenheit) is your threshold.

If the temperature is exceeding the maximum threshold of 80 degrees Celsius and go additional 10 degrees quite often then it’s definitely a problem. You might need to clean the accumulated dust inside the PC or your PC needs Thermal Paste replacement. Check out our in-depth article about the Thermal Paste right here. If that doesn’t solve the issue then you might need a new cooler or if you have overclocked the PC then you need to down the core voltages a little bit.
If you’re using a laptop then cleaning and thermal paste replacement are also the keys. You could also lower the overclocking settings if you have done that but what you can’t do is replacing the cooling system with a better one. You could use a good cooling pad which should bring down the CPU temperature of your Windows 11 PC up to 6 degrees to 10 degrees. Keep in mind that all the temperature values (also known as Tj. Max or Temperature Junction) could be greatly affected by the environment temperature.
Related: Do Laptop Cooling Pads Really Work?
Monitor CPU Temperature in Windows 11
There are several tools to monitor CPU temperature in real time but if you want to check CPU temperature without installing any application then you have to visit the BIOS or UEFI to get the details.
Related: How to Enter into the BIOS in Windows 11
Monitor CPU Temperature with HWMonitor
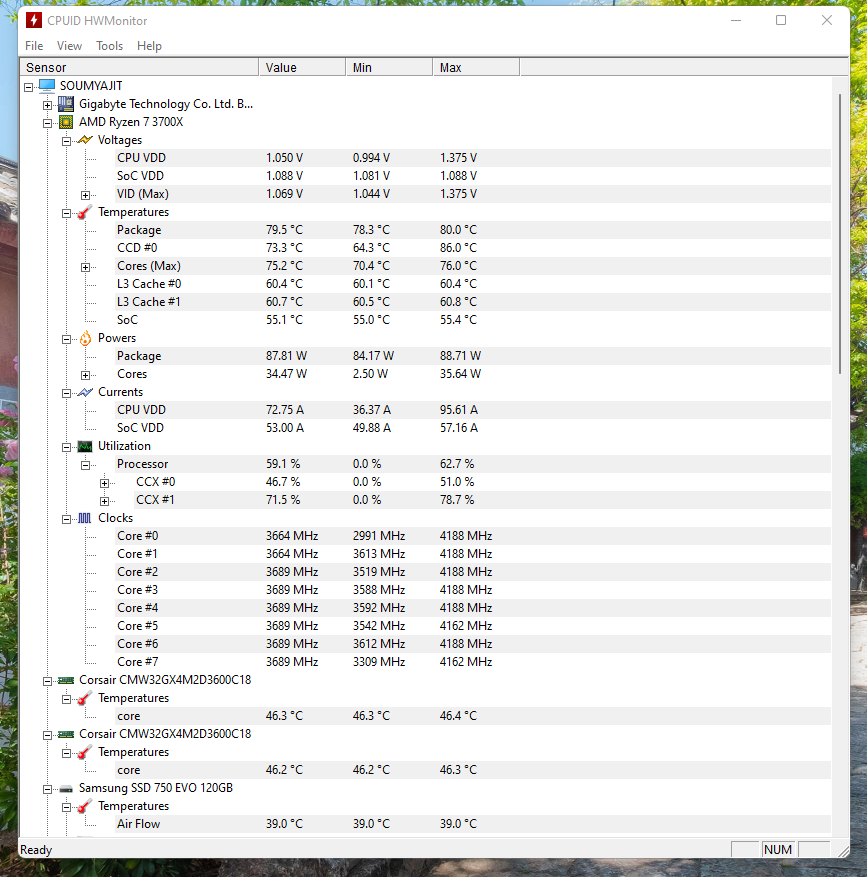
HWMonitor is an excellent choice when it comes to detect or monitor CPU temperature in real-time. It not only detects the CPU temperature but also the individual cores. The program also detects the motherboard, GPU, and hard disk temperatures. Along with core frequency, fan speed, and many more. To use this utility:
- Download the classic version of HWmonitor and install it on your Windows 11 PC.
- After installing, open the program and click on the drop-down for your processor’s model. I am using AMD RYZEN 7 3700X.
- Now expand the “Temperatures” section to see the temperature of all the CPU cores.
Speccy is Also a Great tool to Monitor CPU Temperature
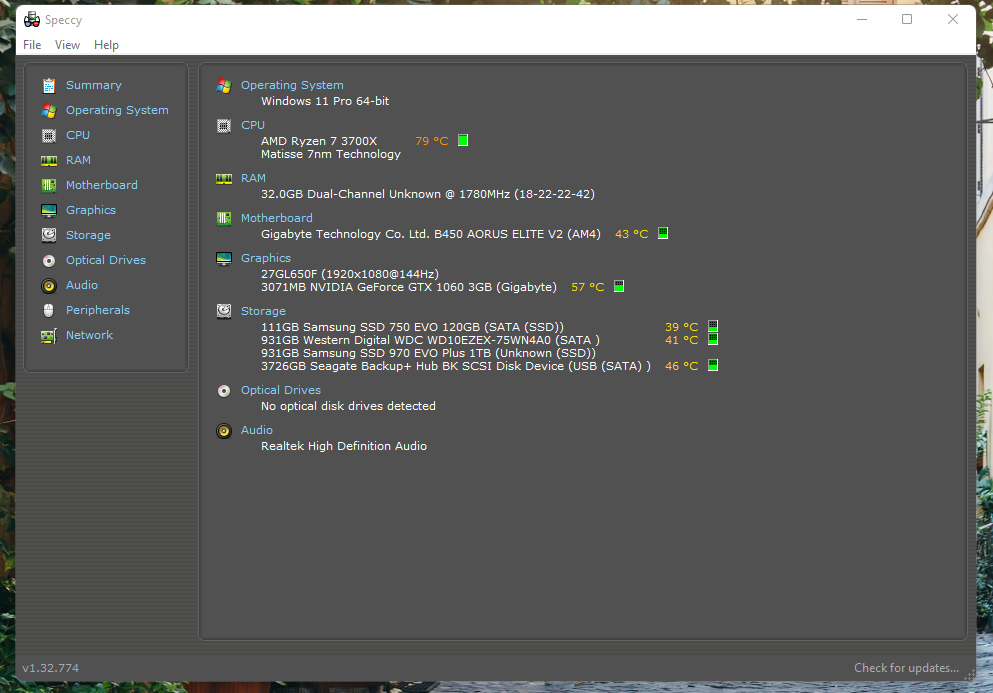
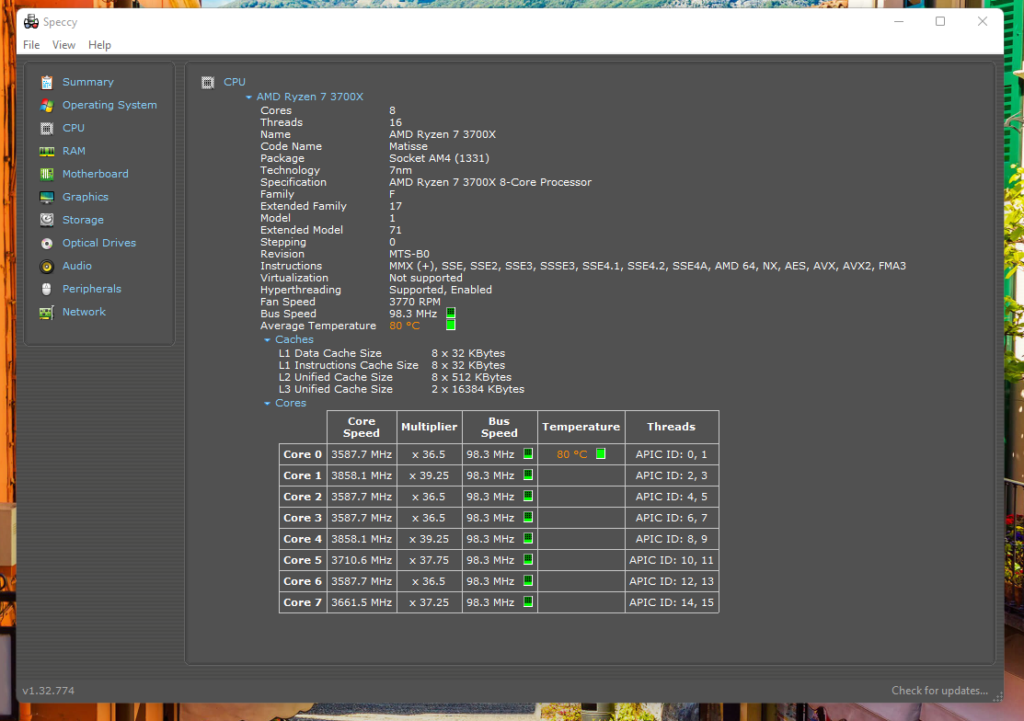
If you’re looking for a tool that shows every single detail of your PC along with the CPU temperature then you could use this app. Details of each and every component of your PC are divided into the different tabs in this application. Just click on them and get the details that you’re looking for. This app also discloses the CPU temperature as well as RAM, Motherboard, Hard Disk, Graphics Card, DVD drive – everything. Overall a great application. To download it:
- Click here to download the Speccy and install it on your Windows 11 PC.
- After installing just click on the tabs named with every component and check whatever details you are looking for.
Monitor CPU Temperature in Windows 11 with Core Temp
One of the best apps to monitor CPU temperature in Windows 11 PC. The app is lightweight, free, accurate, and offers crazy advanced features. To use this application:
- Download the Core Temp utility app from the official website and install it but before that, make sure while installing, disable all the unnecessary checkboxes to avoid installing bloatware on your Windows 11 computer.

- Anyway, after installation, open Core Temp. It will start displaying the real-time temperature of all cores.

- You get the current temperature reading in the second column. Note that “Tj. Max” is the highest temperature at which your CPU core can operate, but it’s always advised to keep it 20 to 30 degrees below the max value to avoid damaging the hardware.
- Good thing about the Core Temp is that it adds its icons in the system tray on the Windows 11 taskbar. It allows you to check the real-time temperature of all the CPU cores at a glance.

- To optimize the experience, you could tweak some settings. Click on “Options -> Settings” in the “Notification Area” tab of the Core Temp and select “Highest temperature”.
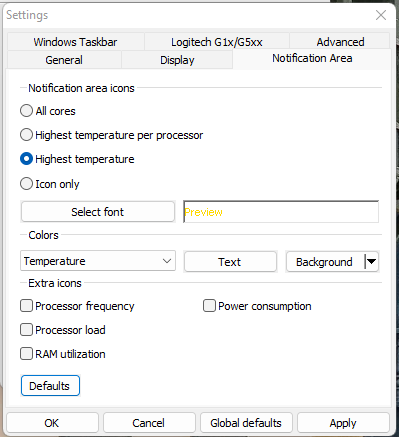
This will reduce the number of icons in the system tray area and only display the CPU cores that reach the highest temperature.

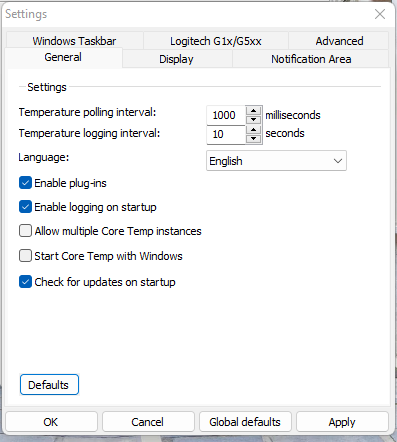
- You can also activate Core Temp automatically when you log into the Windows. To do that, move to the “General” tab and turn on “Enable logging on startup“.
Monitor CPU Temperature in Windows 11 with Open Hardware Monitor
If you don’t want to install any application in your system to monitor the CPU temperature then you could use Open Hardware Monitor. It’s free, open source and you don’t need to install anything. Just download the zip file, extract the file and use it. It will display the CPU temperature on your Windows 11 PC.

- Click here to visit the website and download Open Hardware Monitor. Next, extract the ZIP file using apps like WinRAR and WinZip.
- Next, open the extracted folder and run the “OpenHardwareMonitor” application.
- That’s it. here you can check the temperature of all the CPU cores by expanding the “Temperatures” section under the processor’s name in the app.
It also shows the CPU Package temperature using the sensor inside the processor which is really great feature to have.
Check CPU Temperature in Windows 11 with HWiNFO
Last but not the least, HWiNFO – is a professional-grade program to check the CPU temperature in Windows 11. Just like HWMonitor, it senses all the readings from the different temperature sensors located on the motherboard and in the different components. You can measure the temperature of each and every core of the CPU along with the CPU die itself. So it’s also a great tool and has everything that you could possibly need. To use this utility,
- Download HWiNFO from the official website right here and install it.
- Next, open the program and enable the checkbox for “Sensors-only“.
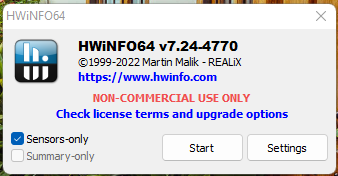
- Now, just click on “Start”.
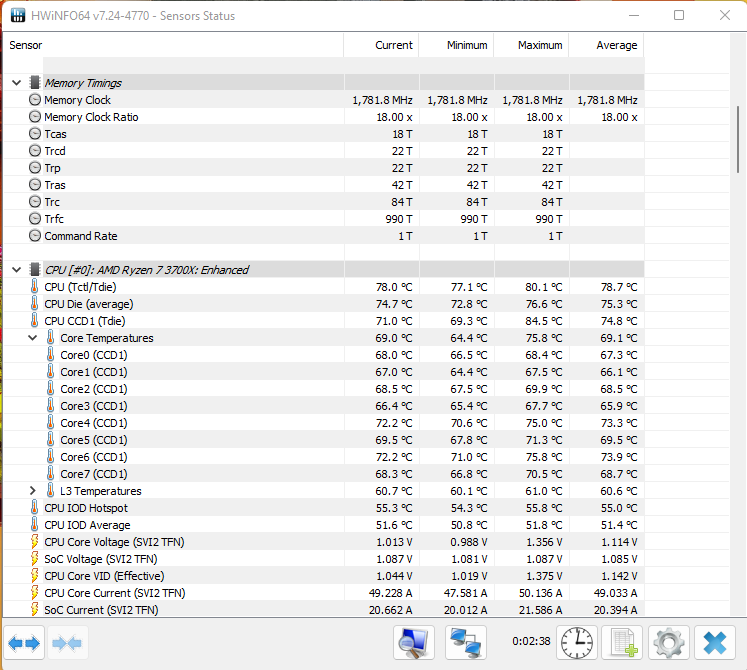
- Look for your CPU name here you have all the CPU core’s temperatures, as well as CPU, die Temperature.
In the Concluding Lines…
So, these are the best utility software you can use to monitor CPU temperature in Windows 11. There are obviously many more but these are my favourite ways to monitor CPU Temperature. Hope you guys enjoyed this article if so then don’t forget to express your thoughts in the comment section below. Thanks for visiting.
Reading your article helped me a lot, but I still had some doubts at the time, could I ask you for advice? Thanks.