
Who doesn’t want their Windows to run lightning fast? Though lightning-fast speed is not technically possible. But you can definitely speed up and improve the performance of your Windows 11 remarkably if it is running pretty slowly. Therefore, here are few tips and tricks that you have to follow to actually get a greater as well as better performance in your Windows 11 of your PC. Though Windows 11 is the fastest version of Windows without any hesitation, still you can get more smoother performance in OS with the help of these tips.
Also Read: AI CPUs Are Here! But Do You Really Need Intel Core Ultra?
Get The Latest Updates Of Windows And Device Drivers
Arguably one of the best option for speed up PC is to update its OS i.e. Windows 11 to its latest version. While checking for updates, your PC will also search for latest drivers that will definitely smoothen and improve performance of your pc.
Check for Updates
Start button > Settings > Updates & Security > Windows Update > Check for update status. If the status says that “You’re up to date” then you have nothing to do at least in this tip. So, read on the next tips. But if the status says that “Updates are available” then select “Install now” and download your required updates by clicking the “Install” button. And lastly restart you PC or Laptop and see how the things change in it.
Turn Off Unnecessary Start up Programmes
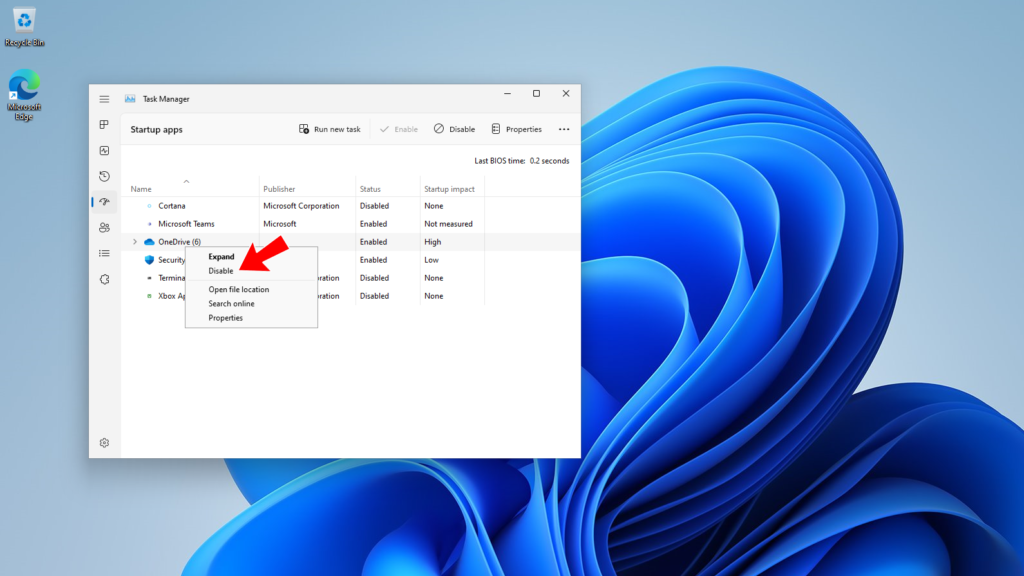
There are some programs and software that automatically run in the background after turning on the computer. That not only makes Windows slow to start but also deteriorate its performance as those programs run together. So, if you disable those unnecessary programs, you will definitely get an improved performance in your Windows.
Disable The Startup Programs
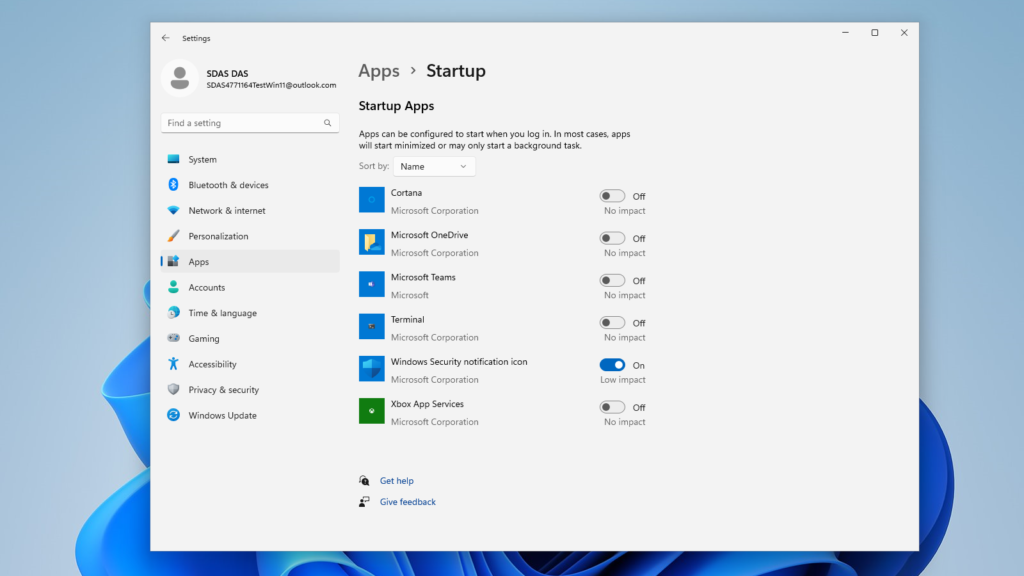
In the notification area, select the “Show hidden icons” to see what programmes are running in the background that you don’t want to run automatically. You can still miss some programs that are not seen in the notification bar. To find those apps go to Start > Settings > Apps > Startup. In the “Startup Apps” area, find your identical apps that you want to disable from running automatically and set them to “Off”.
In Windows 11, there is another way of doing that. Press Ctrl + Alt + Delete > select Taskbar > select Startup > select the programs you want to stop from starting of running automatically and then select Disable to turn them off. In this way, you can speed up your PC or Laptop’s performance significantly.
Open Your Required Apps ONLY
This is just a simple idea and I think almost every user have that much common sense that if anyone run many apps and software together, the device either it is a smartphone or it a computer, it must slow down due to the pressure that is created on its processor and RAM. In that case, as a computer user, you also have to open only those apps that you need right now and close every other apps so that you can get better speed and performance in your Windows. Let me give you a better tip. Restart your PC or Laptop and open only those apps, software and browser windows that you require presently. In that way, you will most probably get a smoother performance in your computer.
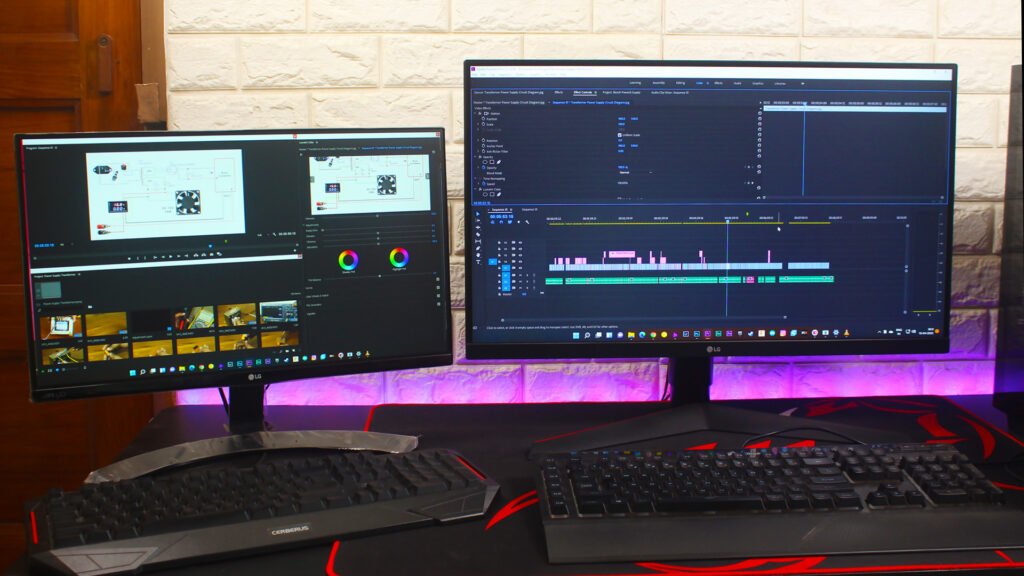
In some cases, there are some apps that are designed to use in the earlier versions of Windows though they all can run in Windows 11 but the problem is; those apps are not so compatible with it so they may slow down your computer. If that happens, you should check for software updates for an updated version as I mentioned in the first tip or you can run the “Program Compatibility Troubleshooter”.
Search the “Troubleshoot” and then select “Troubleshoot settings”. In the list of troubleshooters, select “Program Compatibility Troubleshooter” > “Run the troubleshooter” and after that select the program that causes problems in your computer. Now select “Next” to continue through the troubleshooter and see whether your OS improves its performance or not.
Switch The Appearance Depending On Best Performance In Your Windows 11
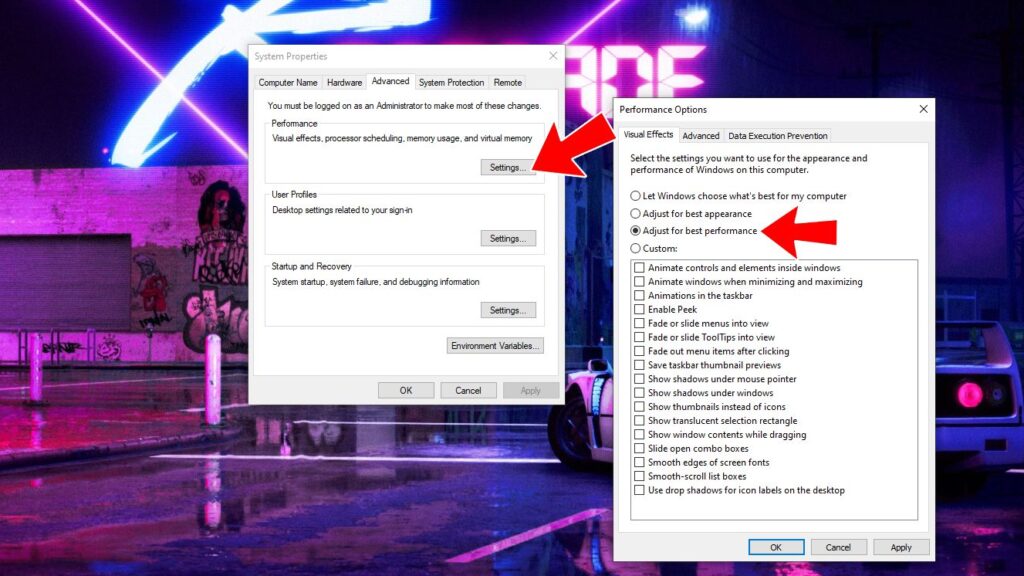
Windows 11 has many marvellous and eye-catching visual effects and appearances to apply. Many users use them to make their computers internally gorgeous. But those beautiful looks slow down the performance of the Windows as it creates much pressure on the system processor and the RAM. So, if you have those effects applied on your computer, you have to say them good bye and turn them off to get the best performance possible.
Apply “Adjust for best performance”
Go to Start Button > Properties > Advanced System Settings > Performance > Settings > “Adjust for best performance” > Ok.In this way, you can disable all the animations and visual effects on your Windows 11 to get a better performance.
Increase The Processor’s Performance
Windows 11 has three power options. 1. Balanced:- that means it can make a balance between the processor’s speed and the power. 2. Power Saver:- by selecting this option, the processor of your PC or laptop lowers its performance so that you can save more power. This first one is good for computers whereas the second one is perfect for laptops as it is important to save the power in the laptops. But there’s another option which is called 3. High Performance:- this option means; your device whether it is desktop or it is laptop will get the best performance in its processor but in one condition i.e. the power will also drain rapidly. So if you want to get the best performance in your device’s processor and don’t have any problem about power consumption then you should go for that option. With the improved performance in the processor, the OS will also be faster and smoother.
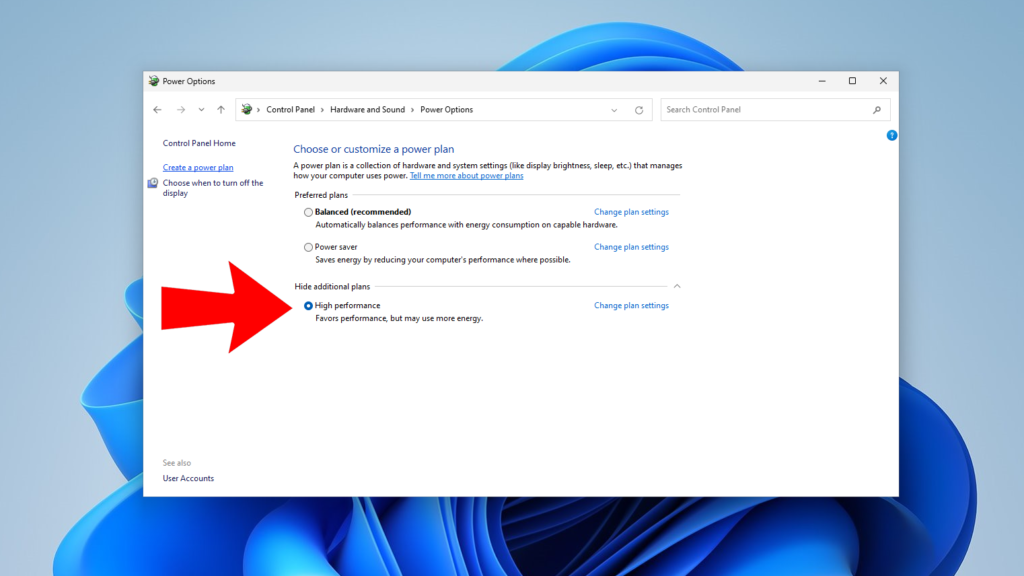
To increase the processor’s performance, Right click the Battery icon in the system tray and then select Power Options. From here, choose the “High Performance” option and you will have improved performance in your processor as well as windows 11. You can also get this Power Options from the Control Panel.
Free Up The Disk Space
Almost every one of us full our drives with unused software or with temporary files and other junks. Don’t go low on disk space because it can reduce the performance of the Windows. Especially, don’t fill the C drive as it has the Windows installed in it and filling this drive will affect the performance of Windows badly. My recommendation is to free up minimum 20 to 30 GB space in every drive so that the OS can perform better and smoother. Uninstall your unrequired programs, delete the temporary files and other junk files that fill your computer’s disks or you can move some of your data to other drives to adjust the disk space in every drives. You can turn on Storage sense to delete unnecessary files and temporary files and also those junks in the recycle bin. On the other hand, you can also run Disk Cleanup tool to get rid of those unused downloaded programs or system files. Disk Cleanup takes some time to calculate and then it start to free your drives from unnecessary files. So use them both wisely.