
The BIOS, or its modern replacement called UEFI firmware, is responsible for starting your computer and helping Windows communicate with essential hardware such as the processor, memory, storage devices, and motherboard. When you troubleshoot hardware problems, install a new CPU, enable features such as TPM or Secure Boot, or check whether a firmware update is available, knowing your current BIOS version can be very useful. sometimes it’s also nessasory to know while upgrading your hardware/ such as CPU. in older BIOS or UEFI version sometimes latest cpus don’t work. for example in b450 mobos you need to upgrade BIOS to use AMDs 5000 series processor such as Ryzen 7 5700x, Ryzen 5 5600 etc.
Also Read: I bought a laptop with a dedicated NPU, but it’s actually completely useless
Why Check Your BIOS Version?
To check the BIOS version you do not always need to restart your PC to find this information. Windows includes several built-in tools that can display the installed BIOS or UEFI version. You can use System Information, DxDiag, Command Prompt, PowerShell, or view the details directly inside the BIOS menu.
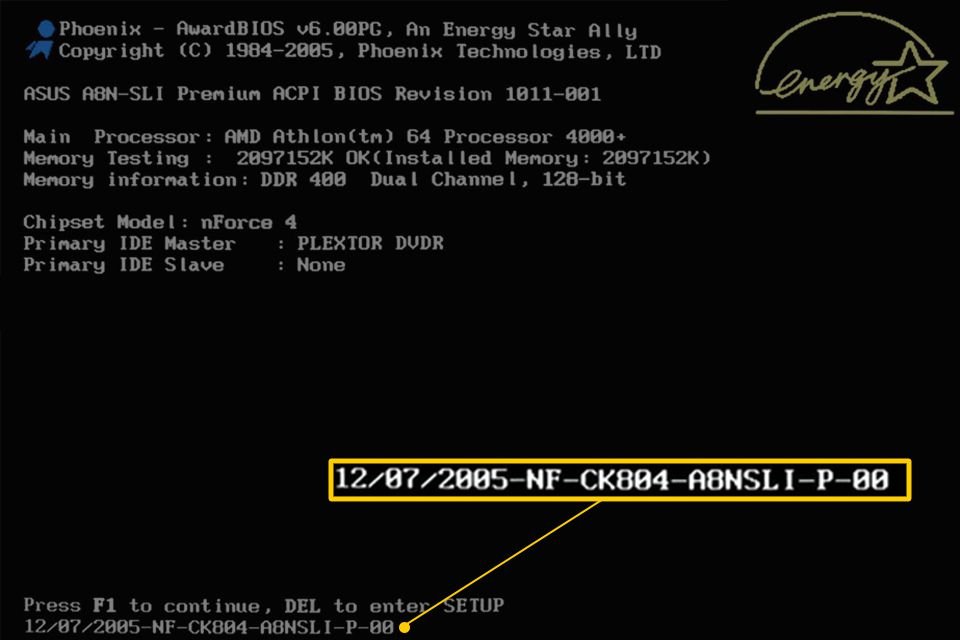
The displayed information may appear under names such as BIOS Version/Date, SMBIOSBIOSVersion, Firmware Version, or UEFI Version. Microsoft’s Win32_BIOS class can report several BIOS-related values, including the manufacturer, BIOS version, SMBIOS version, release date, and system BIOS version.
Check BIOS Version Using System Information
System Information is one of the easiest and most reliable ways to check your BIOS version in Windows 10 or Windows 11. It also shows useful details about your motherboard, processor, Windows installation, and system type.
Follow these steps:
- Press Windows + R to open the Run dialog box.
- Type
msinfo32. - Press Enter or click OK.
- In the System Information window, select System Summary from the left panel.
- Look for the entry named BIOS Version/Date on the right side.
The entry usually displays the manufacturer, BIOS version number, and release date. For example, it may show something similar to:
American Megatrends International, LLC. F15, 12/05/2024The exact format depends on your motherboard or laptop manufacturer. On some systems, you may see a firmware identifier instead of a traditional version number. You can also check the BIOS Mode entry in the same window. If it says UEFI, your PC is using modern UEFI firmware. If it says Legacy, the system is using the older BIOS compatibility mode.
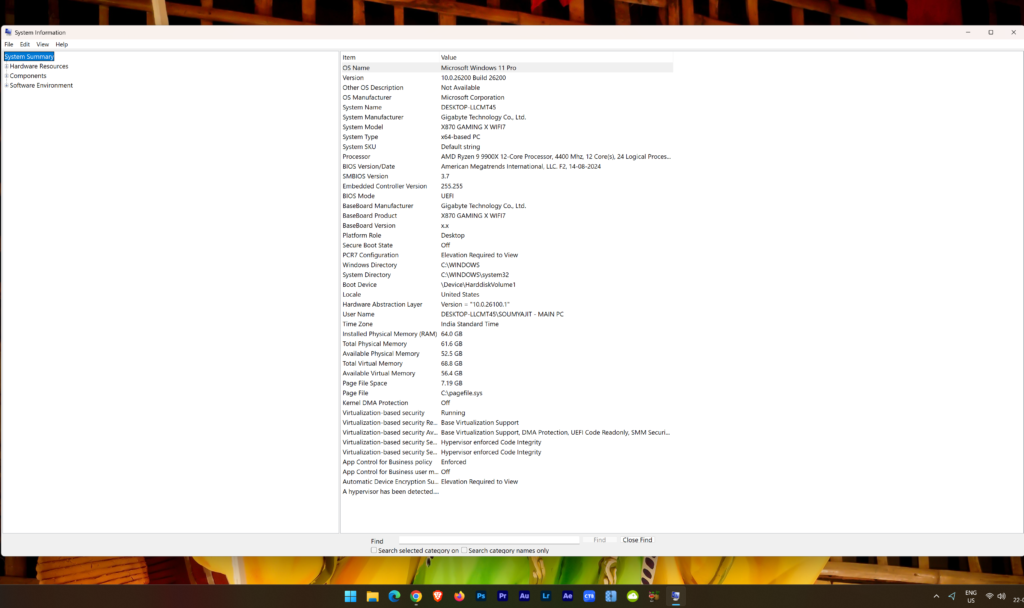
Microsoft lists msinfo32 as a built-in way to open the System Information tool from Windows.
Check BIOS Version Through DxDiag
The DirectX Diagnostic Tool, commonly called DxDiag, is mainly designed to troubleshoot graphics, audio, and DirectX-related problems. However, it also displays the BIOS version under the system details section.
Here is how to use it:
- Press Windows + R.
- Type
dxdiag. - Click OK.
- Wait for the DirectX Diagnostic Tool to load.
- Stay on the System tab.
- Find the BIOS entry under System Information.
You may see a short version number, a manufacturer name, or a longer firmware string. If you are using a laptop, DxDiag may display the firmware version supplied by brands such as Dell, HP, Lenovo, ASUS, Acer, or MSI.
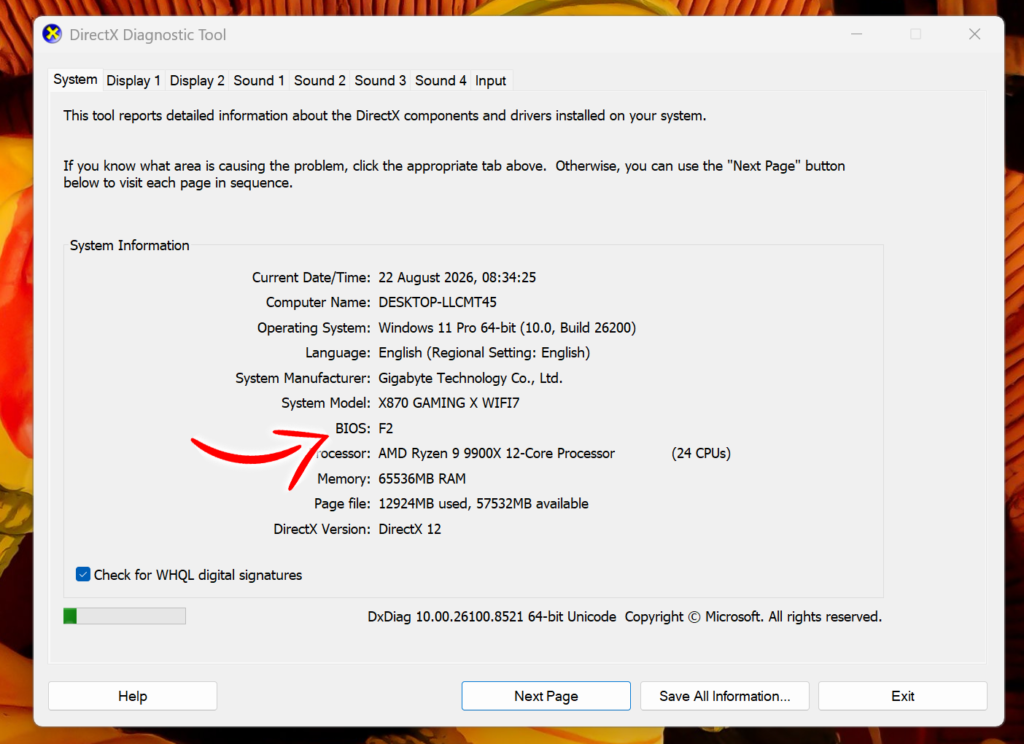
DxDiag is particularly convenient when you are already checking your GPU driver, DirectX version, operating system build, or system memory. However, the information shown can sometimes be less detailed than the System Information tool. If the result looks unclear, compare it with the BIOS Version/Date entry in msinfo32
Check BIOS Version Using Command Prompt
Command Prompt provides a quick way to check the BIOS version without opening a graphical utility. Traditionally, the WMIC command has been used for this purpose.
Follow these steps:
- Open the Start menu.
- Search for Command Prompt or
cmd. - Open it.
- Enter the following command:
wmic bios get smbiosbiosversion- Press Enter.
Windows should display a heading named SMBIOSBIOSVersion, followed by the installed firmware version.
You can also display the manufacturer and version together:
wmic bios get manufacturer, smbiosbiosversionAnother useful command is:
systeminfo | findstr /I "BIOS"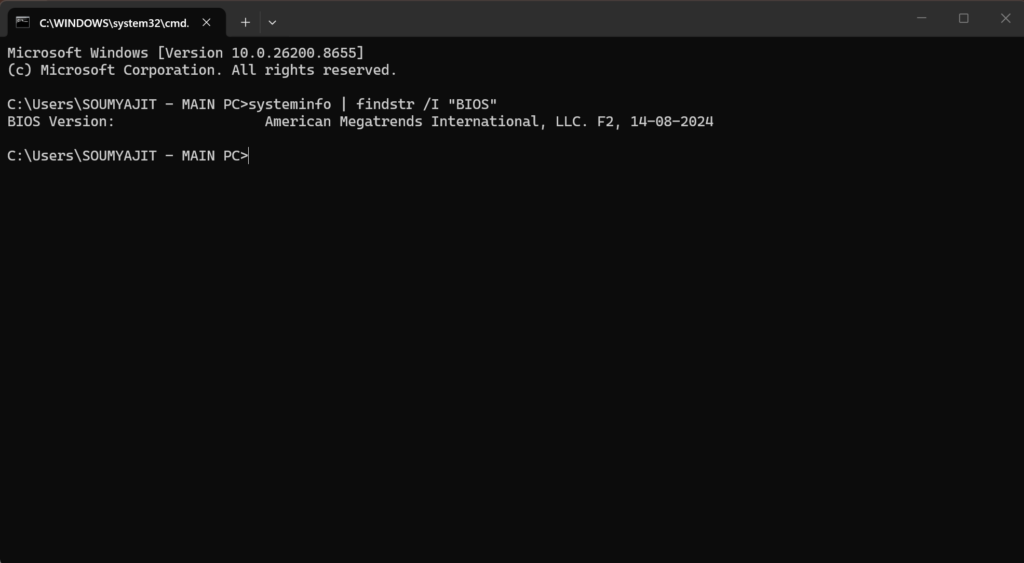
This filters the larger systeminfo report and attempts to show only the line related to the BIOS. The systeminfo utility can display detailed Windows and hardware configuration information from Command Prompt.
However, there is an important limitation. WMIC is deprecated and may not be available on some newer Windows 11 installations. In that situation, Command Prompt may show an error saying that wmic is not recognized. You do not need to install a third-party application; use the PowerShell method below instead.
Check BIOS Version Using PowerShell
PowerShell is a more modern and flexible method for retrieving firmware information. It is also useful if you want to collect details from multiple computers or create an automated hardware inventory.
To display the BIOS version only:
- Open the Start menu.
- Search for PowerShell.
- Open Windows PowerShell or PowerShell.
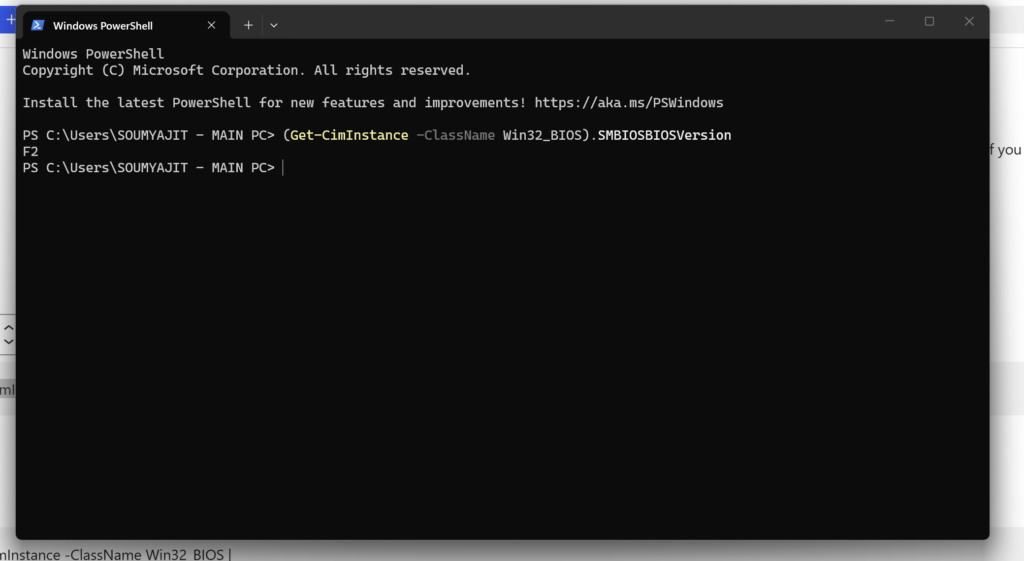
- Run this command:
(Get-CimInstance -ClassName Win32_BIOS).SMBIOSBIOSVersionThe result will show the BIOS version reported through SMBIOS.
For more complete information, use:
Get-CimInstance -ClassName Win32_BIOS |
Select-Object Manufacturer, SMBIOSBIOSVersion, Version, ReleaseDate, SerialNumber
This command can display the manufacturer, SMBIOS BIOS version, general firmware version, release date, and system serial number.
You can also use the following command:
Get-ComputerInfo -Property Bios*Get-ComputerInfo returns consolidated operating system and computer properties, while the Win32_BIOS class provides dedicated BIOS information. Microsoft documents BIOSVersion and SMBIOSBIOSVersion as separate BIOS properties because some systems report more than one version string.
The Get-CimInstance command is generally preferable to the older Get-WmiObject command. If you are following an older tutorial, you may still see this command:
Get-WmiObject Win32_BIOSIt can work on many systems, but the CIM-based command is the better choice for current Windows installations.
Check the Version Directly Inside BIOS or UEFI
If Windows is not starting correctly, you can check the firmware version directly from the BIOS or UEFI menu.
First, restart your computer. As soon as the manufacturer logo appears, repeatedly press the firmware setup key. Common keys include Delete, F2, F10, Esc, or F12, but the correct key varies by manufacturer. Your computer may display a message such as “Press F2 to enter Setup” during startup.
Once the BIOS or UEFI screen opens:
- Look for the Main, Information, System Information, or Advanced tab.
- Find an entry named BIOS Version, UEFI Version, Firmware Version, or Build Date.
- Note the version number and manufacturer.
- Choose Exit Without Saving if you have not changed any settings.
You can also reach the UEFI firmware menu through Windows. In Windows 11, open Settings > System > Recovery, select Restart now beside Advanced startup, and then choose Troubleshoot > Advanced options > UEFI Firmware Settings > Restart. Microsoft provides this route for accessing firmware settings such as Secure Boot and other system-level options.
Which Method Should You Use?
For most users, System Information is the best option because it is quick, clear, and available on almost every Windows PC. DxDiag is convenient when diagnosing gaming or graphics problems. Command Prompt is useful for quick checks, while PowerShell provides the most detailed output and is better for technical users.
Before downloading a BIOS update, write down the exact computer or motherboard model, BIOS version, and board revision if available. Only download firmware from the official manufacturer’s website. During an update, keep a laptop connected to its charger and never force the computer to shut down unless the manufacturer specifically instructs you to do so.
Checking the BIOS version takes less than a minute, but it can prevent unnecessary updates and help you choose the correct firmware for your system.