When it comes to fast and responsive PC experience experts always recommend keeping as much space as possible in the C drive. Keeping freeing up space is becoming more crucial if your computer doesn’t have a high-capacity drive plugged in. With the running out of capacity of the storage causes random slowdowns and other issues. Windows itself has a feature called ‘Storage Sense’ that literally helps you to clean up all the unnecessary system files and junk whose job right now is to just occupy the space. So deleting them will definitely free up a lot of space in the C drive of Windows 11.
Read More: How to Enable Windows Sandbox in Windows 11 Home?
How Much Free Space is Necessary for C Drive?
Well, that depends on what kind of user you are. If you are a gamer then having 20GB free would be more than enough. If you prefer to do your office work in Word, Exel, or in the browser and are not much of a download kind of person then having 10GB is ok. But as a creative person you have done a lot of photo editing, video editing, Audio mastering, and graphics designing type of work then more than 30GB is recommended. The programs that are the best for these jobs sometimes occupy a lot of space from the C drive to save your work as temporary files and cache files. It is quite hard to tell how much exact space would be necessary so having extra space is always a good option. Rather you could use a dedicated storage drive and configure those software to create such files in that particular storage by keeping your C drive untouched.

What is Windows Storage Sense?
‘Windows Storage’ sense is a quite handful tool to manage both online and offline storage. It automatically cleans up temporary files, empties Recycle Bin, deletes junk files, clears the Downloads folder, and more without any user interaction. Just configure the ‘Storage Sense’ and it will automatically clean up all the unnecessary data on set time intervals. So, users don’t need to manually clean up those garbage files. Seems pretty promising but this feature is only limited to C drive. All the deletions processes are limited in the C drive even, you can’t add any manual folder that you are thinking of to clean up automatically at certain intervals.
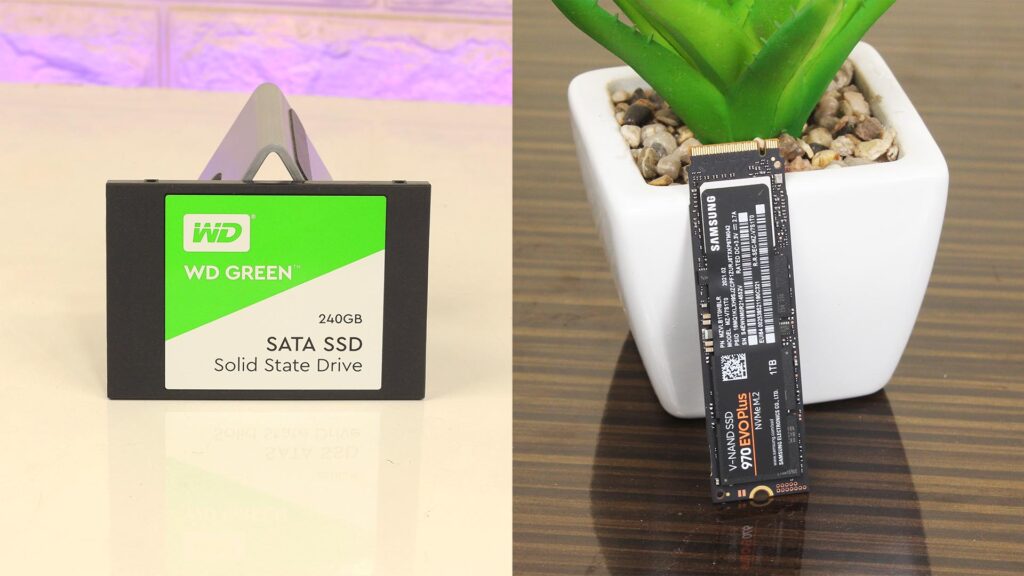
Storage Sense is also able to manage OneDrive storage on the PC. If you configure it correctly after a certain period of time files of set folders will be automatically uploaded to Onedrive and make it online-only by deleting that file from your physical storage.
How to Automatically Free Up Storage Using Storage Sense?
To configure ‘Storage Sense’ all you need to do is to move to the Settings of Windows 11 by just typing ‘Settings’ on the search box of Windows 11 or you can use the keyboard shortcut ‘Windows + I’ to land into the Settings.
Also Read: 200 Shortcut Keys in Windows That you need to know
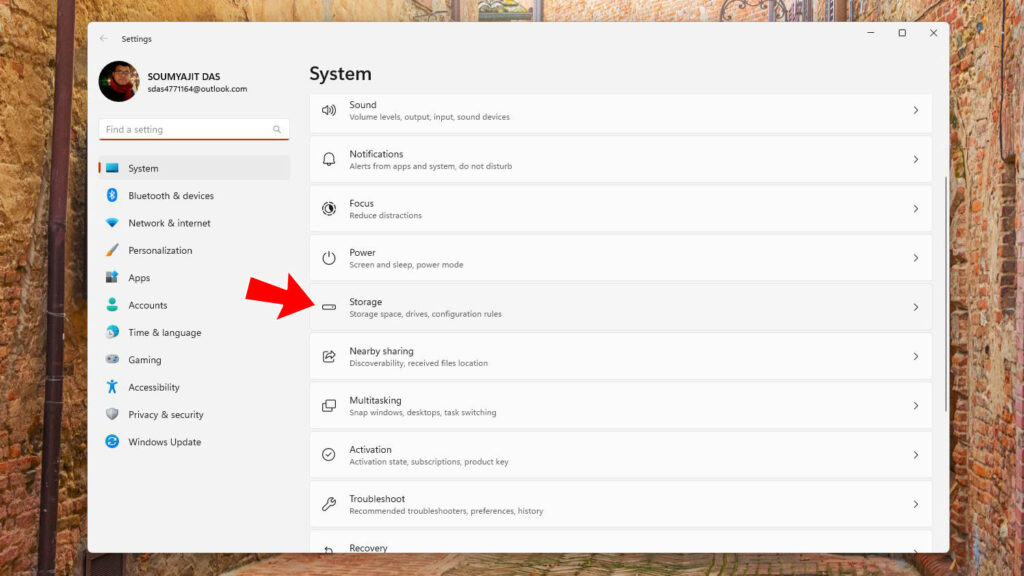
Next, head to the ‘System’ from the left sidebar and click on ‘Storage’ from the right side pane.
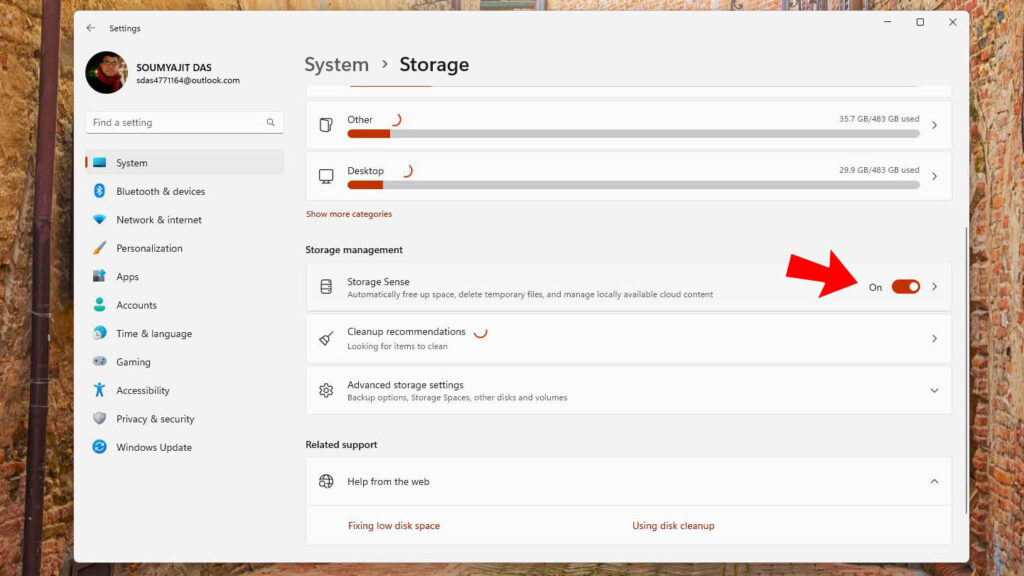
Now just look for the option says ‘Storage Sense’. Click on the toggle switch to enable it. If it’s not already enabled.
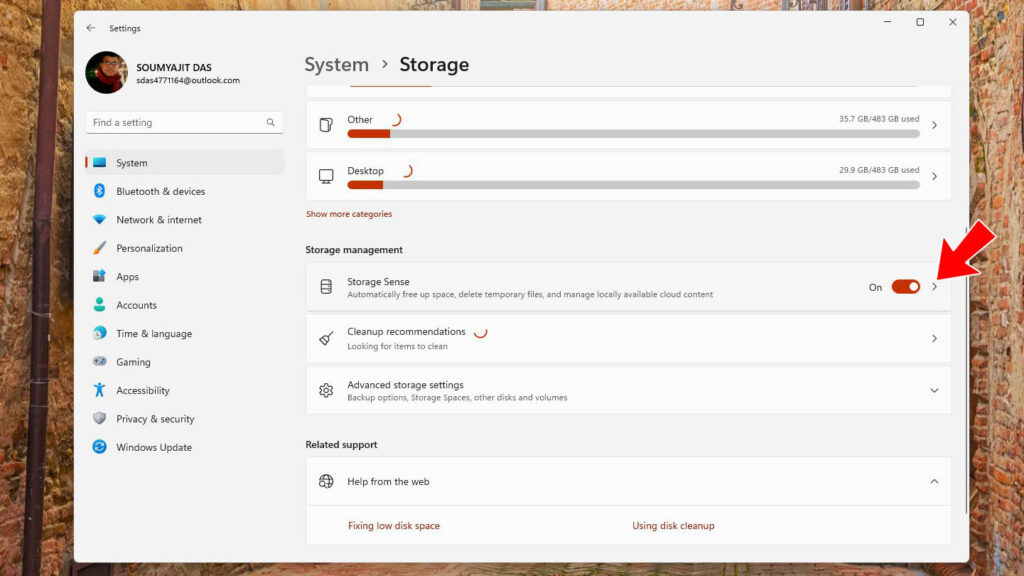
Ok, now you have to do a little bit of configuration. Click on the arrow near the toggle switch of Storage Sense to configure the settings.
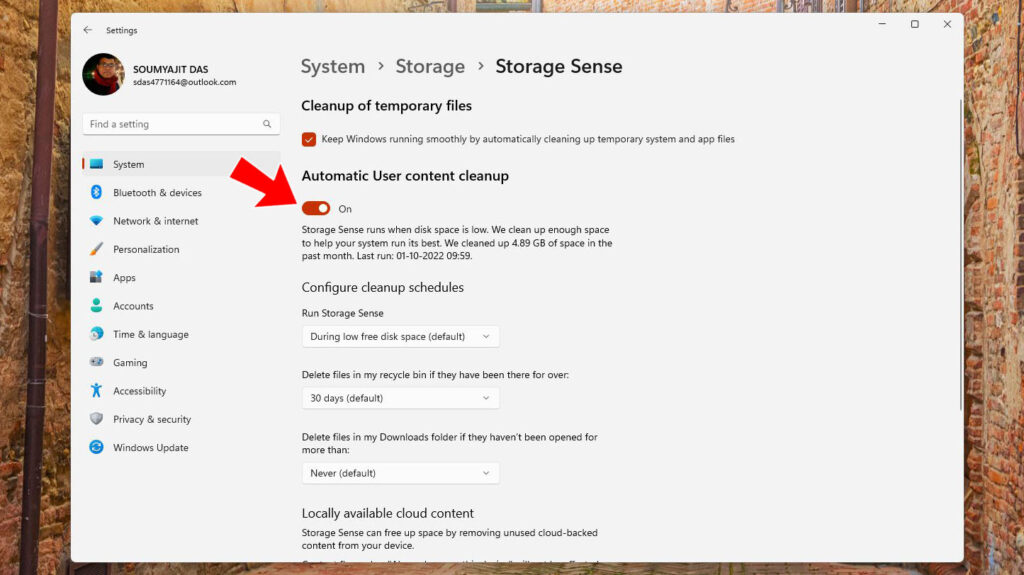
Once you are inside the ‘Storage Sense’ configuration settings, just look for ‘Automatic User Content Cleanup’. Just toggle the switch on. Now Storage Sense will automatically free up space whenever you are running out of storage.
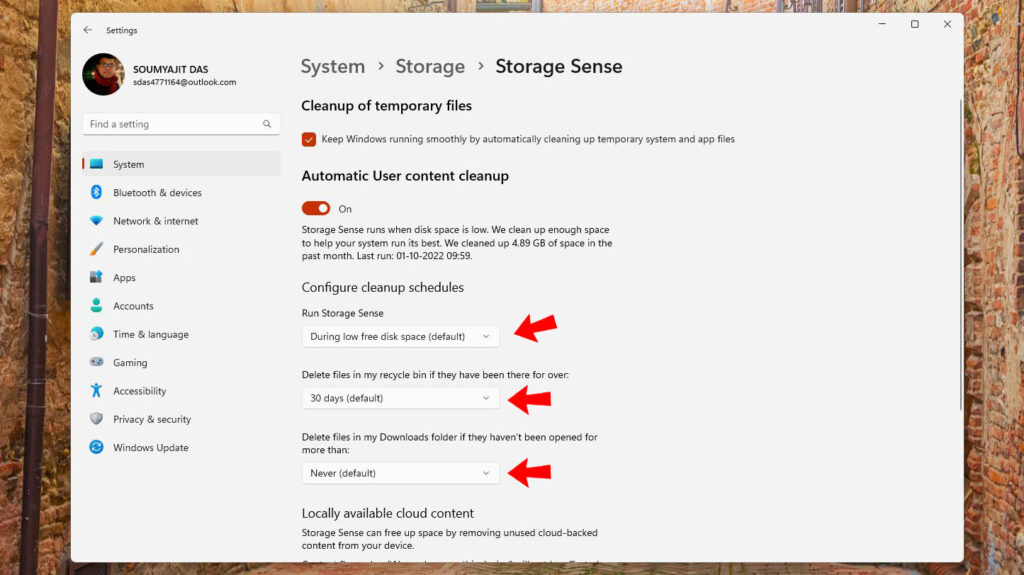
You can click on the drop-down menus of ‘Configure cleanup schedules’ to select how frequently and when you want to run the auto cleanup process in the download folder and recycle bin.
Have You already Used Storage Sense Before?
Maybe, I don’t need to ask you this. Few features of storage sense are by default activated. But to do things automatically you have to configure it. So, yes you may have used this but probably don’t know its proper function. So, would you go to configure your PC to automatically delete certain files to clean up storage? Let me know in the comment section below. Thanks for visiting.
