When it comes to testing suspicion software or script Windows Sandbox is really a handy and hassle-free one-click solution but sadly it’s missing from the home version of Windows 11 just like Windows 10. However this is not the only feature that’s taken from the home users – Hyper-V, Group Policy Editor, Bitlocker the list is just going on and on. We have a detailed article on the differences between Windows 10 Home vs Windows 10 Pro which you can follow up on. Everything is also similar to Windows 11. Anyway, as we can take Hyper-V in the home version of Windows we can also enable Windows sandbox in Windows 11 Home with just a few tinkering. So, without further ado let’s take a look at how to enable Windows Sandbox in Windows 11.
What is Windows Sandbox?
Windows Sandbox is an isolated environment of your installed Windows. It is a fresh version where all the settings are just set as default. Changing or tweaking things inside Sandbox doesn’t bring any impact on the host OS (Windows 10 or Windows 11). Here you can run anything – an infected program, non-verified program, unknown batch file or scripts, delete system file, or whatever. As Sandbox restarts all of the changes will be removed. Basically, Windows Sandbox is a type of Virtual machine which doesn’t save or store anything. Isn’t it great? You don’t need to manually remove your mess. Every time you open the Sandbox it starts from fresh new by destroying the previous session changes.
Enable Windows Sandbox in Windows 11 Home
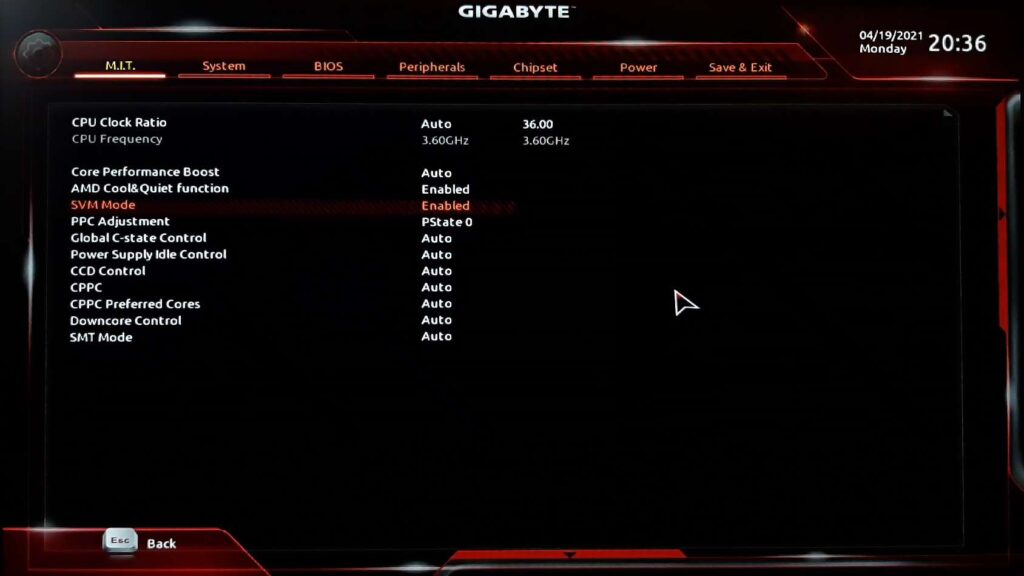
To use the Windows sandbox one of the most important features should be enabled from BIOS – called ‘Virtualization’. We have a detailed article on ‘How to enable Virtualization from BIOS or UEFI?‘ check it out. If you can’t manage to boot in to the BIOS we also have an article that will help you to enter into the BIOS
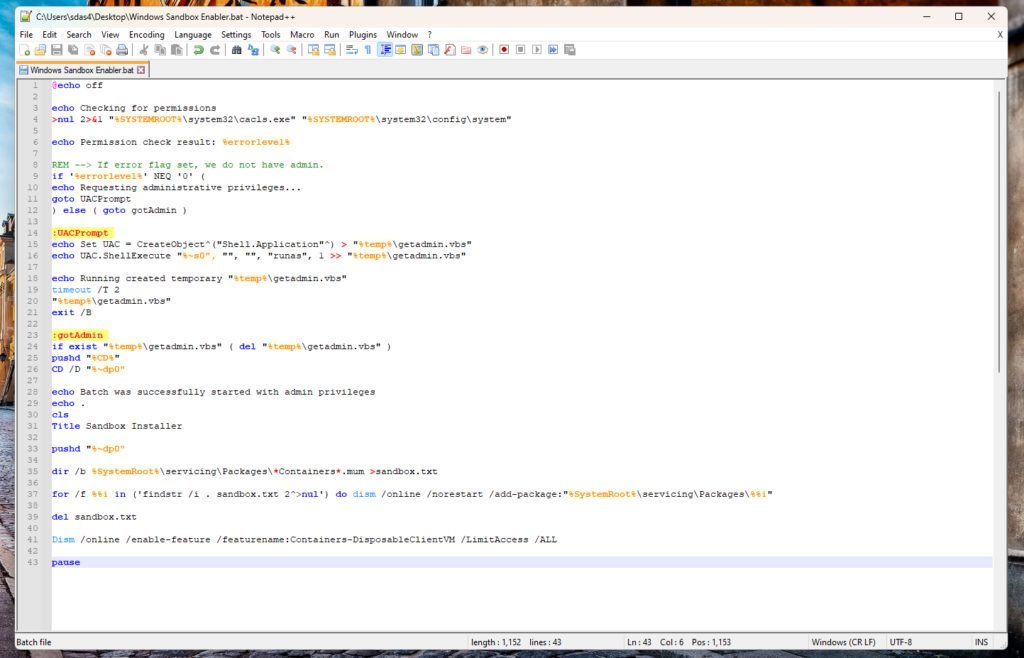
With the activation of ‘Virtualization Technology’, you are ready for the next step. Download the ‘Windows Sandbox Enabler’ script from this link. This script has everything that’s necessary. It is a batch file. You can even read all the commands in this script. Just you need to open it in Notepad or Notepad ++. If you really want to understand what’s going on through the script I prefer to use Notepad ++ for better visualization.
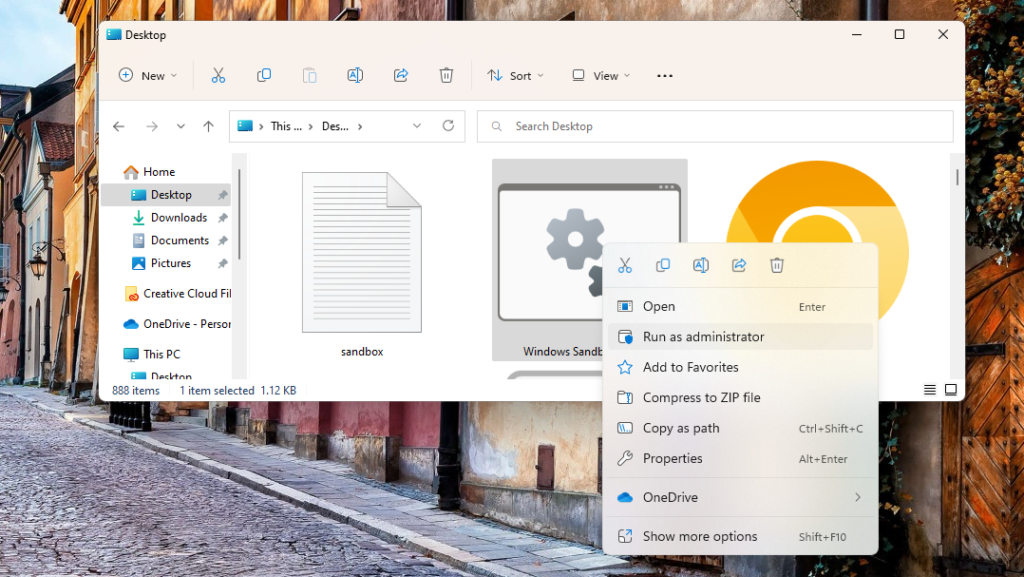
Anyway, after downloading right click on it and Run it as Administrator.
Now a Command Prompt window will open and ask for your permission. Just type ‘Y’ and hit ‘Enter’. Now your computer will automatically restart and when it is ready you as a user won’t notice any changes but it’s done for what the script was for.

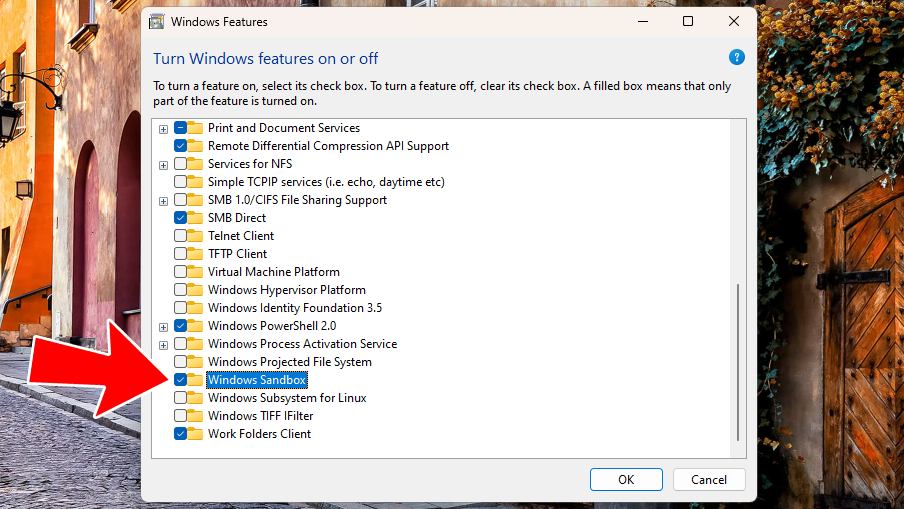
Now all you have to do is to use a Windows 11 keyboard shortcut Windows + R and type ‘optionalfeatures.exe’ and hit Enter.

This will open a new window named ‘Windows Features’. Scroll down a little bit and you will find the option ‘Windows Sandbox’ just check on the checkbox on the left and hit ‘Ok’. Maybe Windows takes a bit of time by setting up a few things. While it is done you can now use Windows Sandbox.
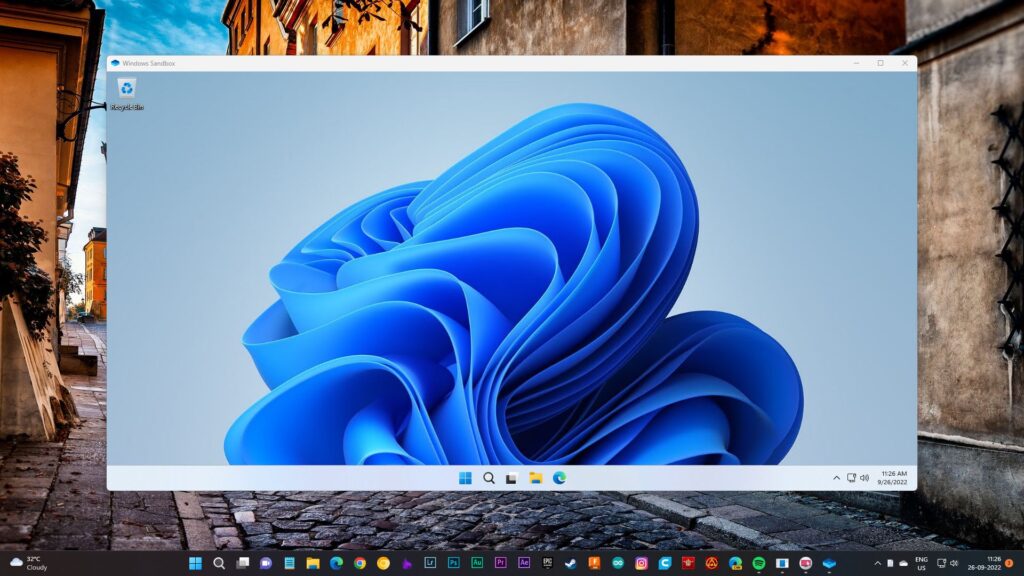
Search ‘Windows Sandbox’ in the Windows Searchbox and obviously click on the first option with the name ‘Windows Sandbox’.

Now here you can do whatever you want. Nothing will bring impact your host OS. There you have it, you have successfully enabled Windows Sandbox in Windows 11 home. Now if you’re thinking of “Can I remove Windows Sandbox from Windows 11 home?” The answer is yes you can.
How to Remove Windows Sandbox in Windows 11 Home?
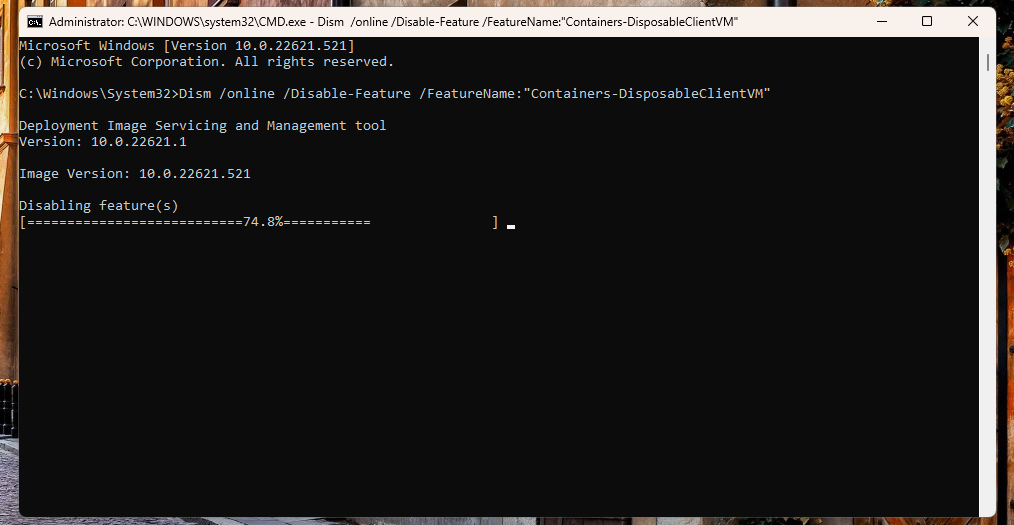
If you for some reason decided to remove the Windows Sandbox from Windows 11 Home edition first of all open the CMD and type this command (Dism /online /Disable-Feature /FeatureName:”Containers-DisposableClientVM”) and hit Enter. After restarting Sandbox will be removed.
In the Concluding Lines…
So, enabling Sandbox in Windows 11 Home isn’t rocket science I think anyone can do this trick but if you don’t want to modify Windows 11 then you could use third-party software like Sandboxie Plus and Shade Sandbox. If you ask me I would prefer to use the inbuild Windows Sandbox in Windows 11. If you’re a user of Windows 11 Pro then you don’t need to run any script just turn on the Virtualization Technology from BIOS and activate Windows Sandbox from ‘Optionalfeatures.exe’. That’s it. Hope you guys have enjoyed this article and learned something new if so then don’t forget to express your thoughts in the comments below. Thanks for visiting.
is this safe?
It is safe