As the final build of Windows 10X has been released, many reports and sources said that Windows 10X is OEM Ready only. So, as a consumer, we can’t buy Windows 10X from Microsoft and it is confirmed that in consumer-grade, there is no device of Windows 10X is coming soon. So, there is no way to test the Windows 10X right now. Right? Actually, we have good news for you: you can’t normally run Windows 10X on a normal PC, perhaps on a virtual machine, you definitely can. In fact, we have tested the latest build of Windows 10X (20279) on our PC and it worked quite well. Therefore, if you want to test something new then what are you waiting for? go ahead and read our detailed guide on how to run Windows 10X on your PC.
Read Now: Explaining Windows 10X: Everything You Should Know
Our PC Configuration
- CPU: AMD Ryzen 7 3700X
- Motherboard: Gigabyte B450 Elite V2
- RAM: Corsair Vengence Pro 32GB
- Graphics Card: NVIDIA GTX 1060

Run Windows 10X on your PC
As we have aforementioned, Windows 10X can’t be run on a normal PC rather it needs to use predefined specialized hardware so we have to use a virtual machine. But Currently, you can’t run Windows 10X on third-party virtual machine applications such as VirtualBox, VMware, QEMU, etc.
We have used the VHDX file (Hard disk image file). It is only be used on Microsoft’s Hyper-V application and it’s only available on Windows 10 Pro. In short, you need Windows 10 Pro, Enterprise, or Education to run Windows 10X on your PC. Windows 10 Home does not support the Hyper -V application. if you have Windows 10 Home then forget about Windows 10X.
How to Set Up Hyper-V?
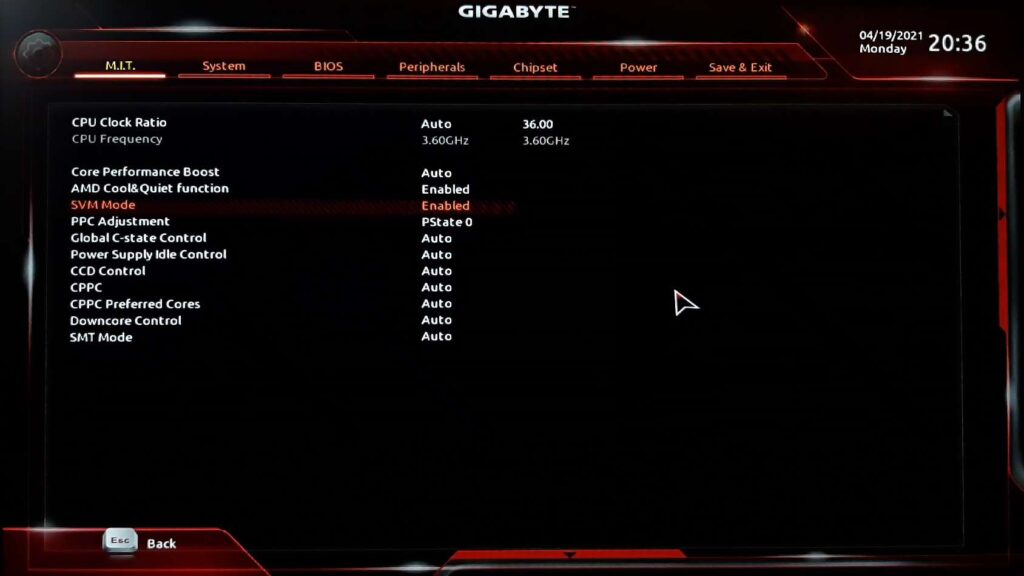
First of all, to set up the Hyper-V, we need to enable ‘Virtualization’ from BIOS. Every BIOS or UEFI is different and also there are other different names of ‘Virtualization’ that are listed. As we are using Gigabyte Motherboard, they named it ‘SVM Mode’. So look for ‘Intel VT-x’, ‘Intel VT-d’, or anything on similar lines. if you can’t find anything then google it Something like this: “How to Enable ‘Virtualization’ on ‘Your Motherboard Manufacturer’?”
To enter into the BIOS, our case have to hit the ‘Del’ key a couple of times when on the boot screen, the motherboard manufacturer logo appears. Then enter into the ‘MIT’ tab, select ‘Advanced Frequency Settings’. Select ‘Advanced CPU Core Settings’ > ‘SVM Mode’ (Virtualization Technology). Hit Enter to set it to Enable. Now press the F10 key to save and exit.
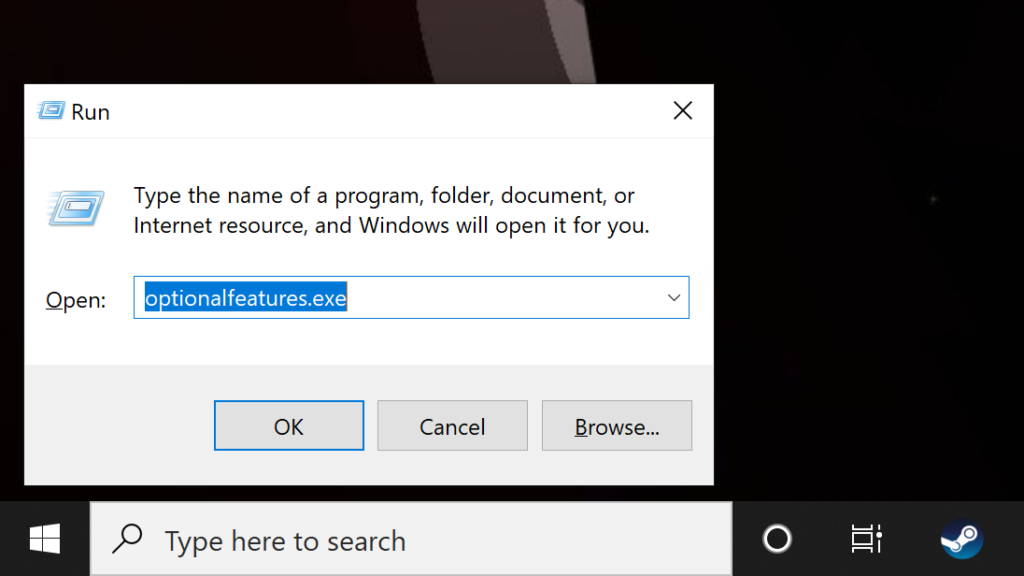
After the successful reboot, Windows boots up. Now press ‘Windows key + R’ from your keyboard. Now the ‘Run’ window appears. Type ‘optionalfeatures.exe’ and hit Enter.
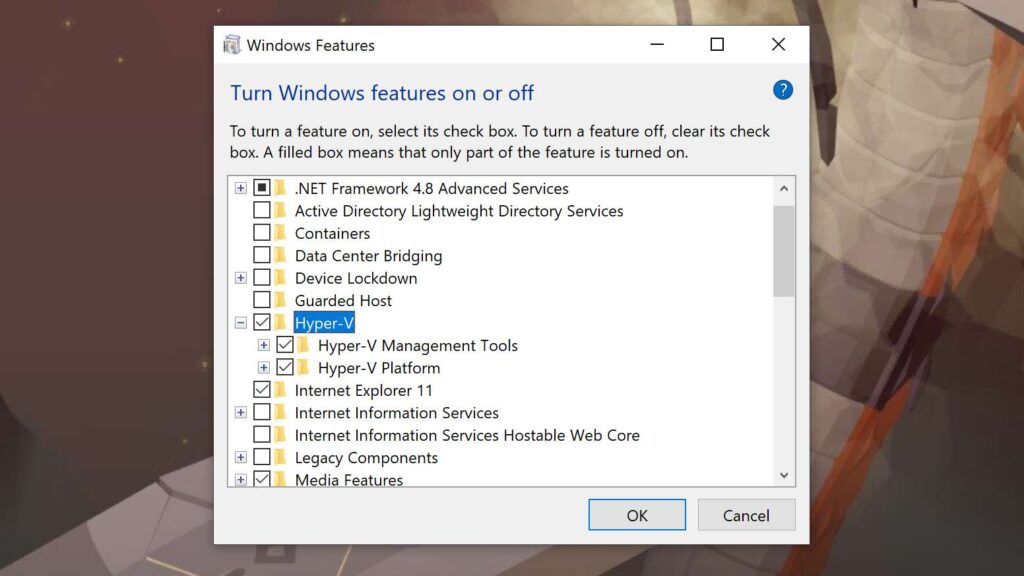
Now, On the ‘Windows Features’ window, scroll down and look for Hyper-V. Now, enable all the checkboxes under Hyper-V and hit the OK button. It will start installing the necessary packages and will ask you to restart the computer once the installation is finished.
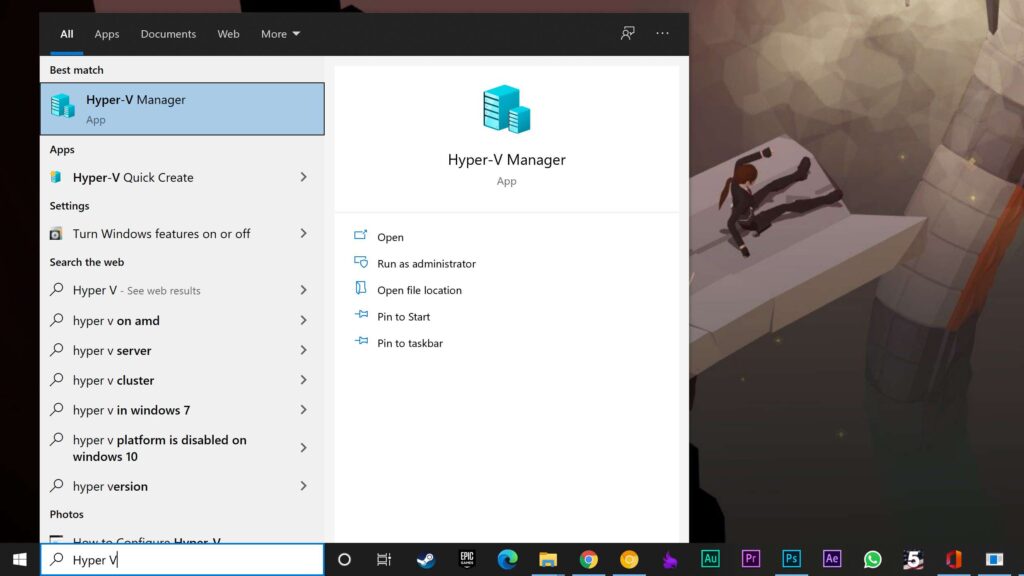
So, the Hyper-V is now successfully installed. Just search it, ‘Hyper-V’ on the search bar. The first option is our concerned one. Click on it.
Now, you need to download Windows 10X. Of course, it is not to be downloaded from Microsoft instead, our friend thebookisclosed created the VHDX file for Windows 10X. which you can click here to download.
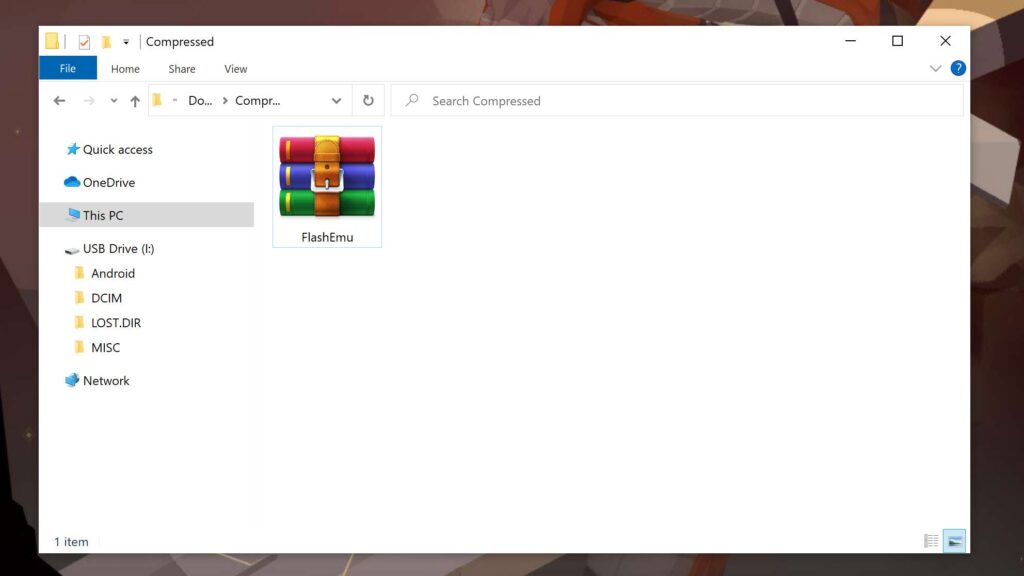
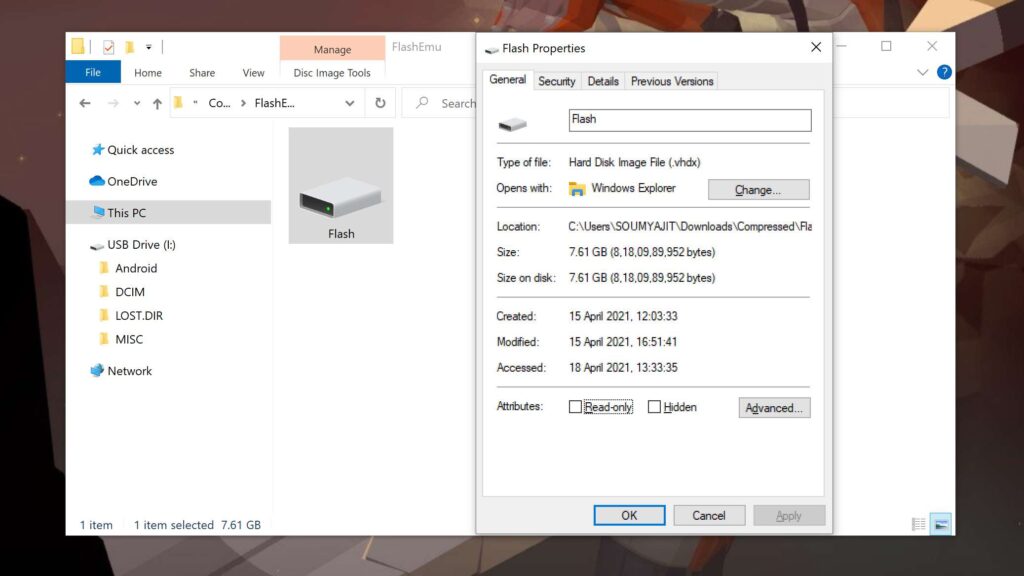
After downloading, Unzip it with any kind of unzipping software. Here, we have used ‘Winzip’. Keep in mind, when you will unzip, there will be some storage space left in the ‘C Drive’ because the Unzipped file size is 7.61GB.
How to Install Windows 10X?
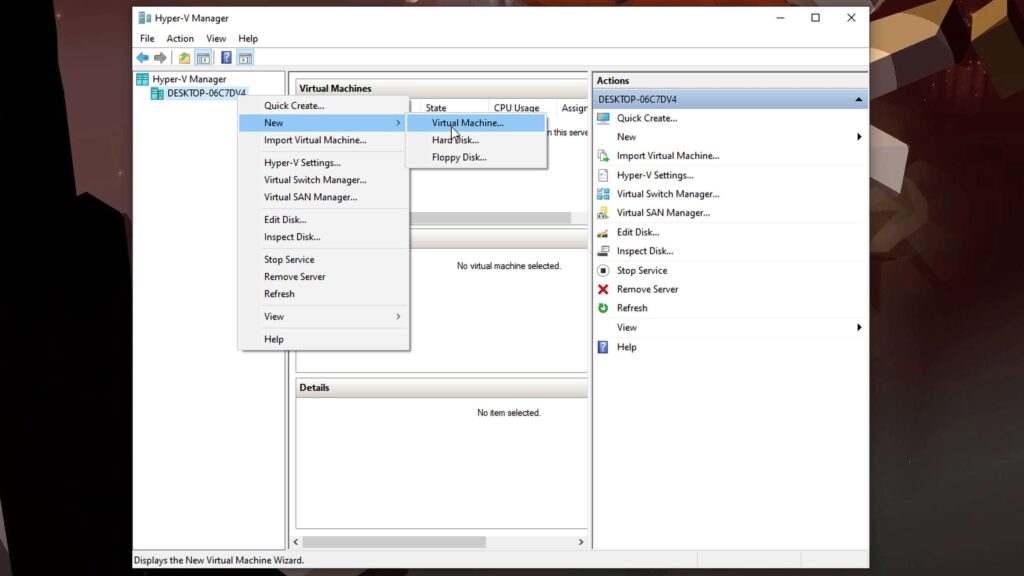
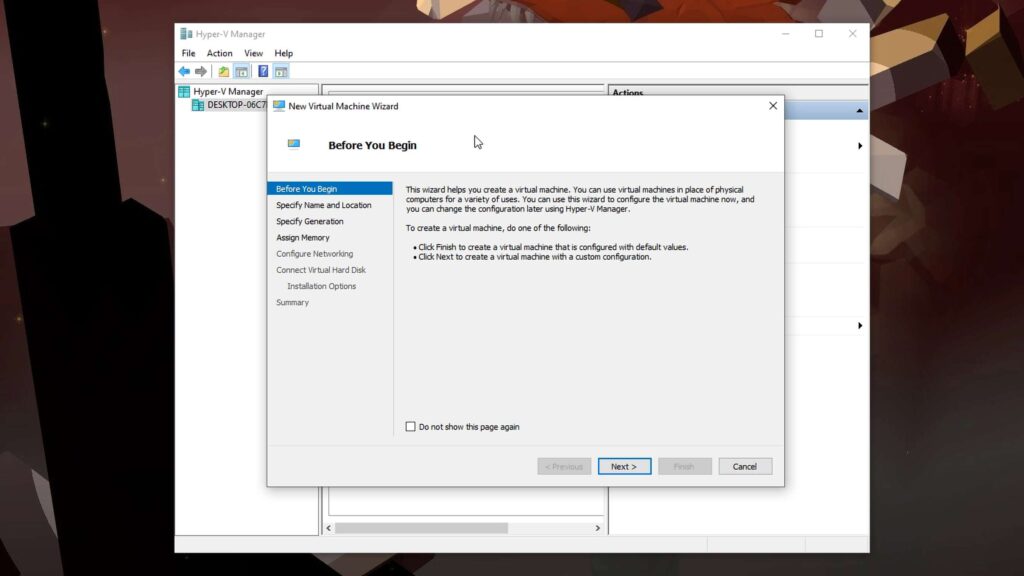
Now the VHDX file and the Hyper-V are ready. Let’s install Windows 10X. Come back to the Hyper-V and click on ‘New’ and select ‘Virtual Machine’ from the top-right panel.
On the ‘Before You Begin’ section, click on ‘Next’.
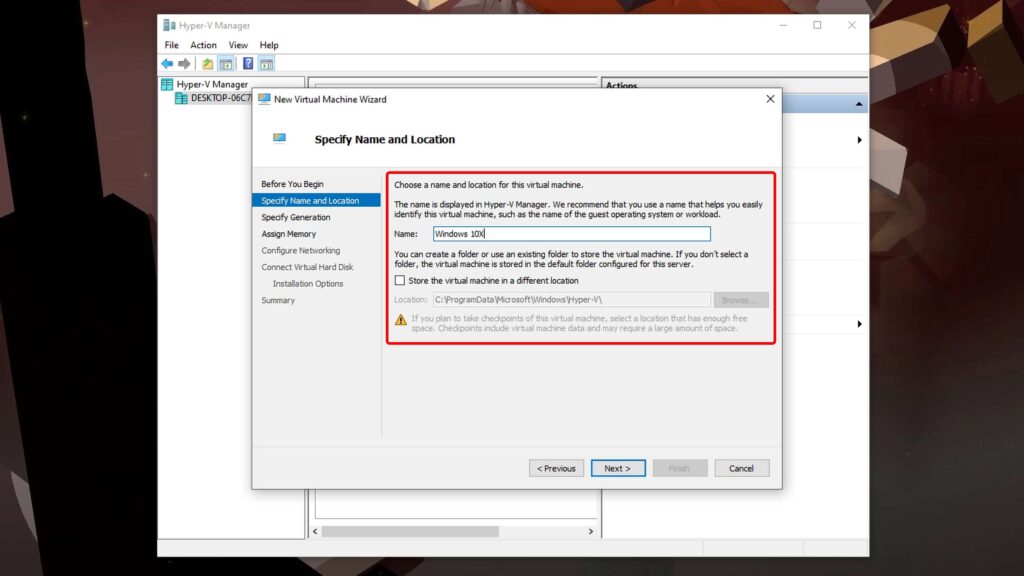
Provide a name to the virtual machine. We have named it ‘Windows 10X’. It is your choice, you can give it whatever you want.
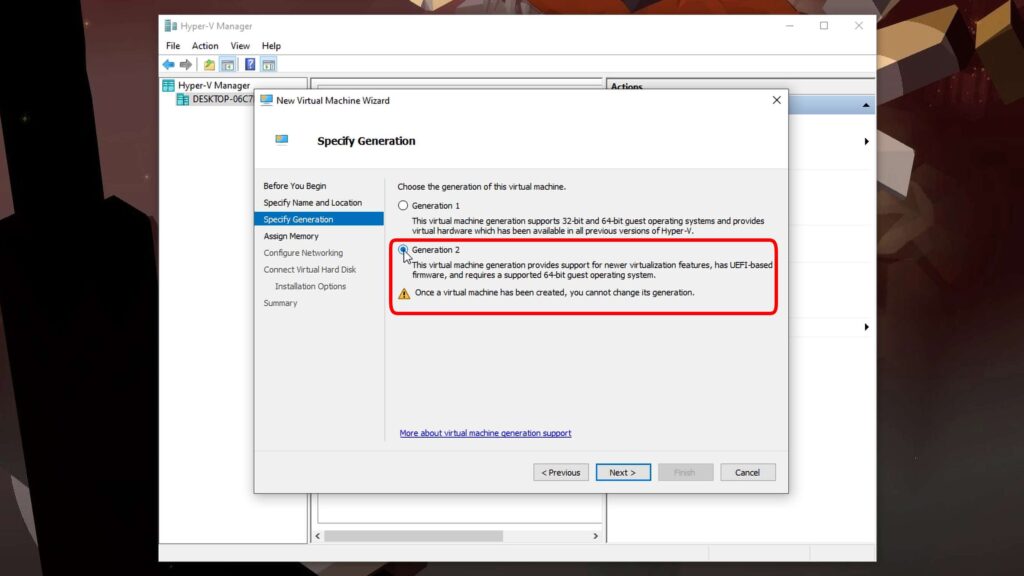
On the ‘Specify generation’ section, choose ‘Generation 2’ and hit ‘Next’.
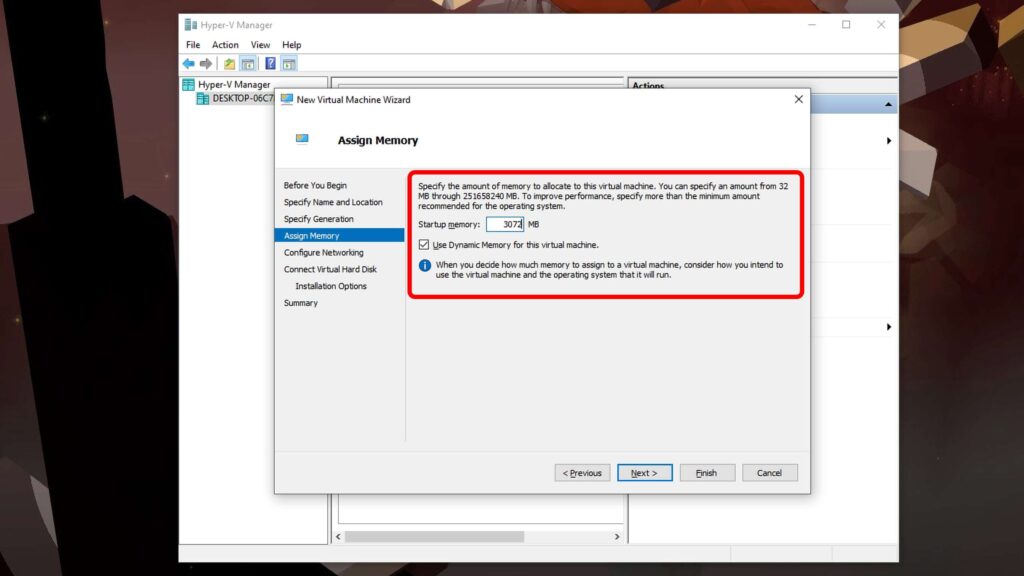
Ok, it’s time for a vital part. Now, you have to define how much RAM of your system you want to allocate to Windows 10X. Keep in mind, the more RAM you allocate, the much smoother and faster experience you would get but do not allocate too much RAM to the Hyper-V. For example, if your system has 16GB RAM (Memory) and you have allocated 8GB to the Hyper-V then your total system may slow down when the Hyper-V is running. So, it is better to allocate 3GB or a maximum of 4GB to the Hyper-V if you have 8GB or 16B RAM. In our case, our system has 32GB of RAM so, there is nothing to complain about allocating 8GB to the Hyper-V. Anyway, after assigning your choice, hit ‘Next’.
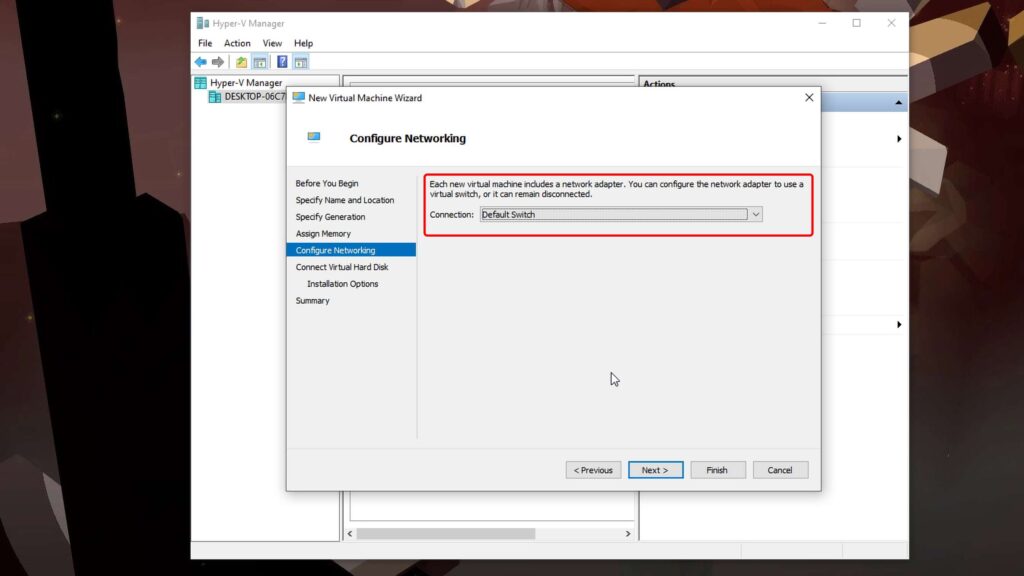
On the ‘Configure networking’ page, choose ‘Default Switch’ from the drop-down menu and hit ‘Next’.
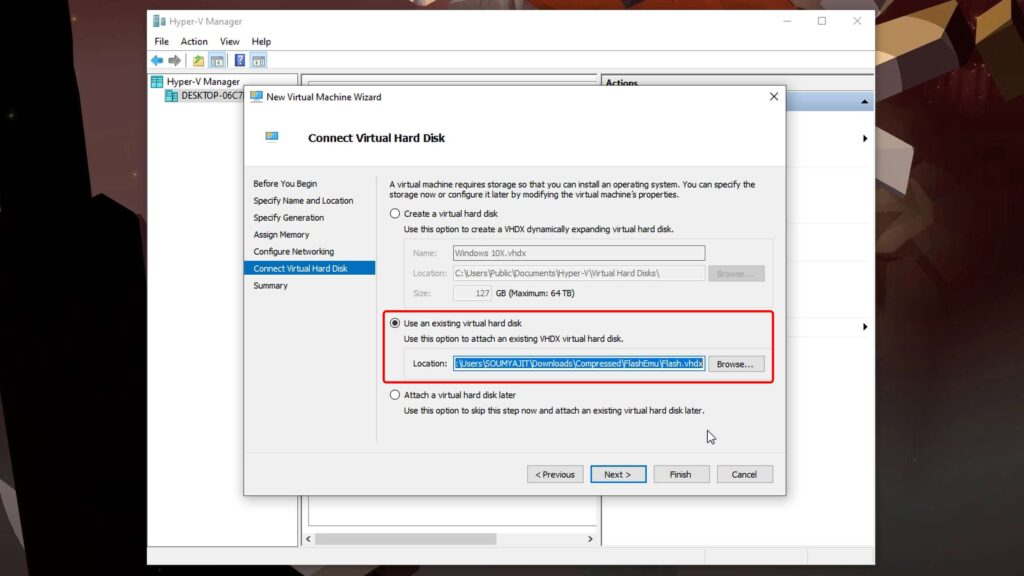
The last step and an important step, click on ‘Use an existing virtual hard disk’ and select the ‘Flash.vhdx’ file by clicking on the ‘Browse’ button. Please do not click on ‘Create a Virtual Hard Disk’. Click on ‘Next’.
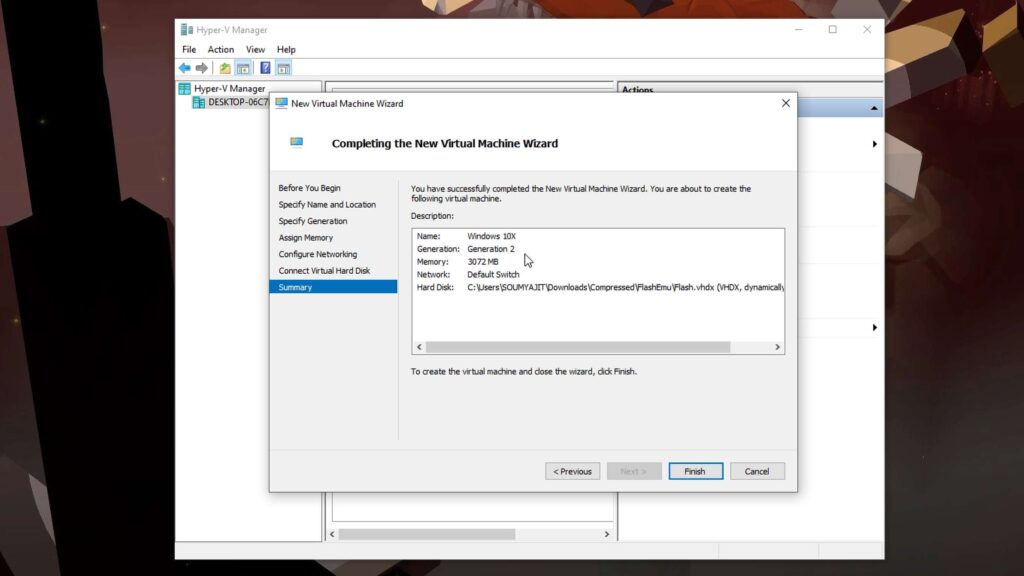
Now on the ‘Summary’ section, verify everything what you have set and click on ‘Finish’.
That’s it. You have successfully installed Windows 10X on your PC. Let’s Run and Test it.
Run Windows 10X On Your PC
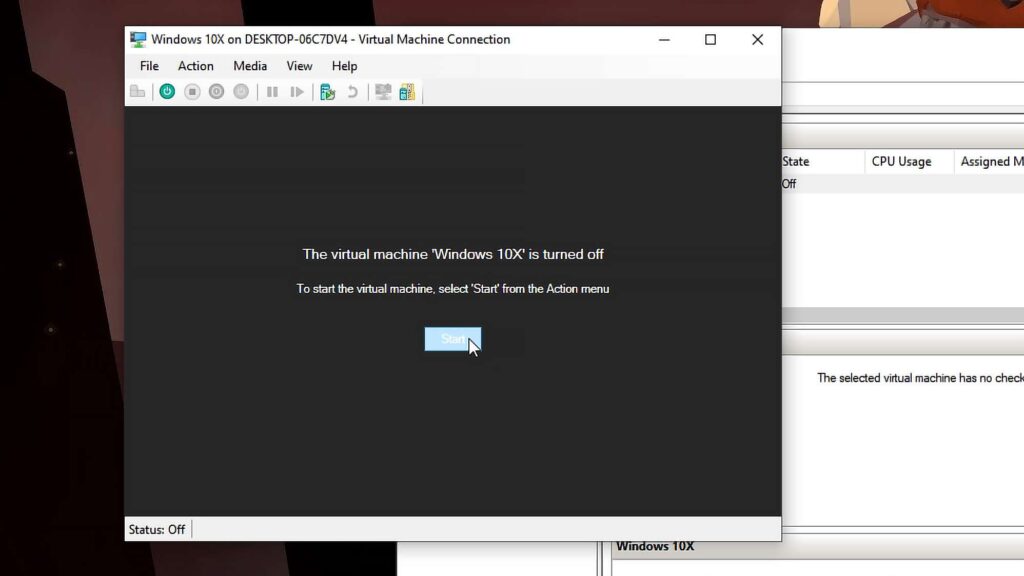
Right-click on the virtual machine. In our case, we named it ‘Windows 10X’ so just right-click on it and choose ‘Connect’.

After that, click on ‘Start’ and the ‘Hyper-V’ will start the Windows 10X virtual machine directly from the VHDX file. On the first run, it will take some time to process all the files and information.
If the black screen remains more than 30minutes then you have an AMD GPU.
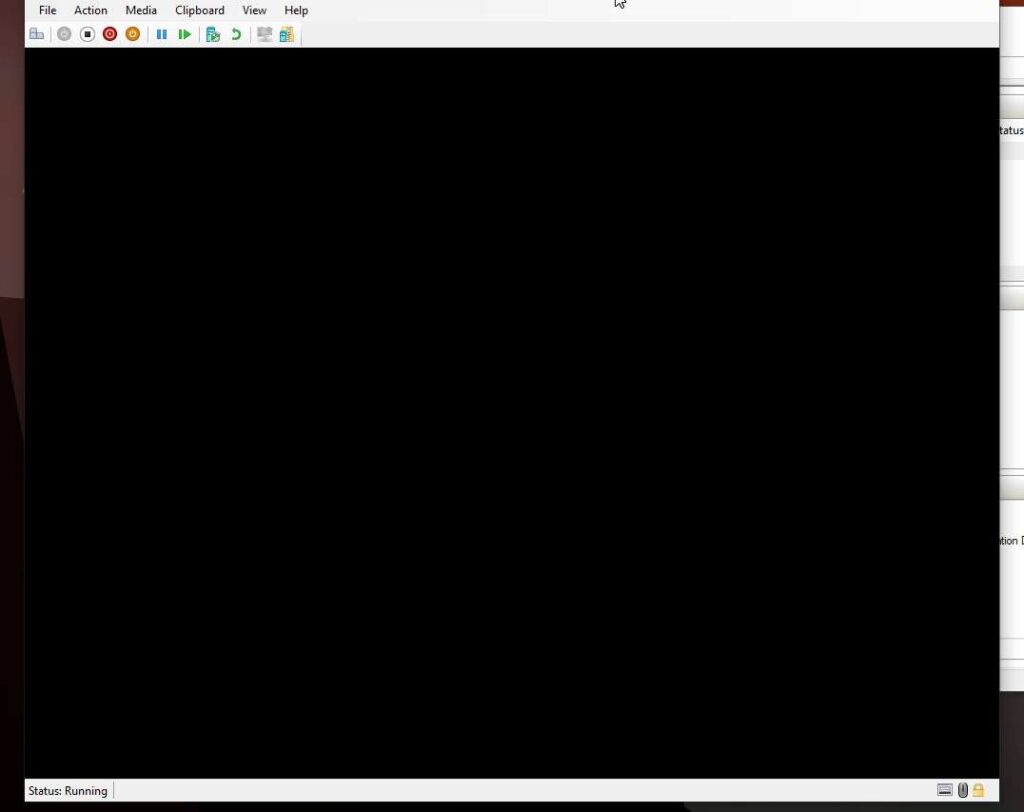
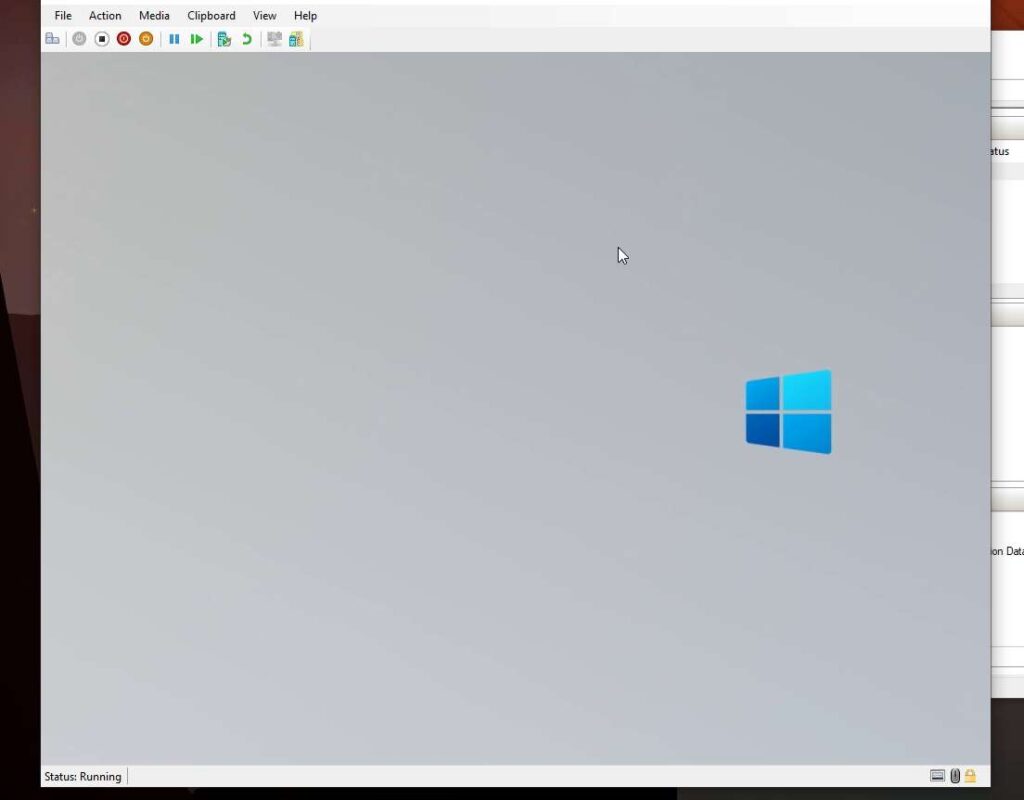
Anyway, we are not concerning much about AMD GPU right now. if you have NVIDIA GPU or Intel’s integrated GPU then you will be greeted with Windows 10X boot animation.
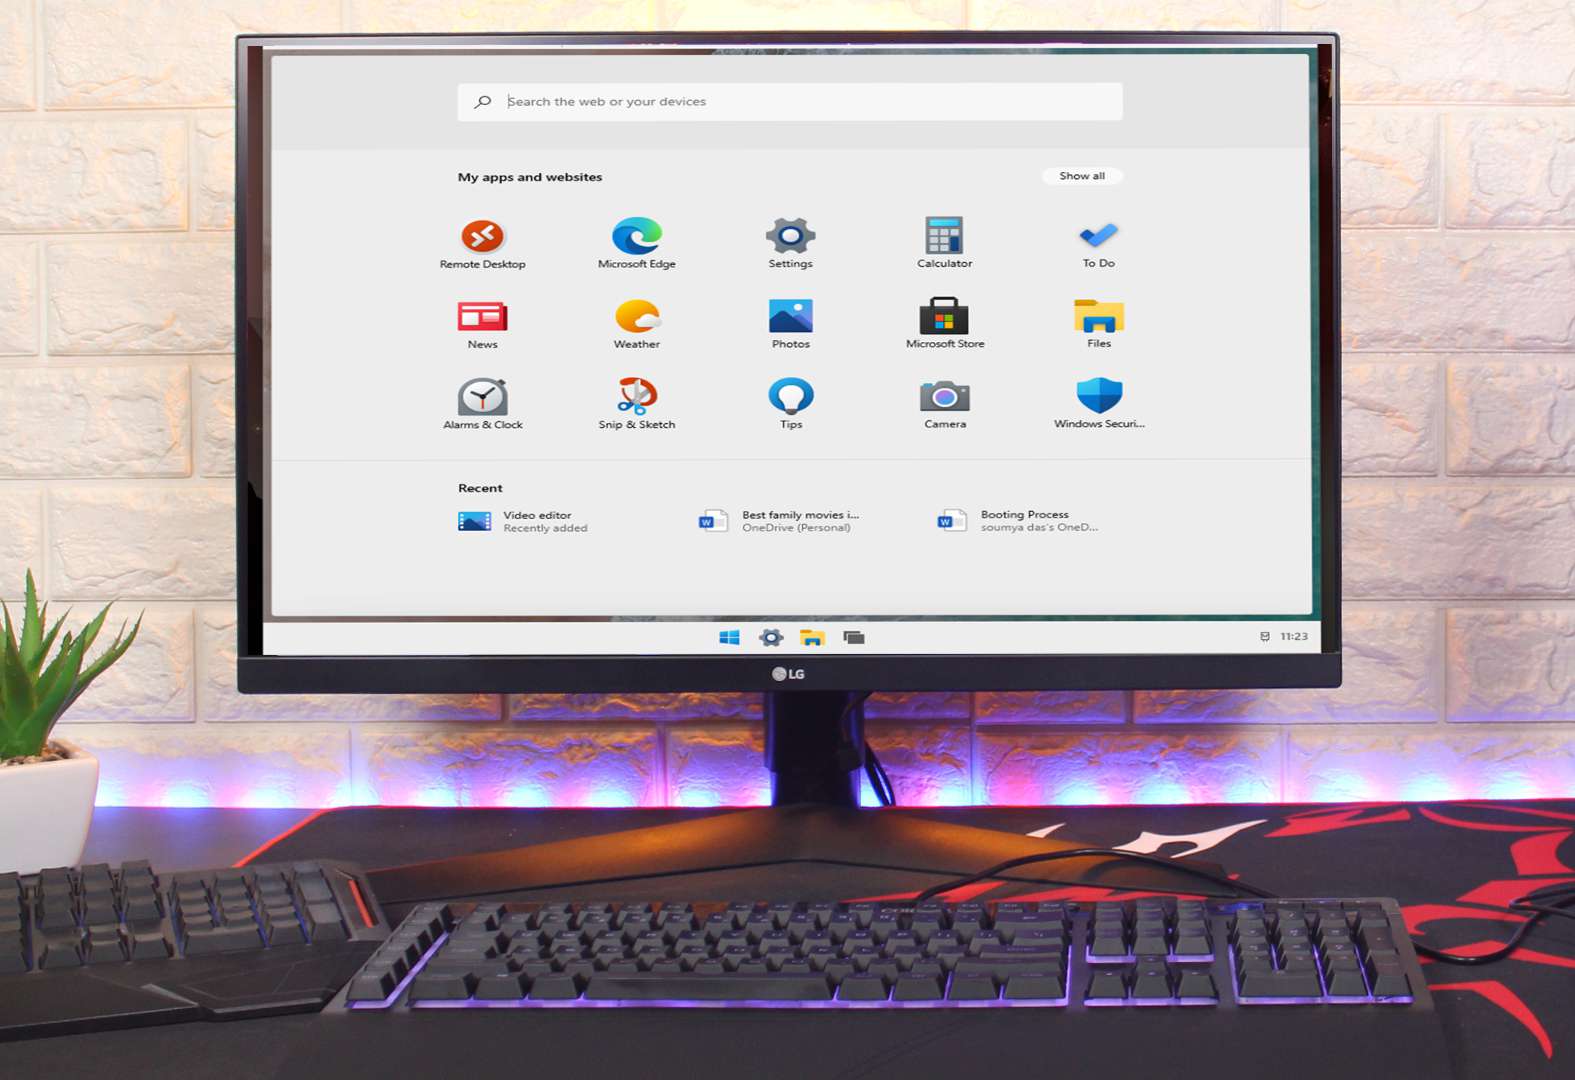
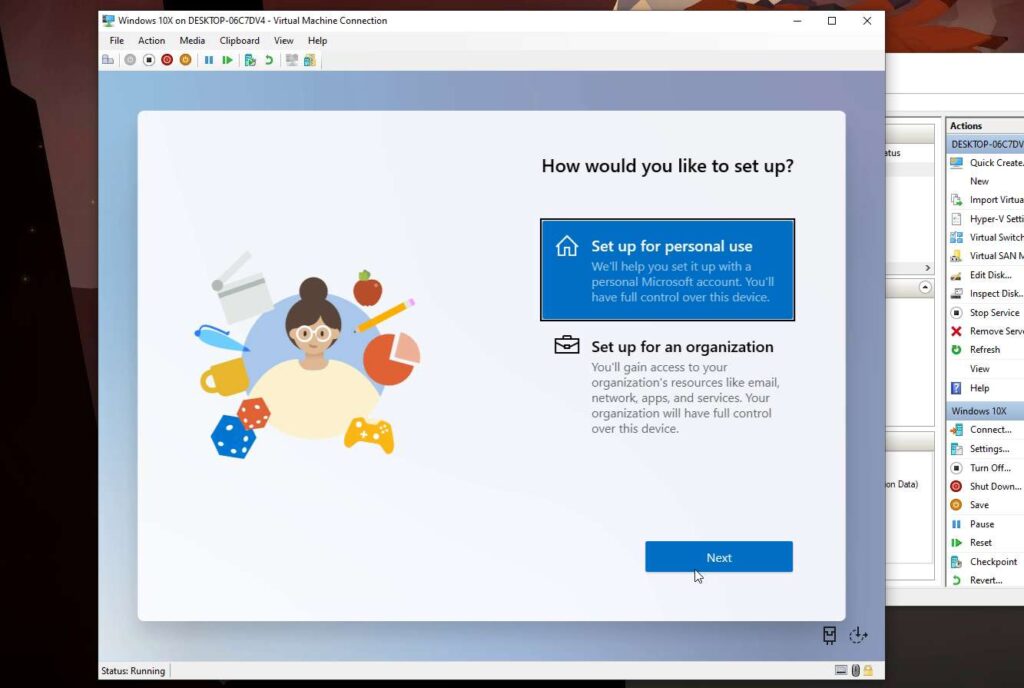
Now, there is nothing much to say, all the on-screen instructions will help you to log in into the Windows 10X.
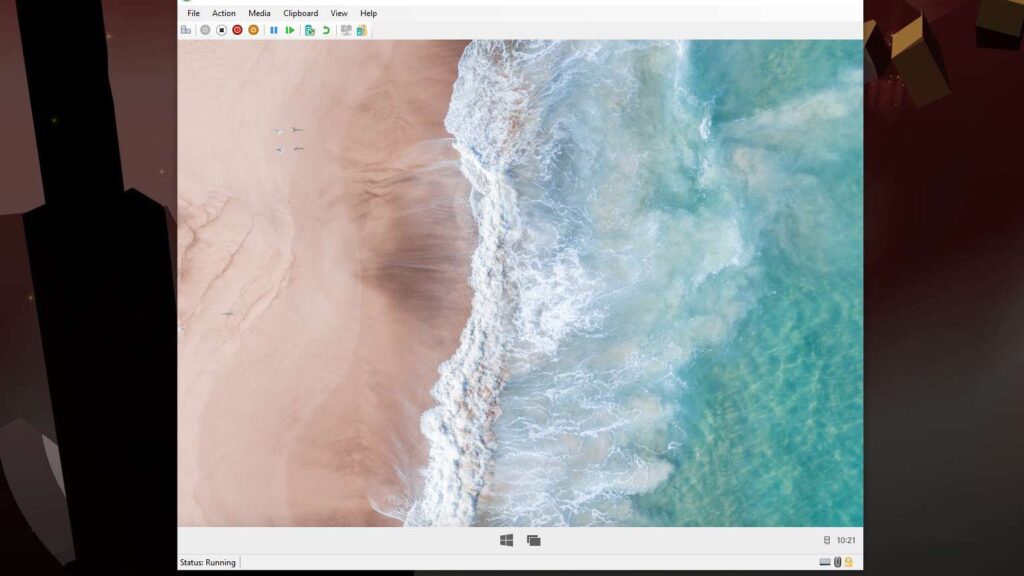
I hope you have successfully logged in. looks everything promising right? as Microsoft said, Windows 10X is the simplified version of the actual Windows 10. So everyhing is so simple and trimmed down here. Nothing fancy and graphical designs are found here. Hope, you can experience that if you use Windows 10X for a couple of minutes.
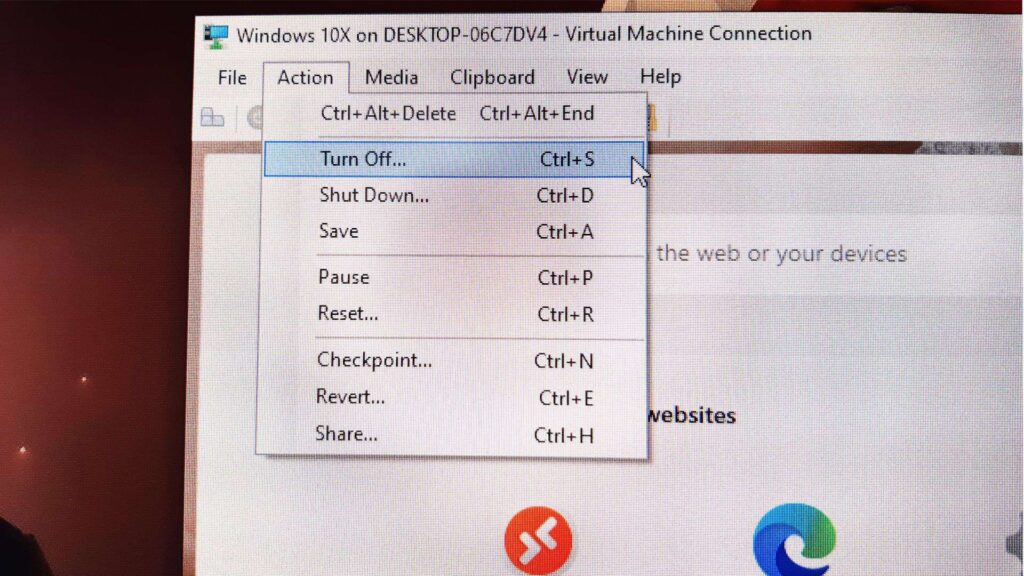
If you want to stop the virtual machine then click on ‘Action’ at the top-row menu and choose ‘Turn off’.
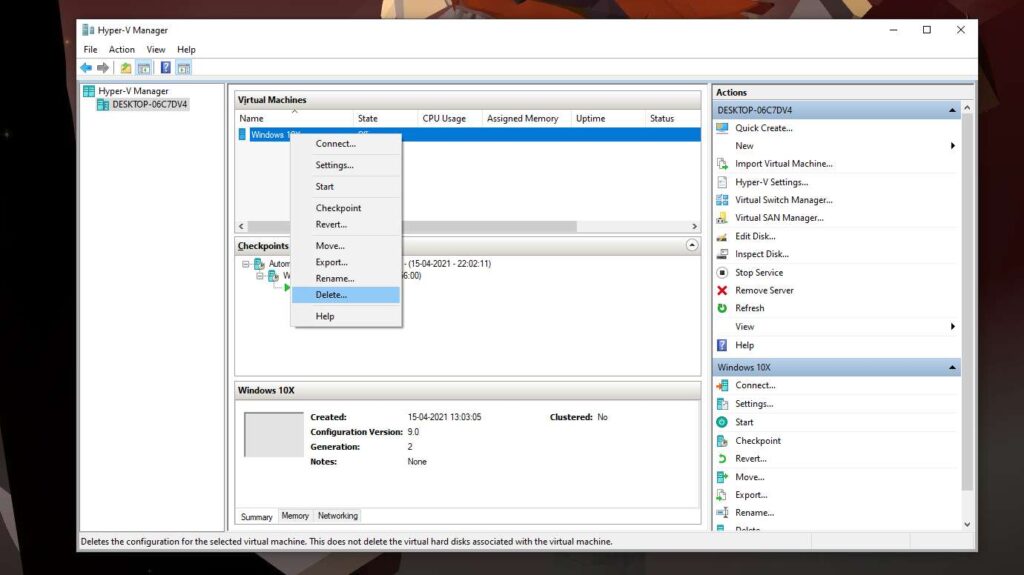
Want to delete ‘Windows 10X’? don’t worry, right click on the virtual machine you have created. We have created with the name, ‘Windows 10X’ and choose ‘Delete’. That’s it.
Run Windows 10X Virtual Machine On AMD GPU
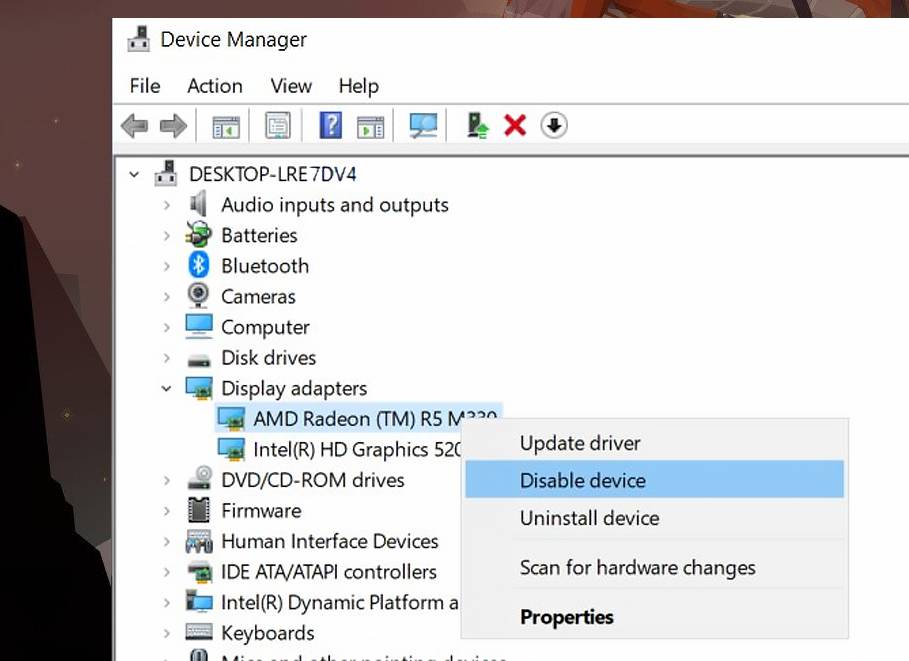
With AMD GPU, there is actually no way to run Windows 10X on the Virtual Machine so you must disable the AMD GPU from the ‘Device Manager’ and you know what? there will be a huge performance loss without the dedicated GPU on Windows 10X. The only support you get is from the integrated weak GPU of your processor.
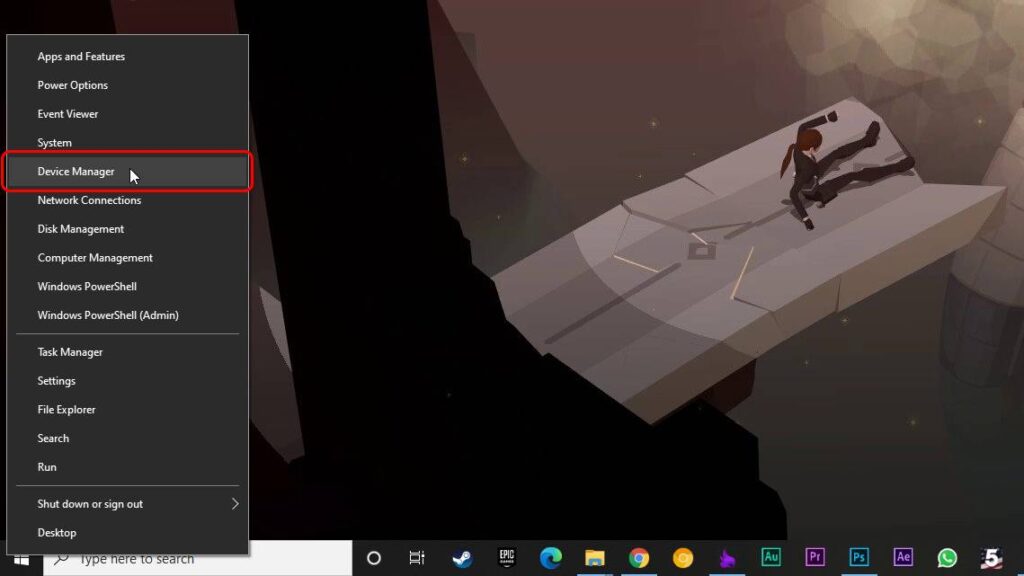
To disable the AMD GPU, right-click on the ‘Start Menu’ and open ‘Device Manager’.
Expand the ‘Display Adapters’ menu. Now, right-click on the AMD GPU and disable it.
Now, start the VM in the Hyper-V Manager and this time, Windows 10X should boot without any issue .
Enjoy Windows 10X!
For now, this is the technique to run Windows 10X on the PC but Microsoft is planning to experience Windows 10X’s UI on Windows 10 with ‘the Sun Valley update’. Yes! Windows 10X will support all the Windows 10’s Win32 applications but for now, it only lets you install ‘UWP’ applications from Windows Store.