In this article, we will explore the process of building a portable sound system with customized features. The project involves repurposing salvaged parts and incorporating various components to create a unique and functional audio device. The article will cover the selection of speakers, amplifiers, battery configuration, circuitry, and enclosure design. By following this guide, you can recreate this project and enjoy a portable sound system with enhanced sound quality and versatility.
Don’t Miss: Kerosene Heater Indoor? A Guide to Safely Using It
Meet Mr. Table
Mr. Table, my trusted companion, has been the centerpiece of my workspace. With a work area of 55 inches x 23 inches, it provides ample space for my PC setup and laptop. However, there was one missing element in this setup – a sound box. By a stroke of luck, I found a beautifully designed body from a previous project and decided to reuse it for this sound box endeavor. Let’s start with the construction.

Selecting Components
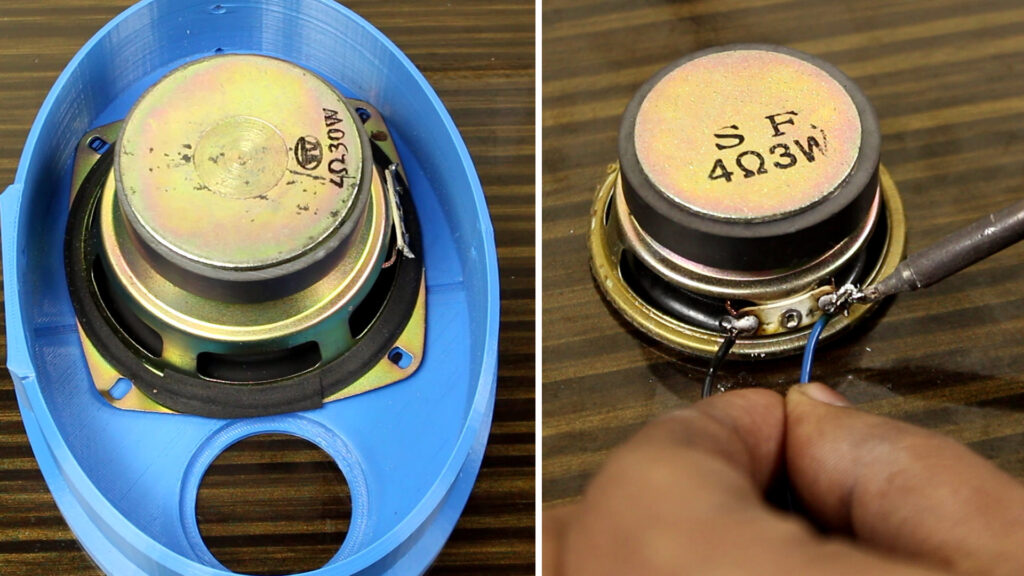
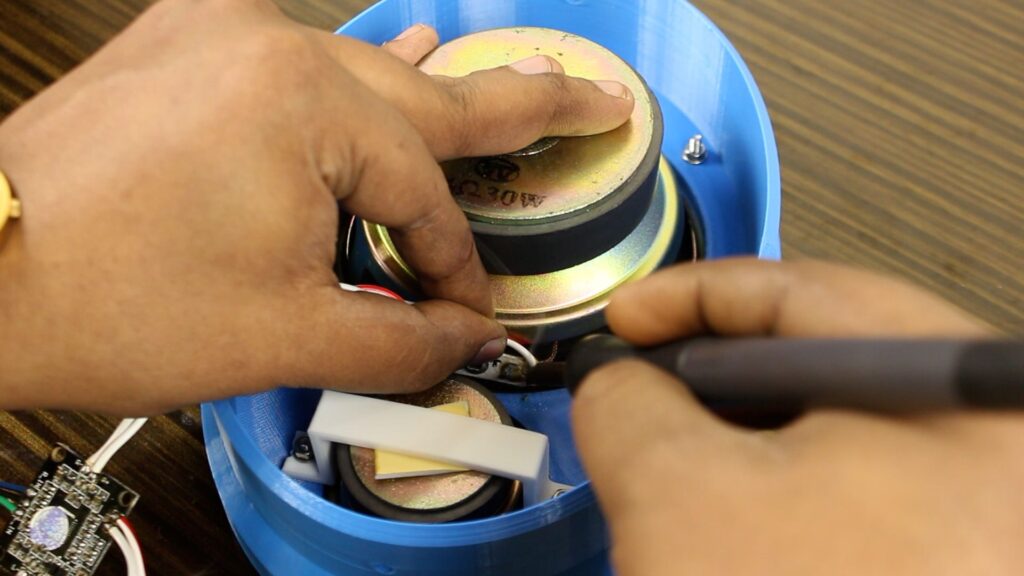
To begin with, I evaluated my speaker collection and chose an 8-ohm 30W woofer to handle the low frequencies (35Hz to 200Hz). For high tones, I chose a 4-ohm 3W speaker. The size of the speaker was an important consideration, as it had to fit within the defined enclosure size.
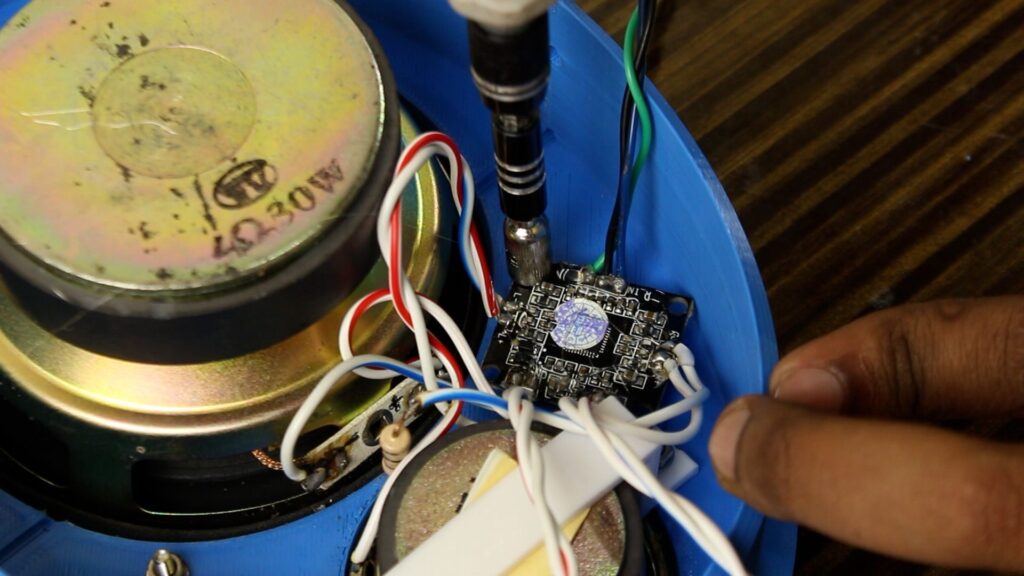
For amplification, I chose a compact Class D amplifier based on the PAM8610 amplifier chip. Class D amplifiers offer higher efficiency than class A, Class B, and Class AB counterparts. This particular amplifier featured two onboard audio channels, each capable of outputting up to 15W.

Creating a Mono Configuration
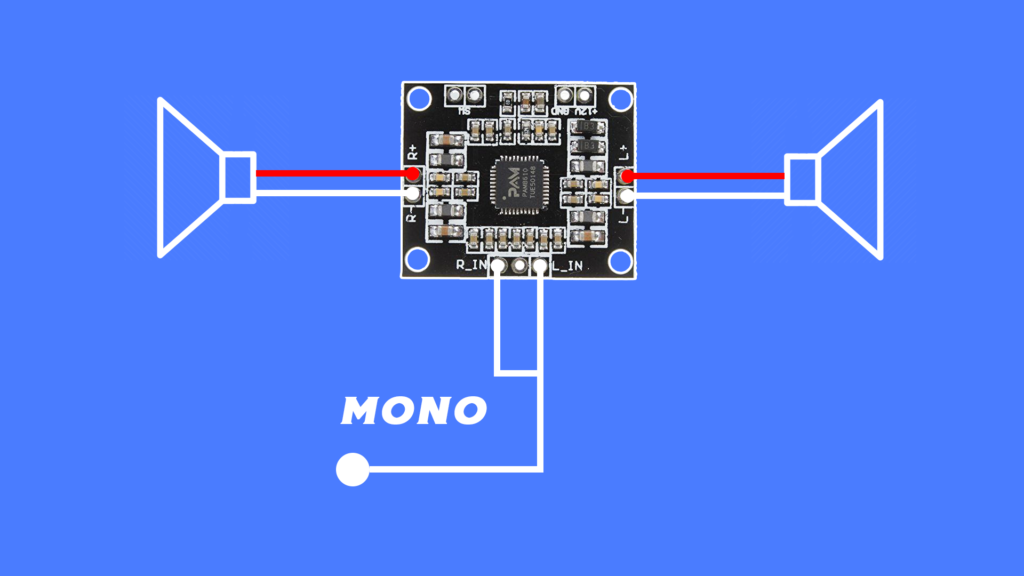
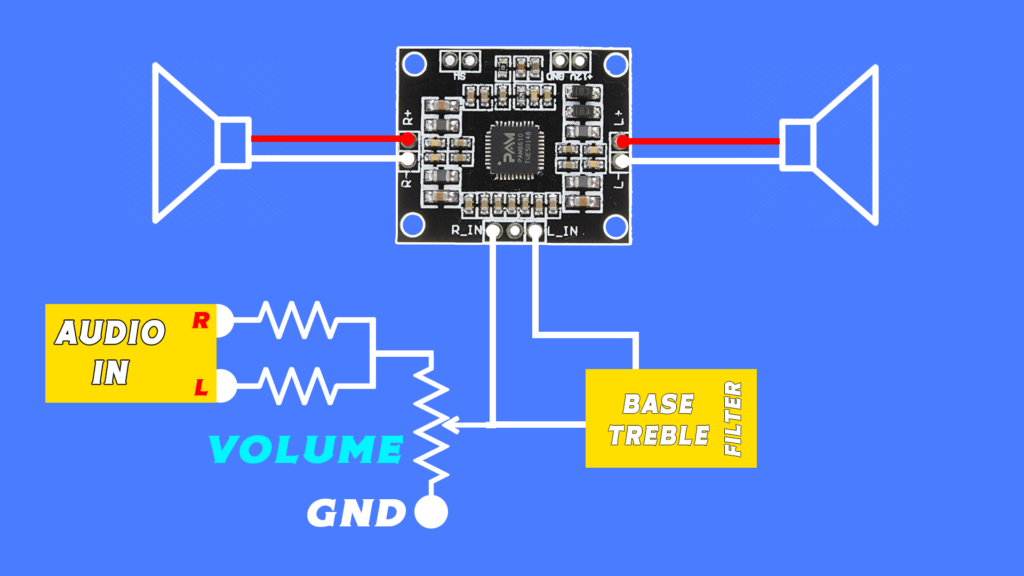
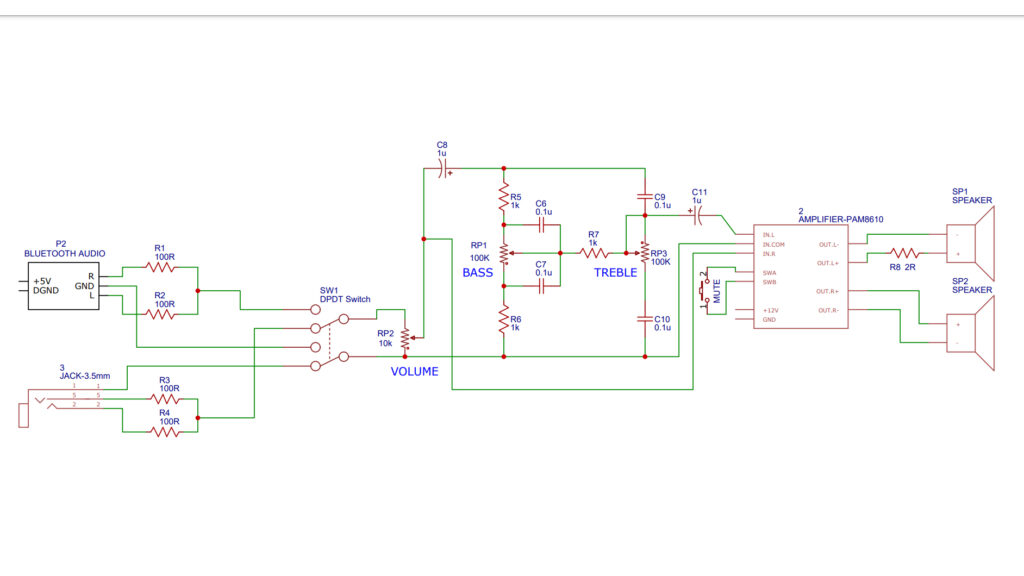
With two different types of speakers, it would be a good decision to use this soundbox in a mono configuration. To get a mono configuration, I shorted the left and right channels of the amplifier’s input.
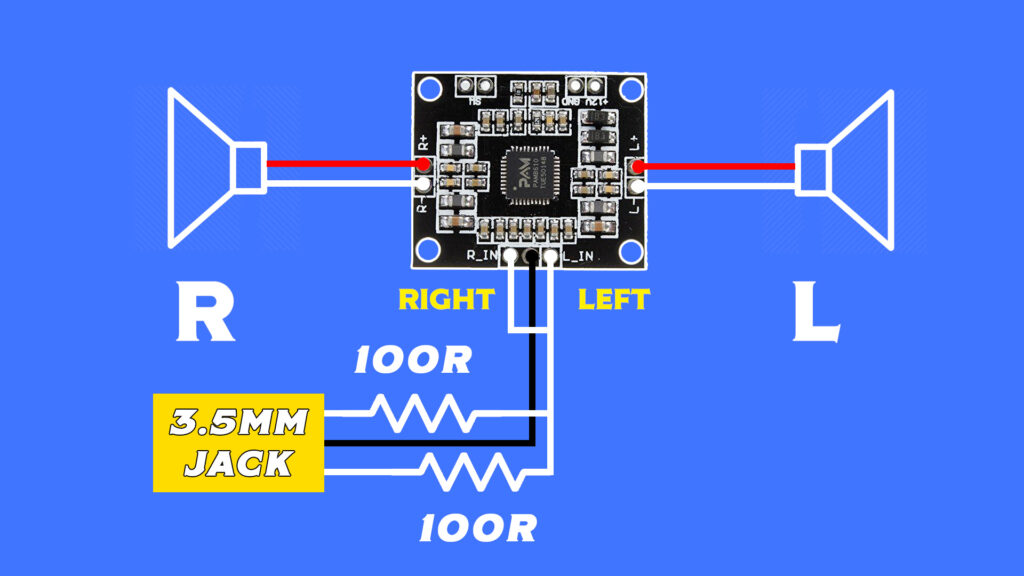
The output of the audio source for example a Bluetooth audio module or 3.5mm audio jack I have used two 100-ohm resistors to short their audio channels like the scheme below. Avoiding directly shorting audio channels is essential to avoid any problems.
Wired and Wireless Connectivity
For connectivity options, my goal was to make the sound system compatible with both wired and wireless connections. The 3.5mm socket was chosen as the best option for a wired option. To enable wireless operation, I integrated a small Bluetooth module that is more than capable of handling the job.

Battery Operation and Balancing
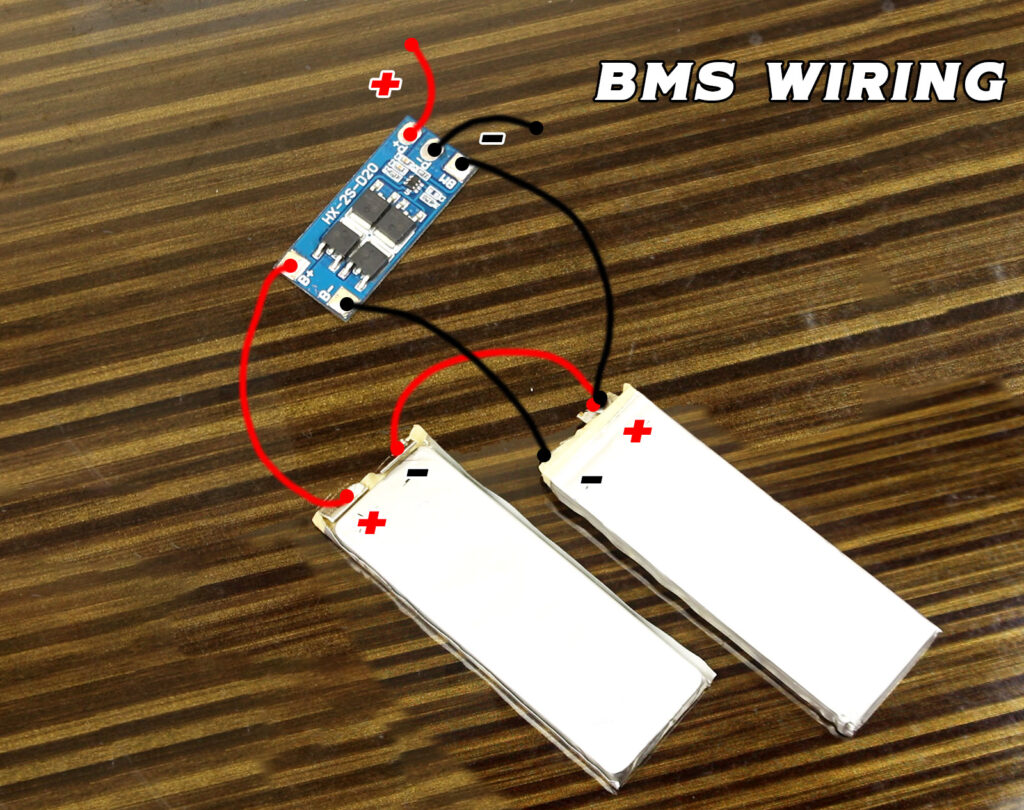
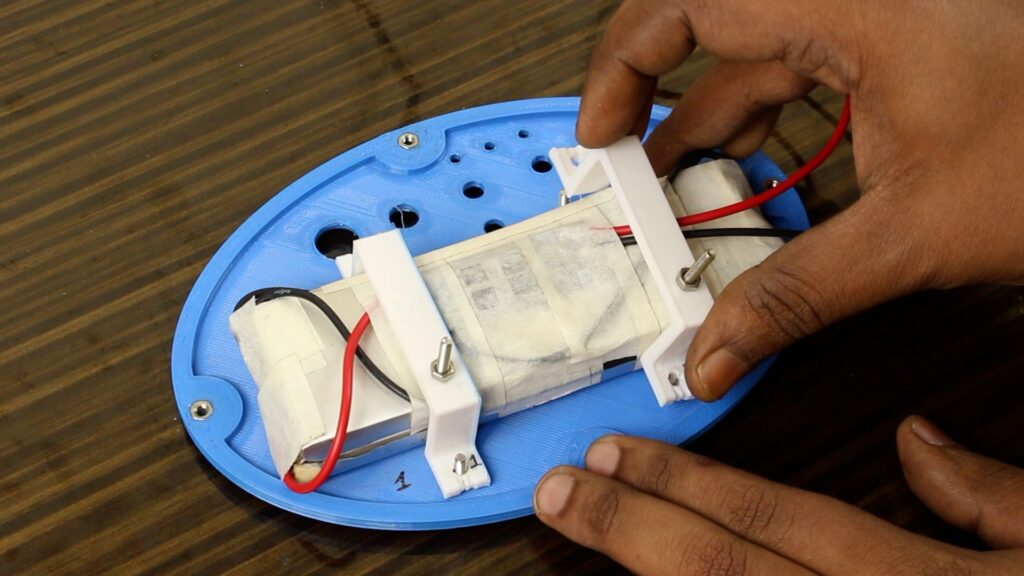
To increase portability, I decided to make the soundbox battery-powered. Batteries are salvaged from a previous project came in handy and I configured them in series to increase their voltage. I have used li-ion batteries with a nominal voltage of 3.7V and a full charge voltage of 4.2V.

To ensure that the batteries are properly balanced during charging, I included a Battery Management System (BMS) that will balance the voltage and provide other necessary protection. Such as Short circuit protection, Overcharge protection, Over-discharge protection, and Overcurrent protection.

Voltage regulation and stability
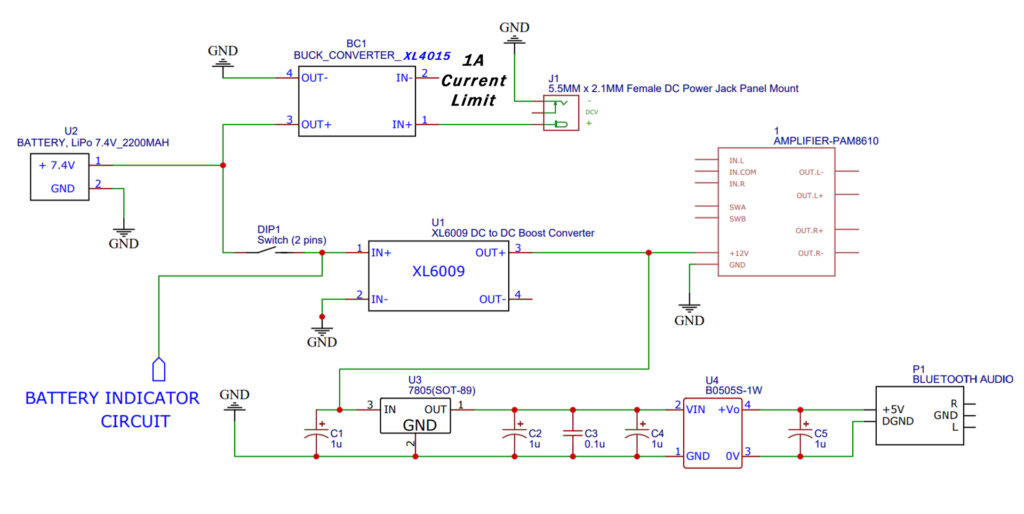
To charge the batteries, I used a 12V power adapter. However, the voltage needs to be reduced to a safe limit in order to charge the batteries. For this purpose, I have used a buck converter and set it to output exactly 8.4V, which is the safe charging voltage for li-ion batteries. If the buck converter has the current limiting functionality it would be wise to use it. Without current limit the li-ion battery stars to draw too much current from the buck converter that it can’t handle. I would recommend to limit the current into 1A.

Additionally, to stabilize the battery pack’s voltage output, I used an XL6009 boost converter, setting its output voltage to around 9V. The high switching frequency of the boost converter ensured that no audible noise was added to the amplifier’s output.
Battery Monitoring and Power Supply Configuration
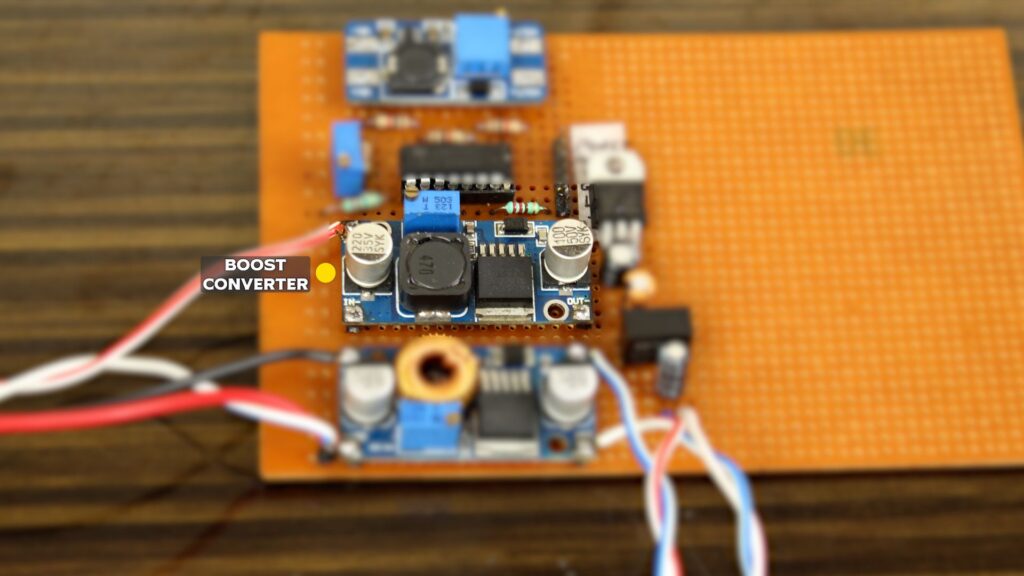
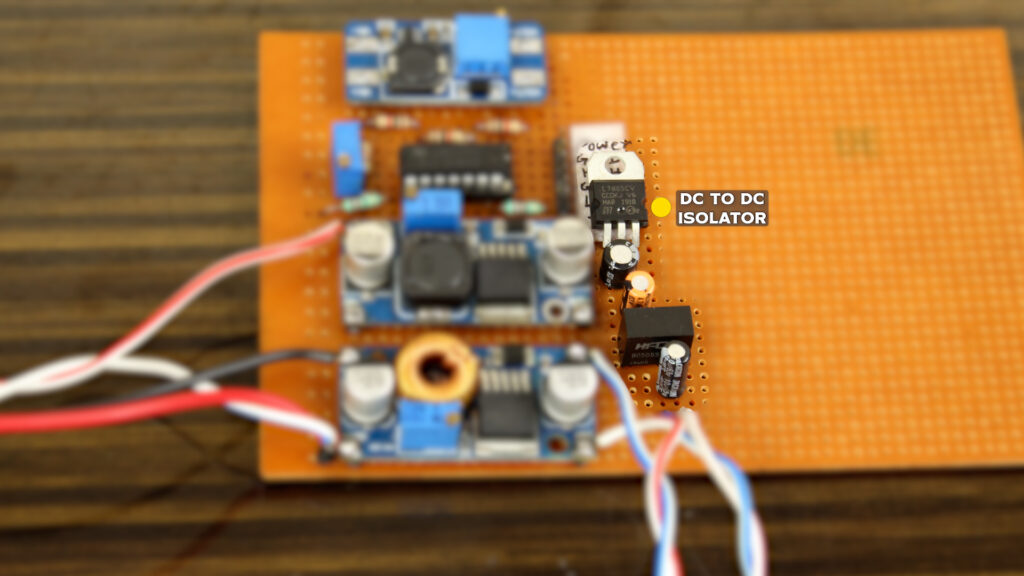
To power up the whole system I have setup everything on a prototype board. I incorporated several essential circuitries such as battery monitoring system and a separate isolated DC–to–DC power supply for the Bluetooth module.
It’s important, using the same amplifier’s supply line for the Bluetooth module adds up noise. In combination of that, I have used buck converter for charging the battery, and a boost converter for powering the amplifier as I have mentioned earlier.
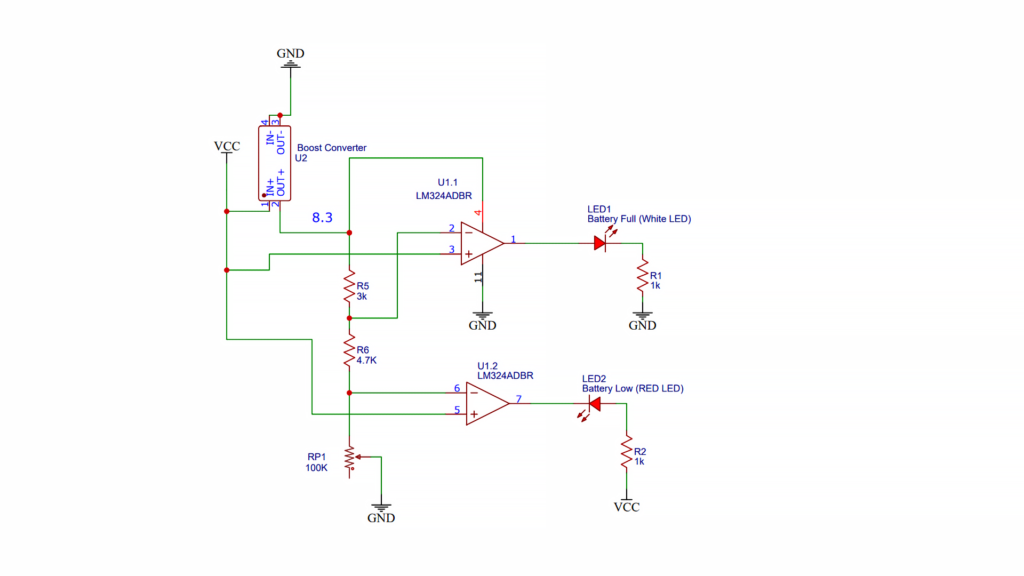
Battery Status Indicator Functions
The battery monitoring system featured two LEDs to indicate the battery status. A red LED indicated a low battery level, while a white LED represented a fully charged battery. Additionally, an LED indicated the availability of power to the amplifier. The battery low indicator was set to trigger at 6.5V, while the battery full indicator was set at 8.3V. This scheme provided a clear visual indication of the battery’s condition.


DC-to-DC Isolator
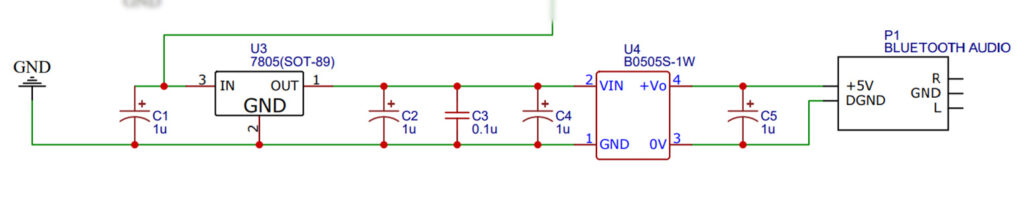
For the Bluetooth module I utilized a DC-to-DC isolator circuit. This isolator circuit effectively separated the VCC and GND, preventing any interference between the amplifier and the Bluetooth module. However, it is worth noting that the isolator I used worked with a 5V input. Therefore, I employed a 5V regulator specifically LM7805 to reduce the voltage before connecting it to the isolator circuit. Here’s the circuit diagram for the DC-to-DC isolator.
Correcting frequency levels and Smoothing the Audio Signal
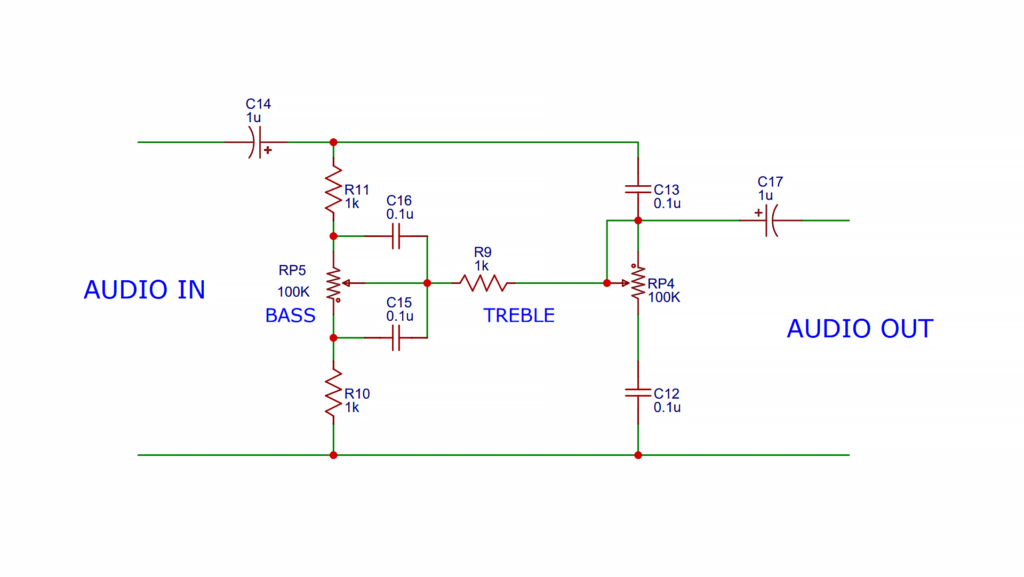
To enable frequency level adjustment, I implemented a circuit that controls bass and treble. This circuit, commonly found on the Internet, combines low and high pass filters to obtain the desired filtration. By adjusting the potentiometers, I can control the bass and treble frequencies, increasing the overall audio quality.
I prefer not to pass the same audio signal for both audio channels of the amplifier. Instead what I have done is: pass the right audio channel of the amplifier directly and connect it with the audio in. And the left channel through the filter according to this scheme.
Amplifier Configuration and Audio Inputs
I prefer not to pass the same audio signal for both audio channels of the amplifier. Instead what I have done is: pass the right audio channel of the amplifier directly and connect it with the audio in. And the left channel through the filter. As shown in the scheme below.
With the below-mentioned schematics, you can understand how I have set the Bluetooth module and 3.5mm jack together.
Enclosure Design and Assembly
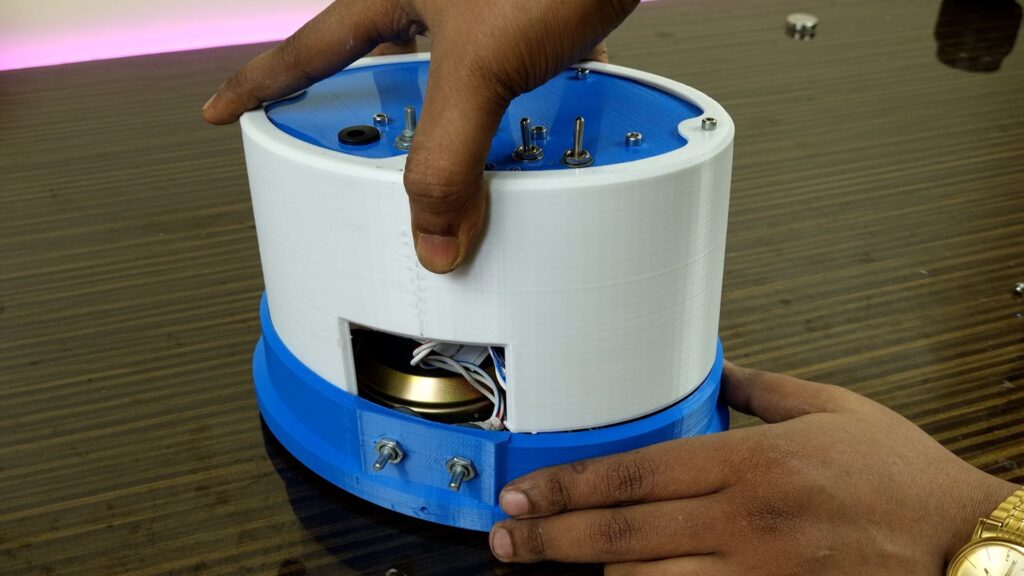
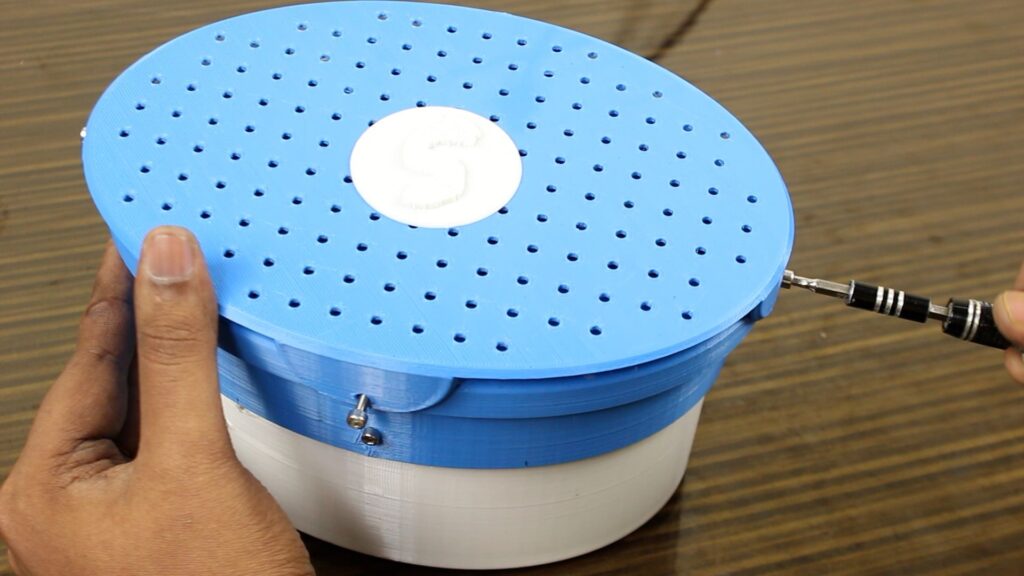
For the enclosure, I designed two separate parts using Fusion 360. One part covered the rear of the existing enclosure, while the other served as the front. I 3D printed these parts and proceeded with the assembly. Click on the download button below to get the all designs and printable files.

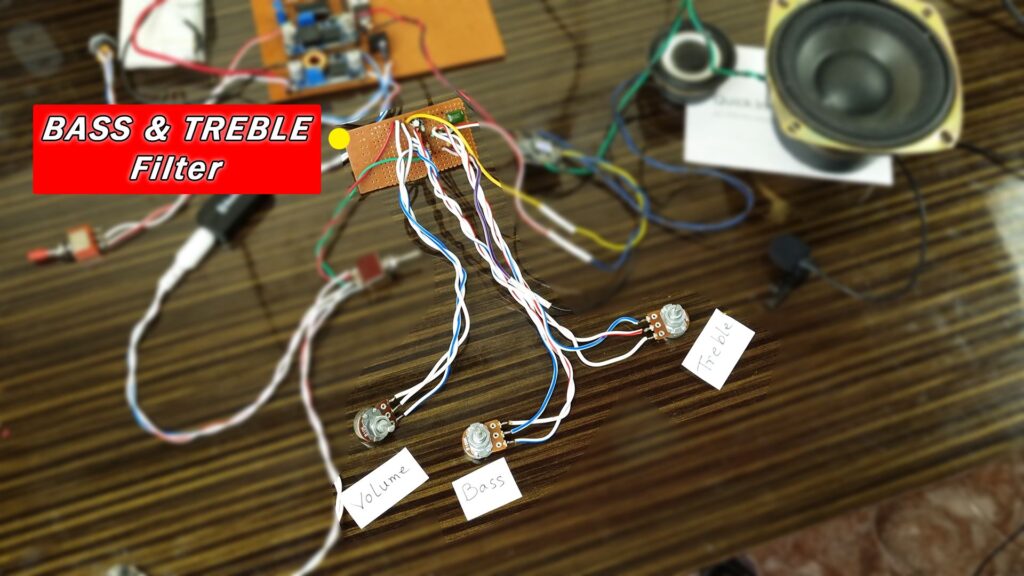
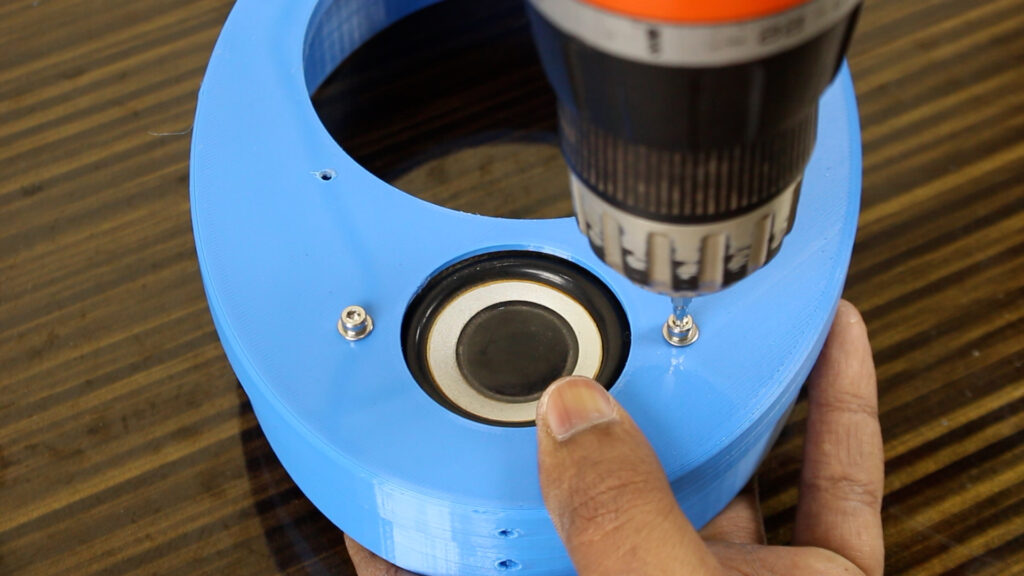
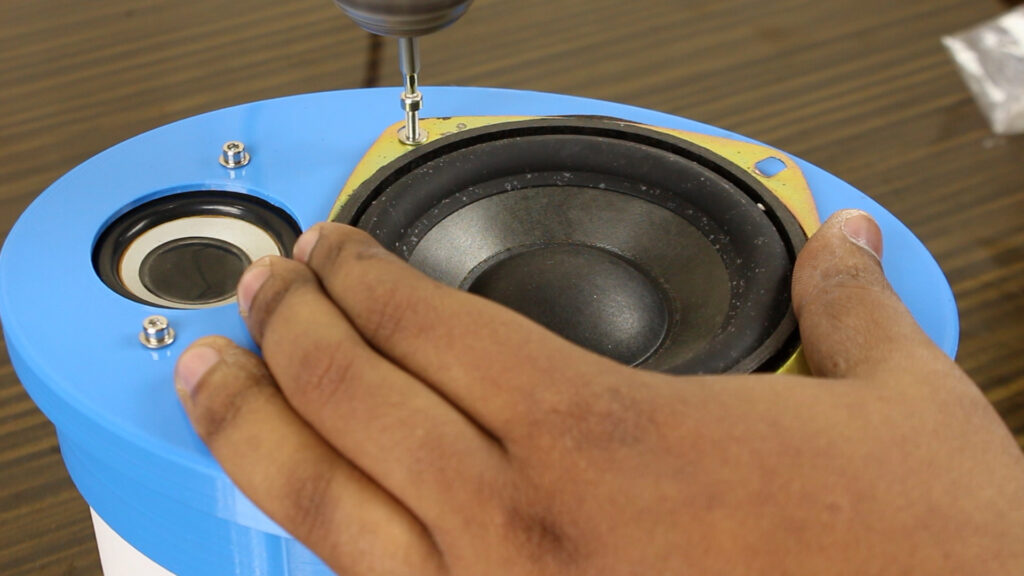
Securing the Speakers and Wiring
I mounted the speakers inside the enclosure, ensuring proper polarity and soldering the wires accordingly. The amplifier was wired according to the earlier plan, and the bass and treble potentiometers were mounted to their respective holes. Watch the full video for more info.
Incorporating the Battery and Circuitry
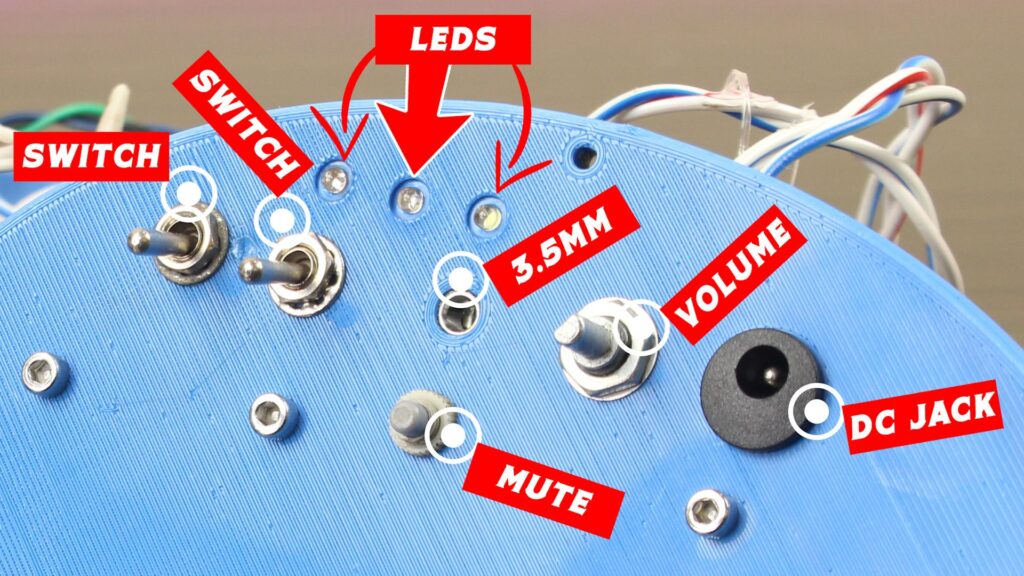
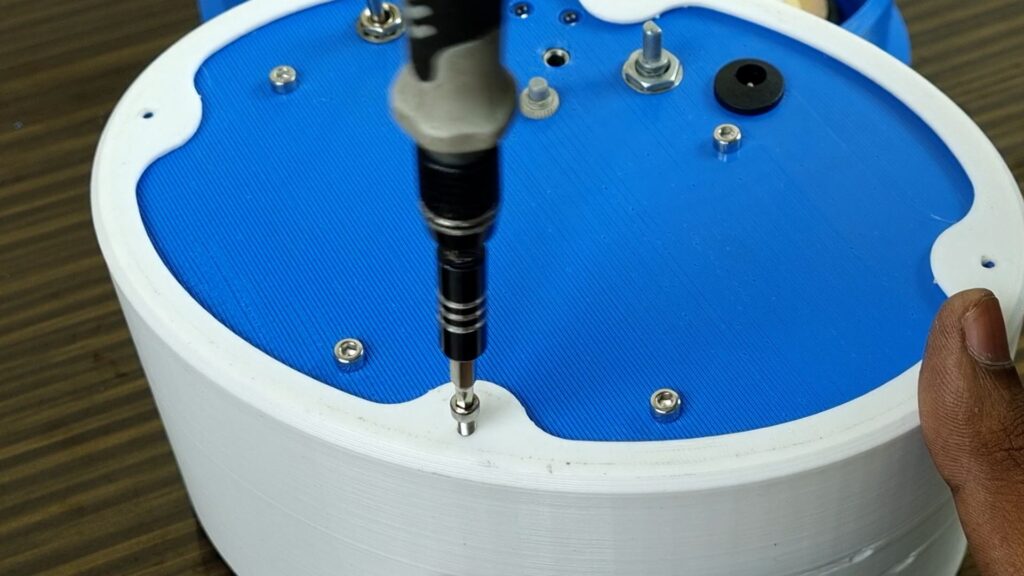
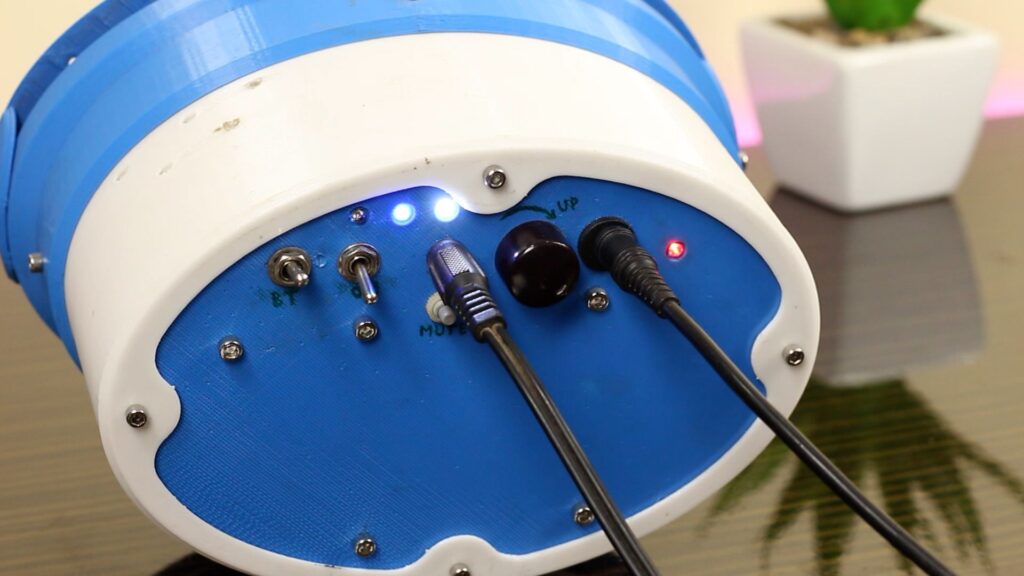
On the back of the enclosure, I have mounted the 3.5mm jack, a mute switch, a volume knob, DC Jack, all the indicator LEDs and two switches one for on/off the sound box and the other this will switch between the audio input – 3.5mm jack, Bluetooth.
Next, using 3D-printed brackets I have secured the battery pack and circuitry. Finally, I have mounted the Bluetooth module with the circuitry and done a little bit of insulation work. Finally, I have set up the amplifier and have hot-glued all the terminals.

Finalizing assembly and testing
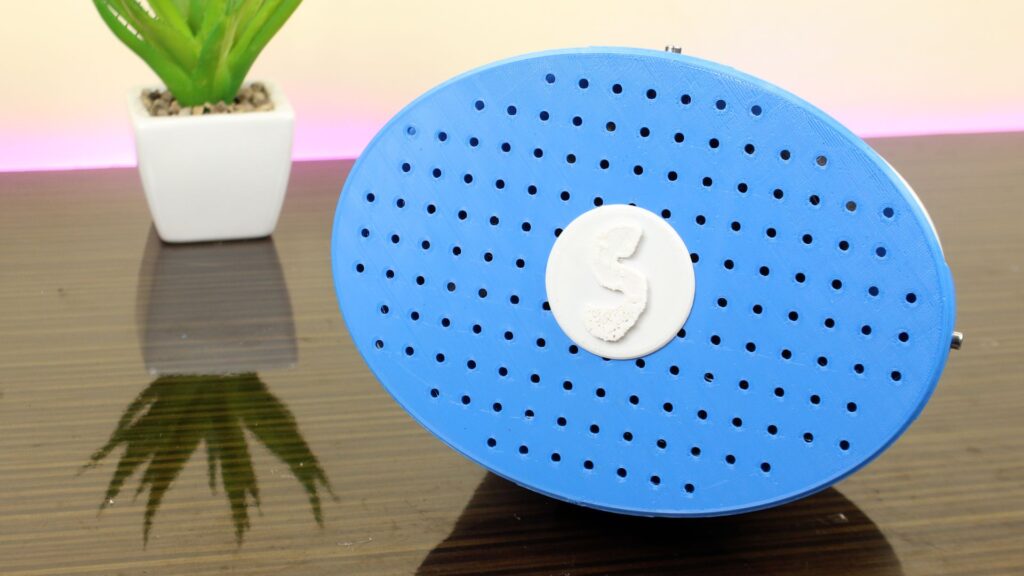
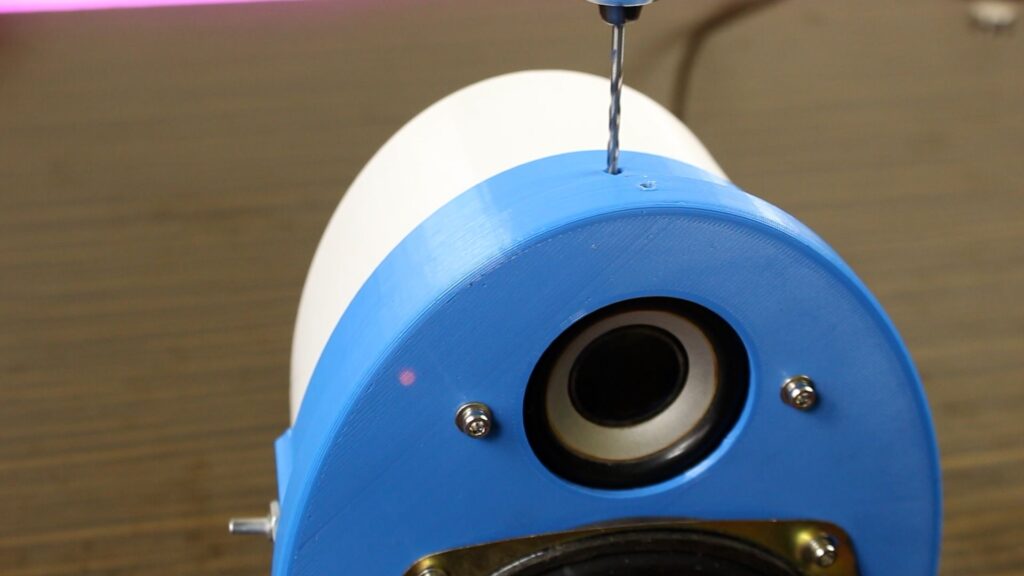
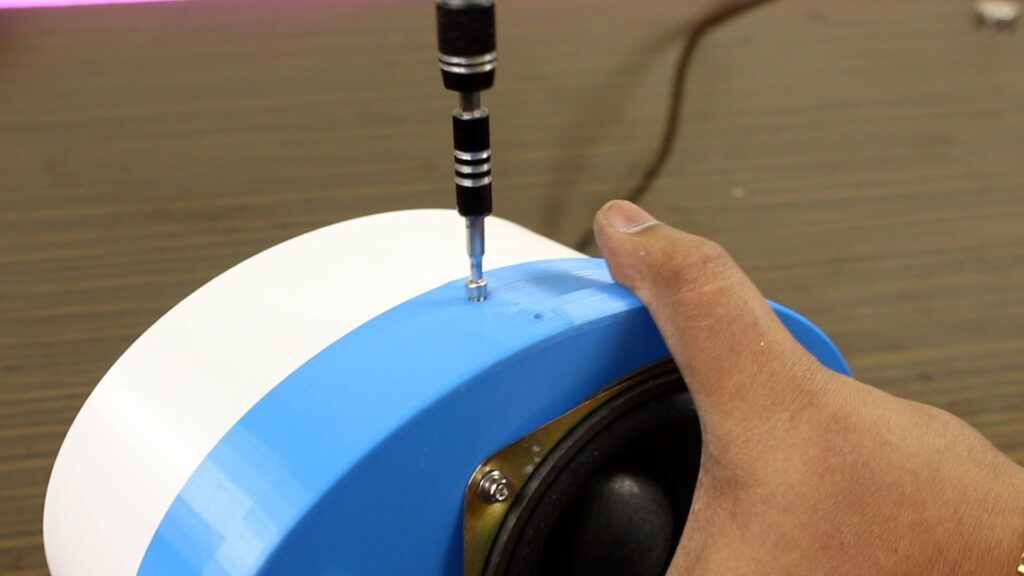
After completing most of the circuit assembly and wiring, I did cable management to prevent short circuits. The final step involved fitting the rear and front parts of the enclosure together and securing them with screws. I also added a 3D-printed mesh grill to protect the speakers and added my logo to the front.

Conclusion
Finally, the creation of the portable soundbox demonstrated the successful integration of various electronic components to create a versatile and quality audio system. The use of repurposed materials, such as the beautifully designed body, demonstrated the resourcefulness and creativity in DIY electronics.


The soundbox offered both wired and wireless connectivity options, ensuring compatibility with a variety of audio sources. The incorporation of a battery-powered design supported by a battery management system provided portability and continuous use without the need to disconnect from the charger. The battery monitoring system with its LED indicators effectively communicates battery status, ensuring optimum performance and preventing power-related problems.
Overall, this DIY project not only resulted in an impressive soundbox with excellent audio quality, but also demonstrated the importance of thoughtful component selection, creative problem-solving, and effective integration of electronic circuits. By following the detailed plans and instructions, enthusiasts can recreate this project and enjoy a unique and customized sound system.