
If you’re owning a 3rd Pinter then you have already unlocked lots of opportunities for your DIY projects. Recently I have designed this model which can hold my phone or my DSLR vertically on any simple tripod, Gorilla pod, or even in monopod. This way, I can record vertical videos for Instagram reels or YouTube shorts. Awesome, isn’t it? So without further ado, let’s print it and check the results.

Watch the Full Video
Slicing Settings are Important for the Stability
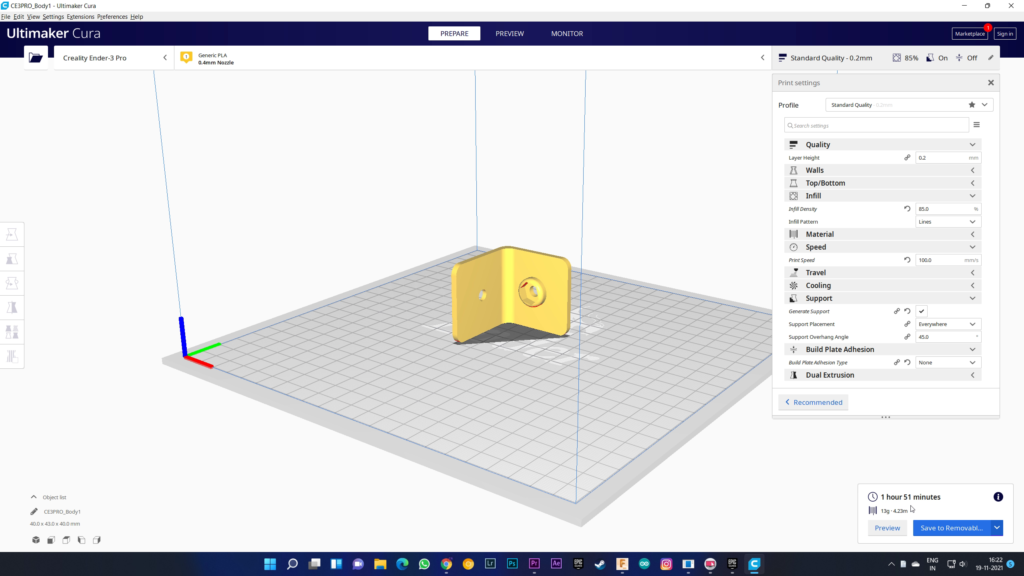
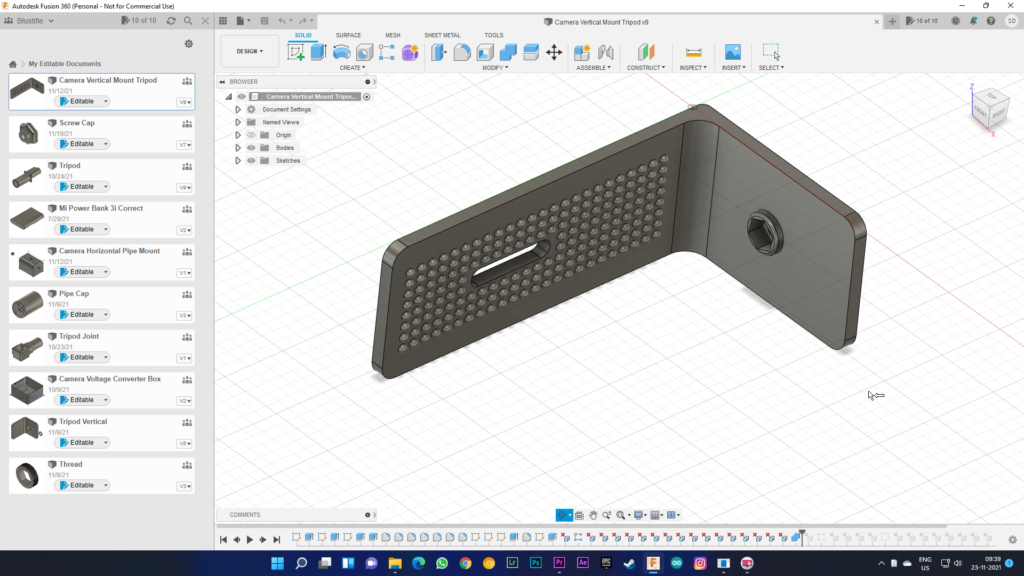
To print this model with my 3D printer, I need to export this model to some kind of slicing software. I personally prefer to use Cura only because of its simple and easy-to-use interface. After exporting, I need to change some settings quite a bit.
Layer Height
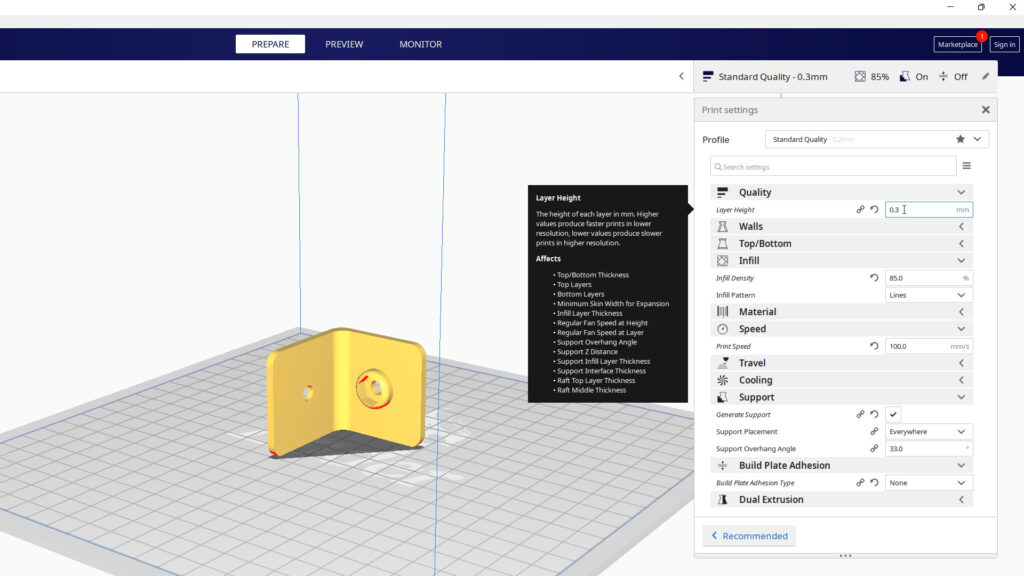
Start off with the layer height. It has nothing to do with the strength of the model but increasing the layer height can hugely impact the printing time. So, if you need a faster printing process and don’t care about the quality of the print then I recommend you to go for 0.3mm of layer height. If we try to balance the print quality and the printing time then 0.25mm is good to go.
Infill Density & Infill Pattern
Changing infill density to the higher value means a stronger model which is obviously pretty essential as this mount is designed to hold cameras. So, I am going with 85% infill density. You may go higher if you want to.
The infill pattern is also very important. The different pattern provides different strength. ‘Gyroid’ is preferable though but it took much more printing time so I go for the default ‘Line’ pattern.

Printing Speed
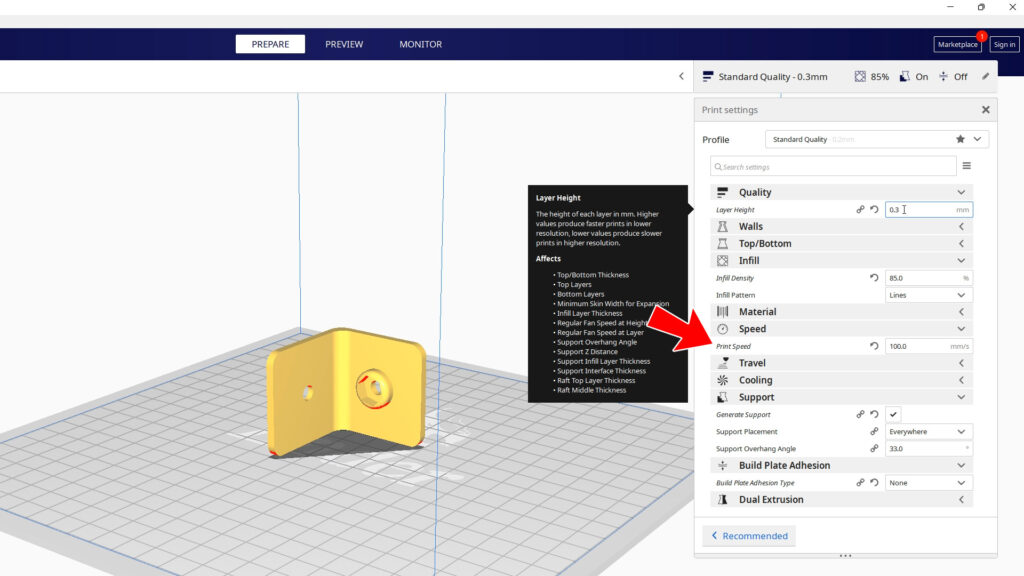
This is not a much important setting though, until either, you are running out of time or don’t care about the print quality. Definitely high-speed print causes imperfections of the print but for me, it doesn’t matter so I have tweaked the printing speed to 100mm/s. By the way, I have used Ender 3 Pro to print this model.
Support Settings
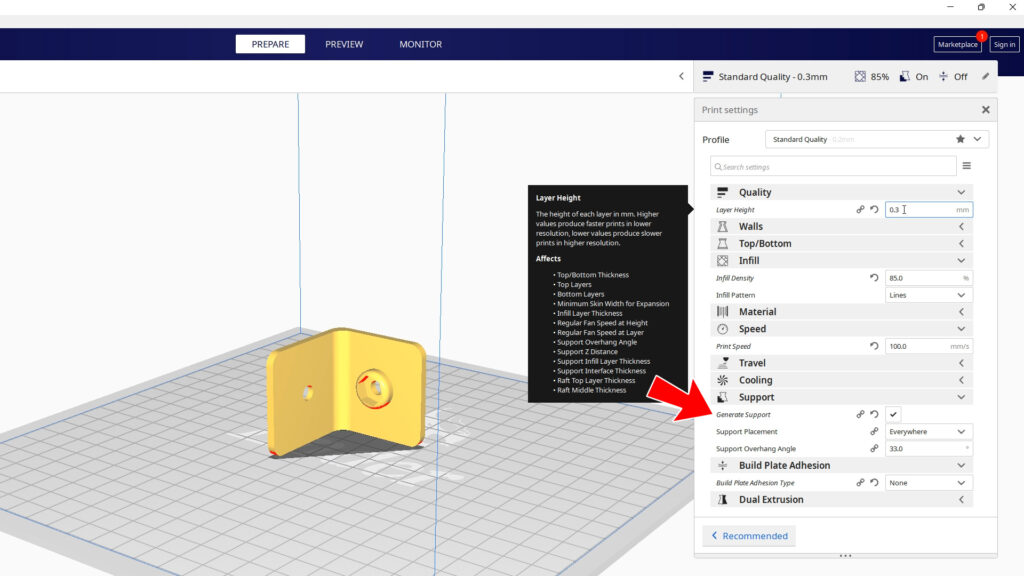
Because of the orientation of the model, on the bed of the printer, I prefer to use support for the hanging part which is just this nut cavity. So, I have used the default one which is everywhere. And don’t forget to tick here – ‘Generate support’.

That’s it. Now just slice it and save the GCode into the SD card. After around 1 hrs 14 min of print, the model looks like this.

Post Printing Finishing With the 3D Printed Camera Vertical Mount!
First off, I have to remove all the support materials from the design. So, I have used this fine cutter and a bit of my skill to satisfy me.
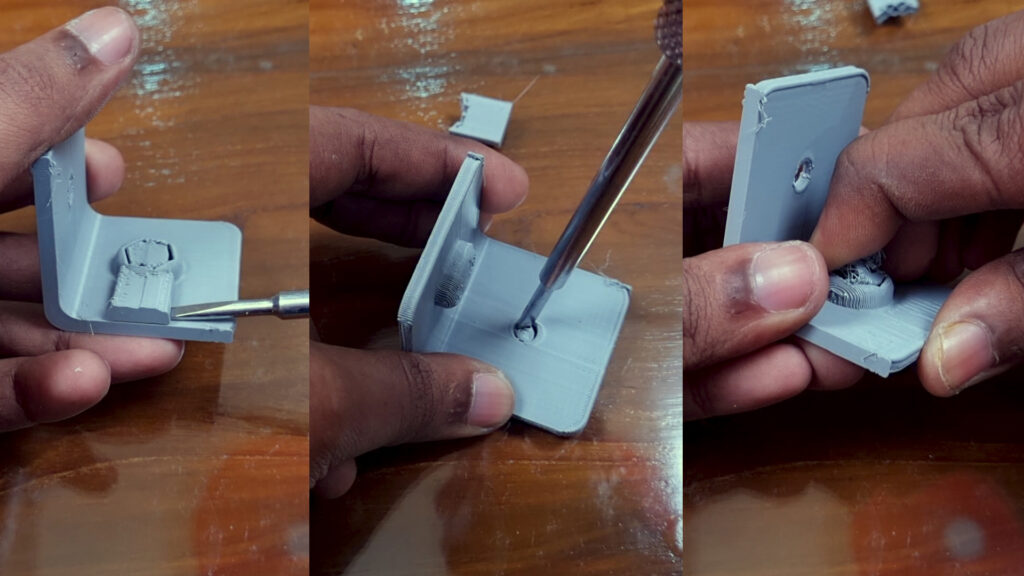
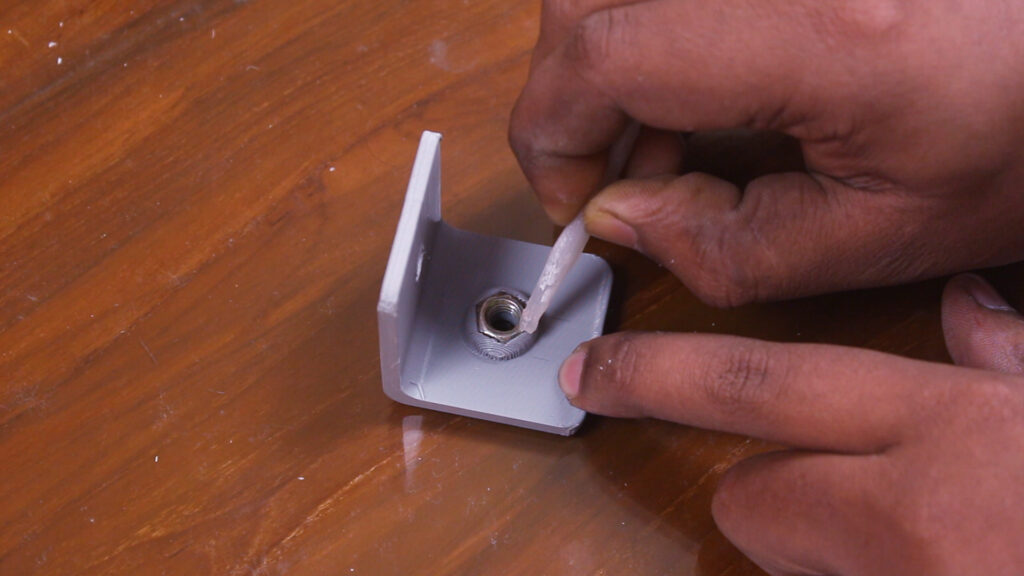
Next, I have placed a quarter-inch nut inside this space and used a bit of super glue to fix it permanently.
Spare Parts You Need to Use the Vertical Mount
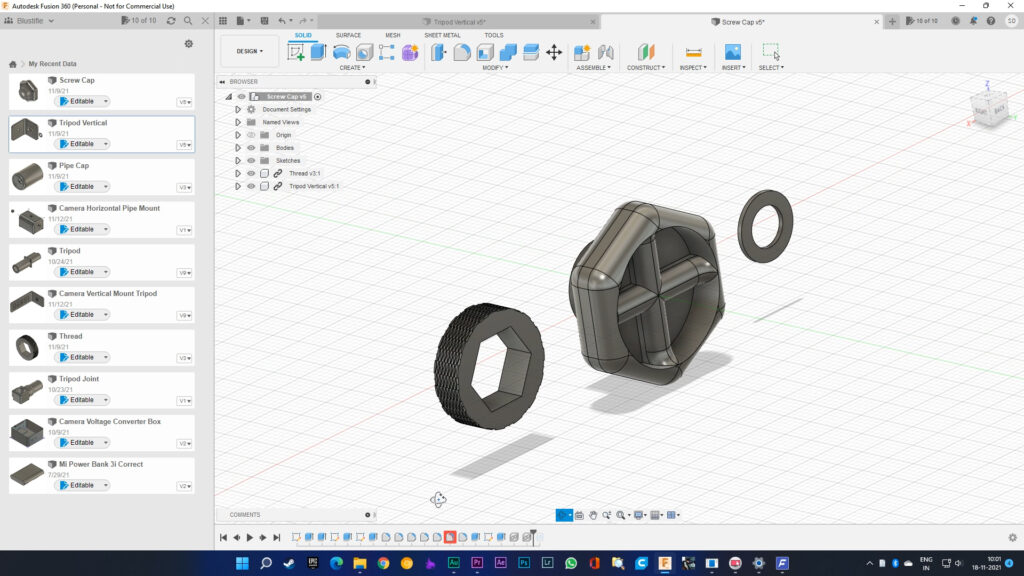
To use this vertical mount, you need 3 more parts: a knob, a ring for this quarter-inch nut, and a washer which I have designed in Fusion 360 and printed with 65% infill.
Assemble All the Parts
After chopping down the head of a 1 inch long and quarter-inch thick screw, I have put it inside the hole of the screw head. It is definitely recommended to use a bit of superglue inside the knob.

Next, slide the nut inside this ring, apply the super glue once again, and put back the nut and ring assembly into the threaded rode.

Then I have just inserted the bolt through this hole (shown on the image below) and put back the washer onto it and to finally fix the washer in its place, I have just used a bit of superglue and let it to be dried for a couple of minutes.

Does a 3D Printed Camera Vertical Mount Really Work?
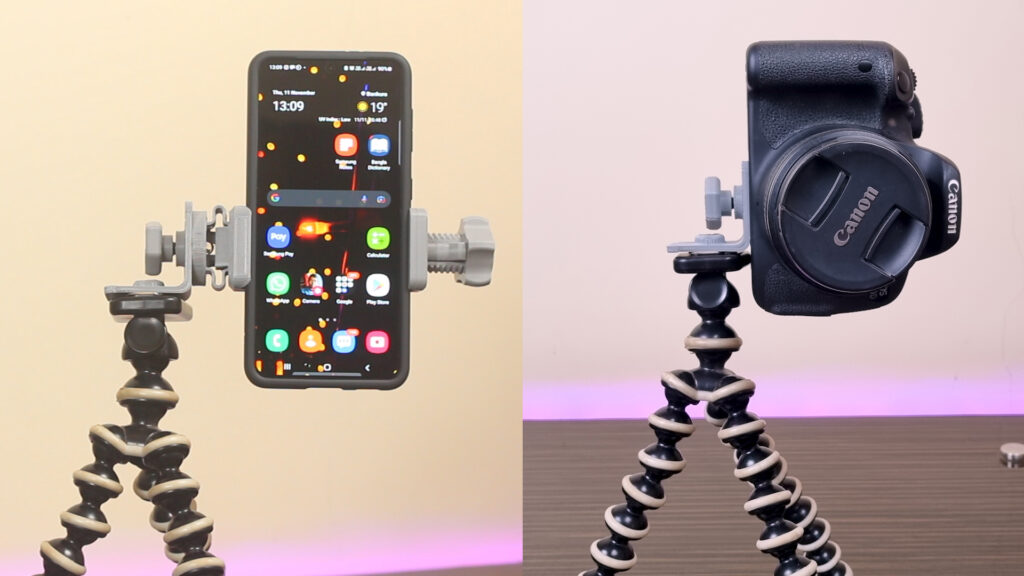
Well, it is completed, and depending upon the weight of the camera, I can estimate that this mount can easily hold those cameras whose weight stays in between 3kgs. But because of the compact design of this mount, cameras can’t fit in it when this mount is attached with the tripod but mounting the DSLR on a Gorilla Pod is definitely possible. Even smartphones can easily be attached to this vertical mount.
To hold the DSLR camera vertically on the tripods, I have designed this camera vertical mount which has the anti-slip feature and adjustable camera height. But it is better to print it with 95% infill density and with the Gyroid pattern to make it stronger. Parts like knob, ring, and washer are the same for this design too.
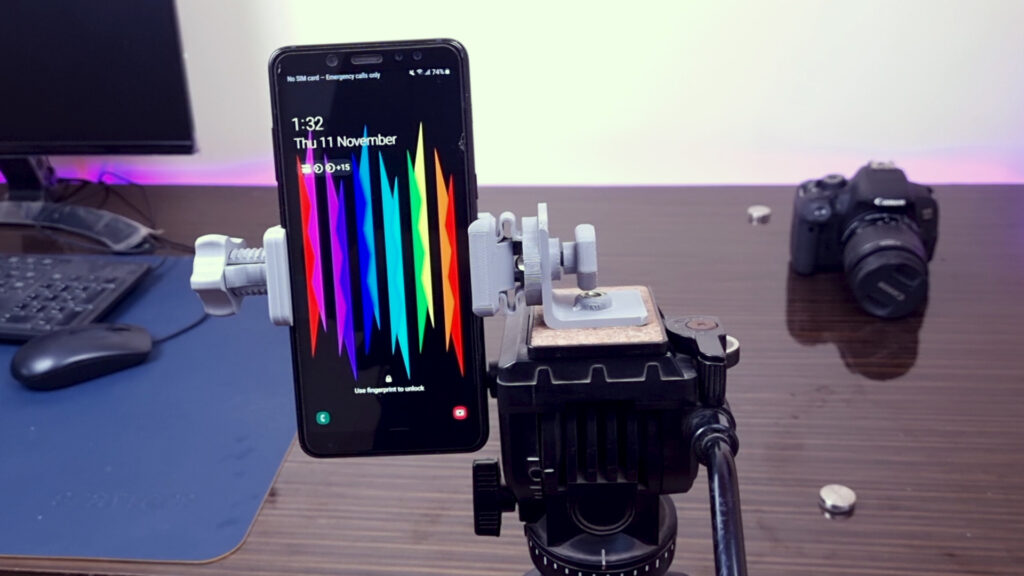
Anyway, after printing, to hold the smartphone or camera: First, I have installed the quick release plate of the Gorilla pod then the mobile mount and slid the phone inside it if it is DSLR then we can directly attach the camera with the mount. If you want the mobile holder then I have also shared the link with you from where I got it.
Ok, without wasting any time, let’s set the Gorilla pod with this quick release plate and we are good to go. You can also set your DSLR Camera with this camera vertical mount but this is only limited with the Gorilla pod. Because of the compact design of this mount, cameras can’t fit in it when this mount is attached to the tripod. But mounting a mobile phone is definitely possible even with the tripod.
Hope you guys have enjoyed the video and learned quite a bit about 3D printing. If it really so then don’t hesitate to express your valuable thoughts in the comment section below. Thanks for visiting & appreciating our work.